- Staff
- #1
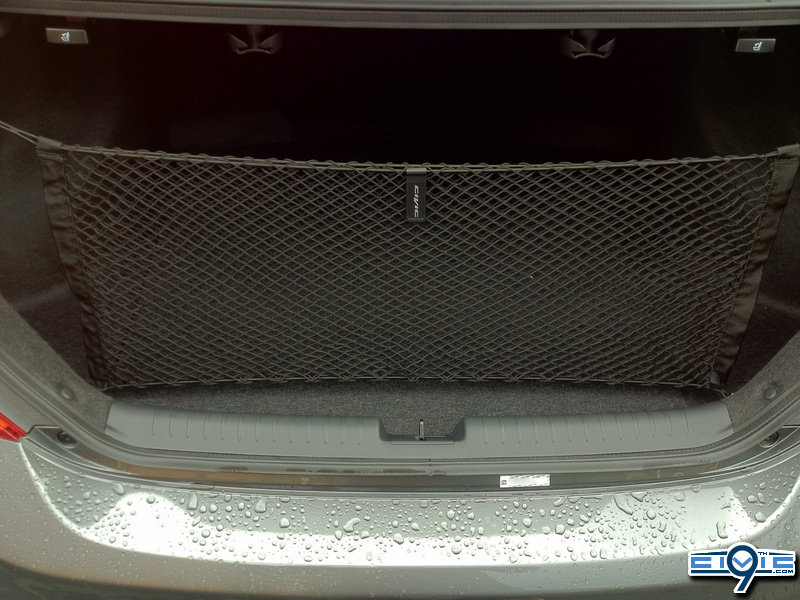
DIY 2012+ Civic Cargo Net

What you need:
What you need:
- Cargo Net Kit (P/N 08L96-TA0-101A)
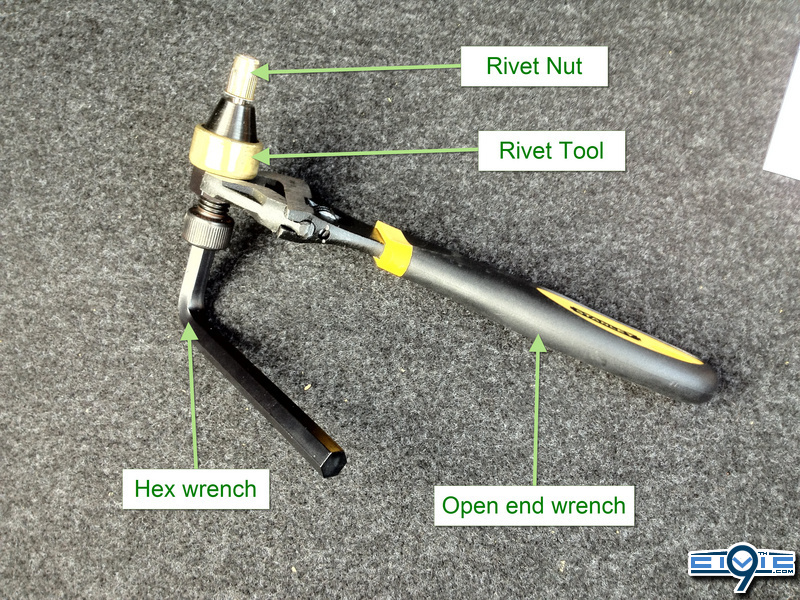
- Rivet Nut Tool (T/N 07AAE-000A100)
- 20 mm or adjustable open end wrench
- Drill
- 3 mm, 5.5 mm, and 9 mm Drill bits
- Deburring tool
- Pliers (optional if using an adjustable open end wrench)
- Plastic clip remover (optional, but highly recommended)
- Push pin
- Felt-tip pen
- Touch-up paint
- Ruler
- 3M Blue tape (painter's tape)
- Shop towel(s)
- Installation Instructions - Sedan and Coupe
- Be careful not to damage the body.
- After installation: Do not store large or fragile objects in the net.
- After installation: Do not store objects with sharp edges or corners, as
they may damage the cargo net or the vehicle. Wrap them in paper or a blanket so they will not contact the net directly.
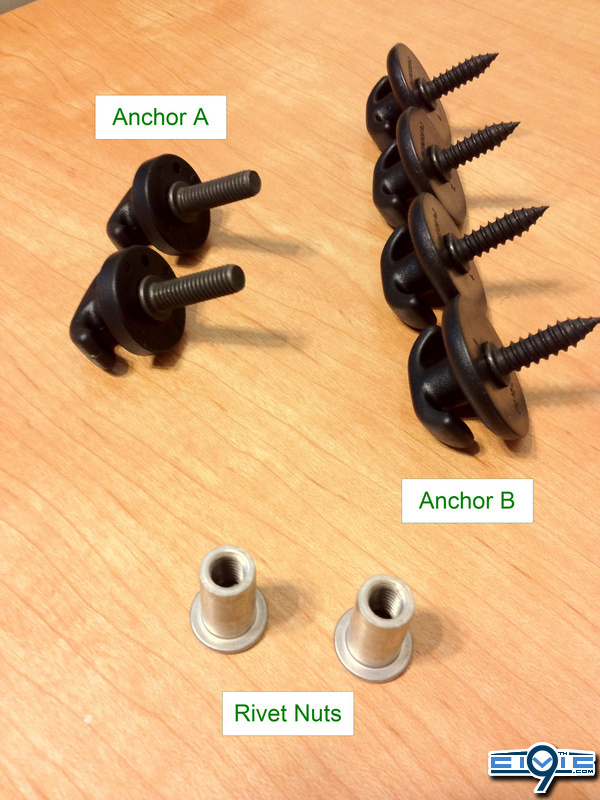
- Install a bolt into each anchor A, and install a self-tapping screw into each anchor B.
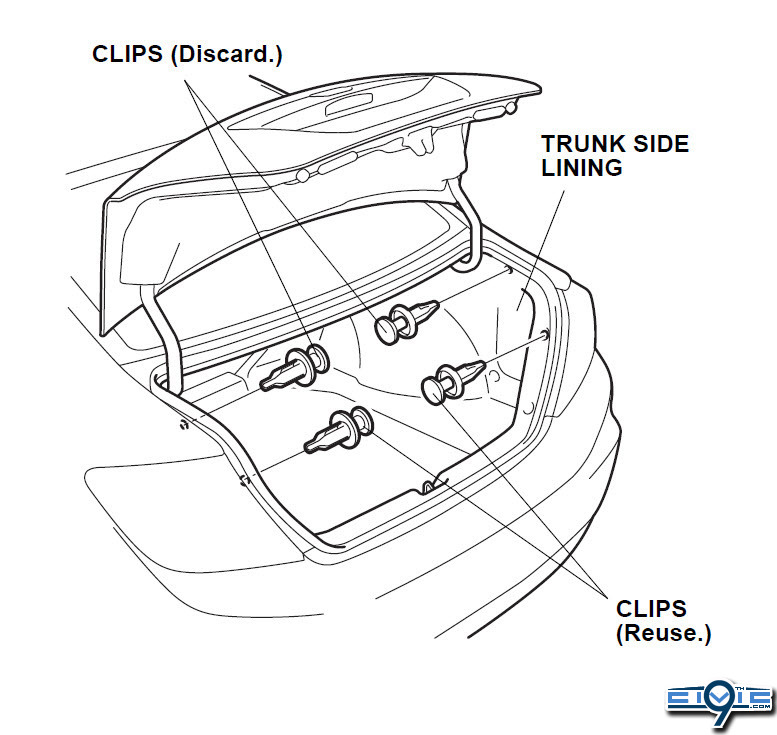
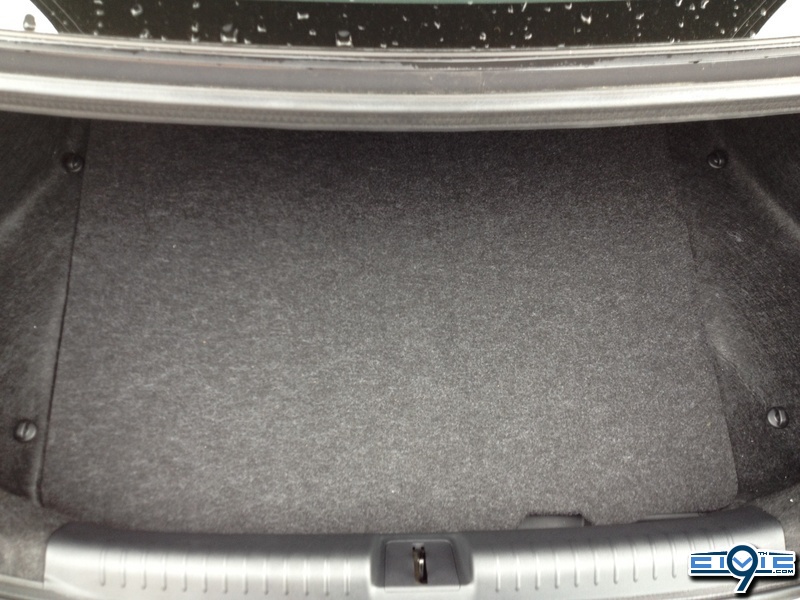
- Open the trunk lid. Remove the four clips from the trunk side lining.
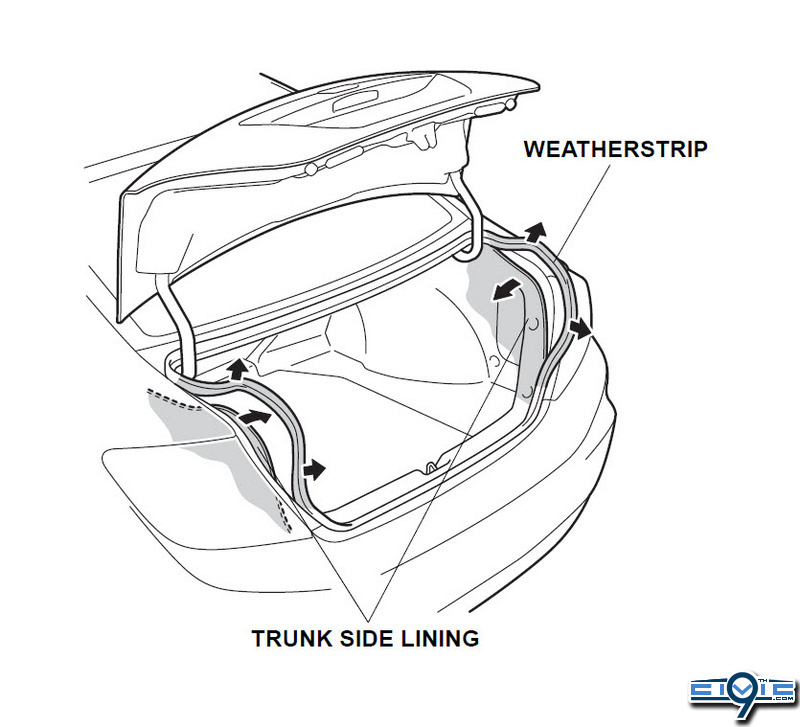
- Pull off the weatherstrip in the areas shown below, and move the trunk side lining out of your way.
DIY Tip: If you have time and will, I highly suggest removing the entire inner trunk liner as it will make the entire process much easier.
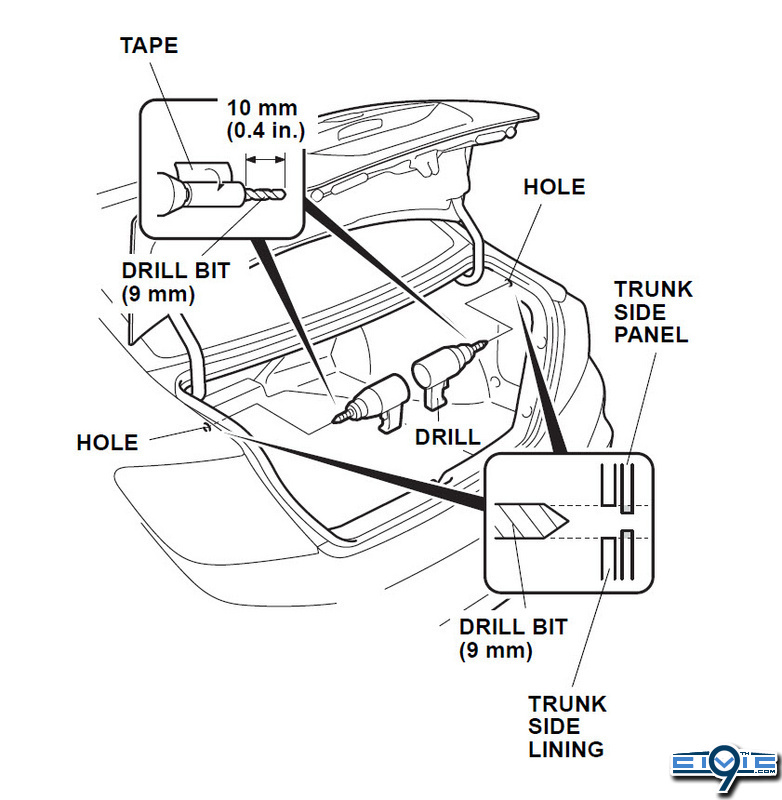
- Using a drill, enlarge the two top clip holes shown below to 9 mm.
Remove any burrs, apply touch-up paint to each hole, then let dry.
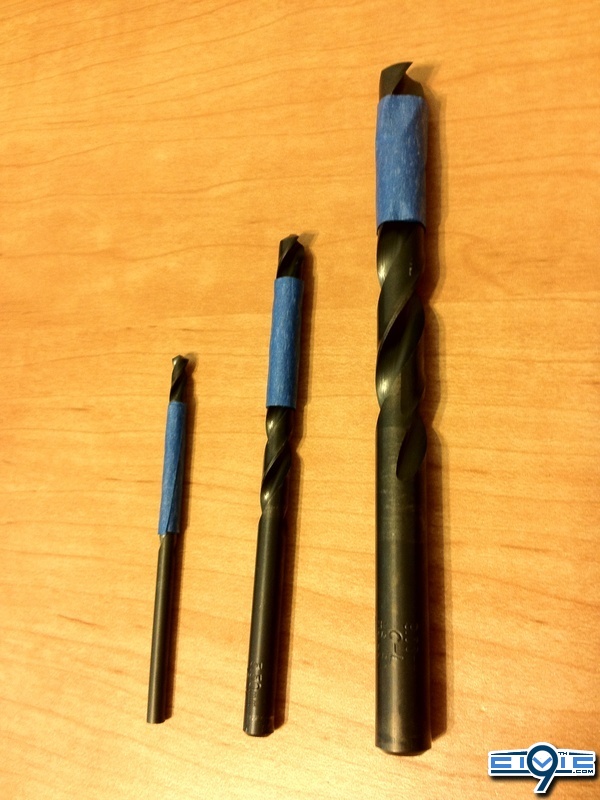
To prevent drilling through the inner panel, wrap blue tape around the drill bit 10 mm (0.4 in.) away from the tip.
- Install two rivet nuts in the 9 mm holes you enlarged.
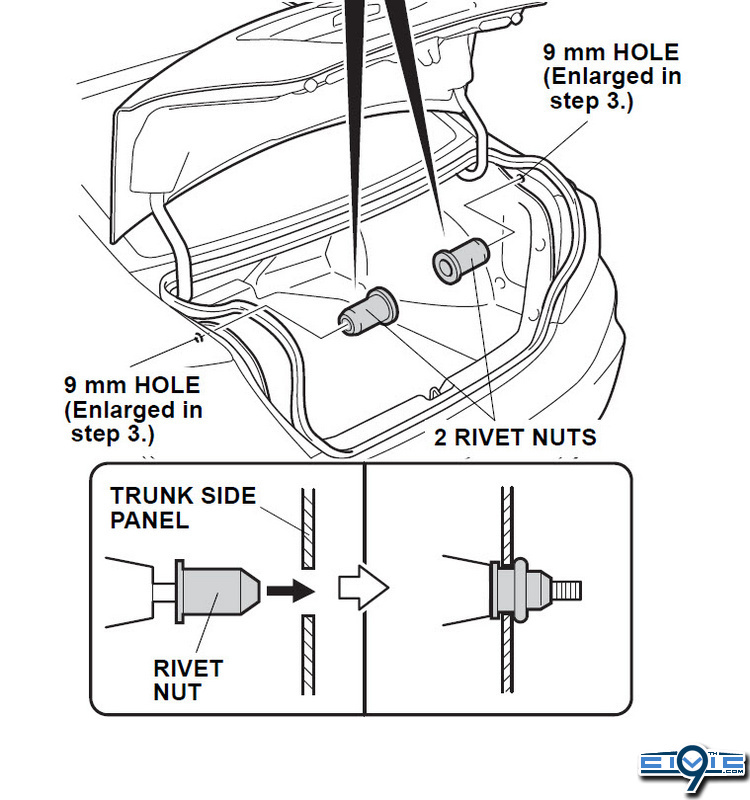
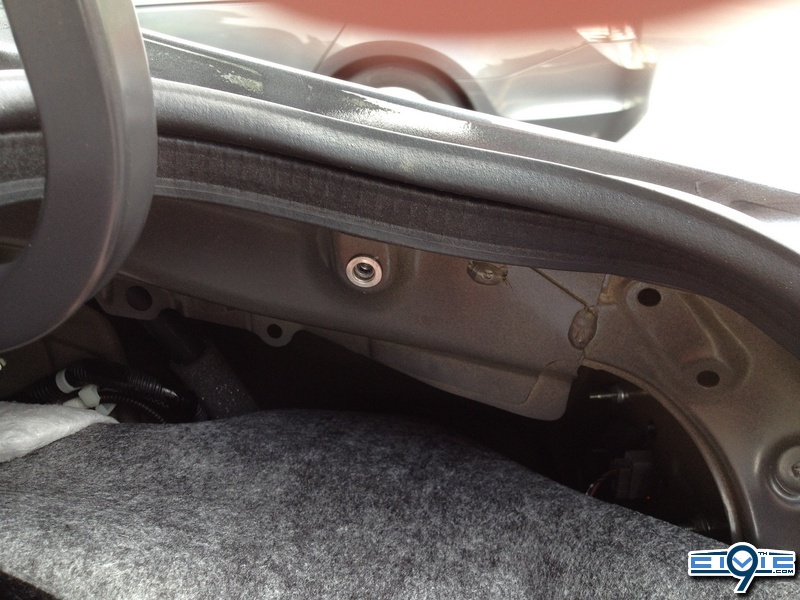
- Install two bolts/anchors A into the rivet nuts.
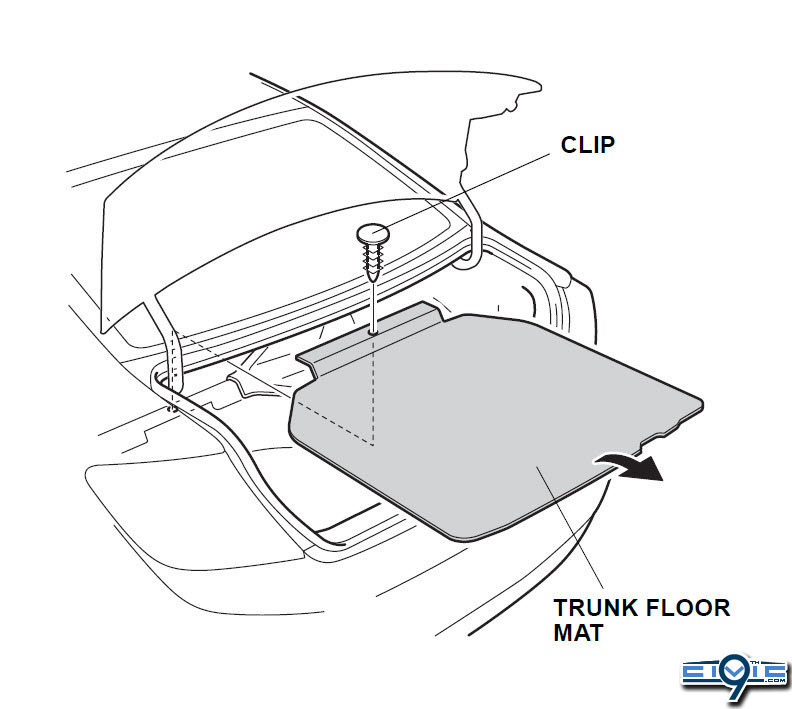
- Pull the levers to fold the rear seat-back forward.
- Remove the trunk floor mat (one clip).
- Attach template R to the trunk right side lining as shown below.
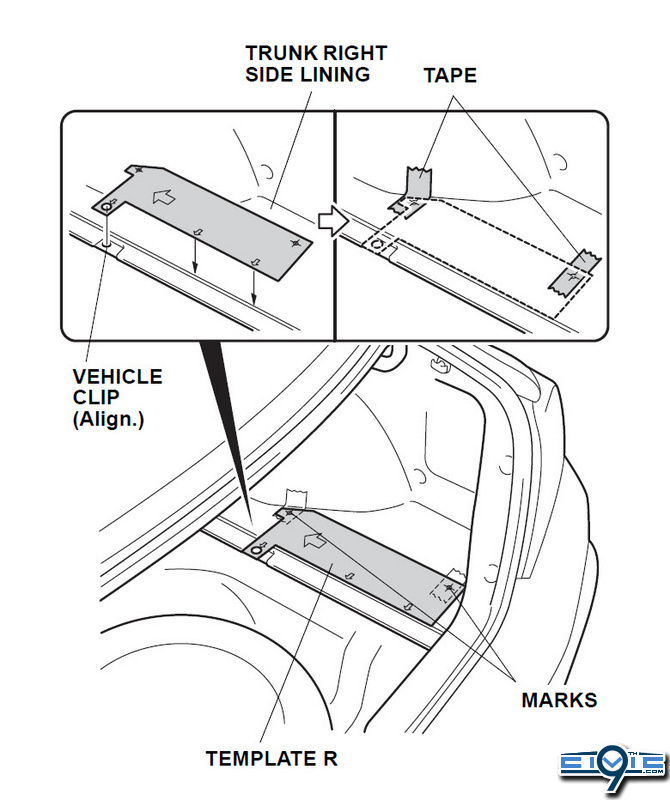
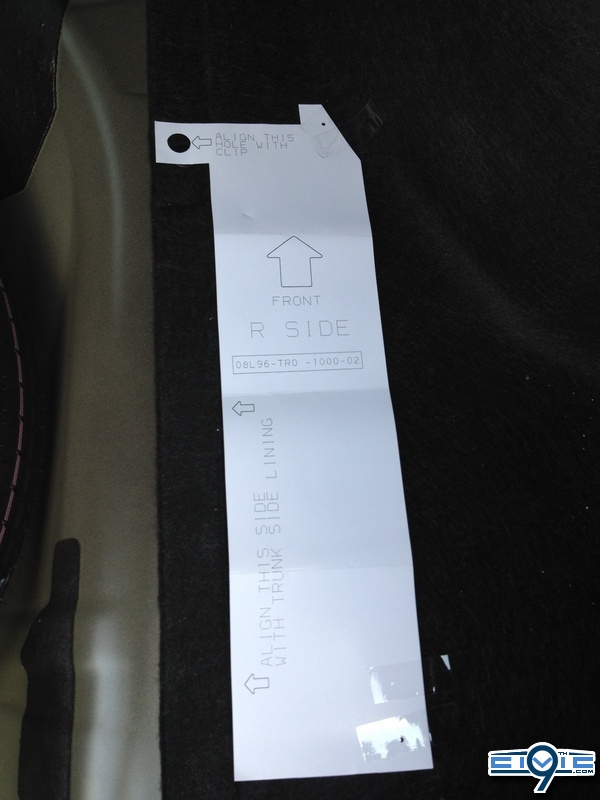
- Put pieces of tape underneath the two marks.
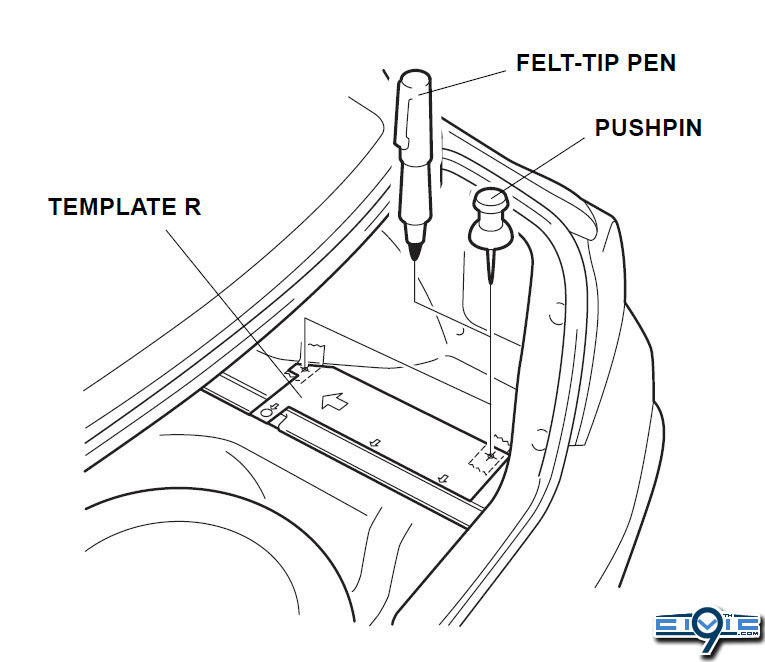
- Mark the tape under template R with a pushpin and a felt-tip pen as shown below.
- Remove template R.
- Attach template L to the trunk left side lining as shown below.
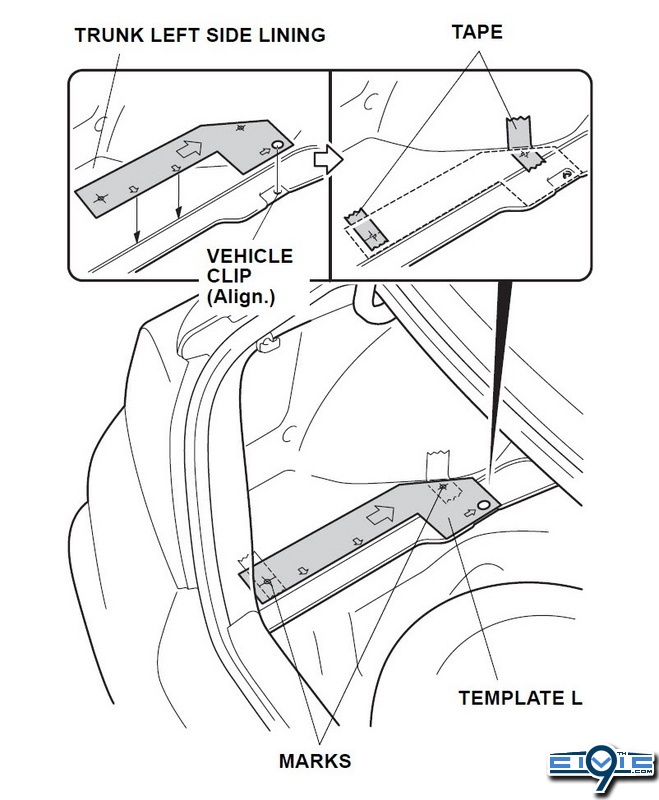
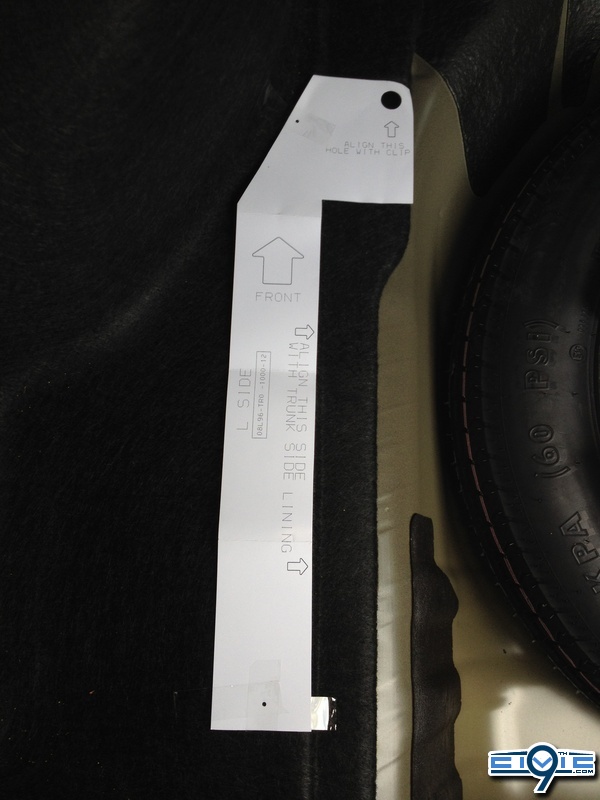
- Put pieces of tape underneath the two marks.
- Mark the tape under template L with a pushpin and a felt-tip pen.
- Remove template L.
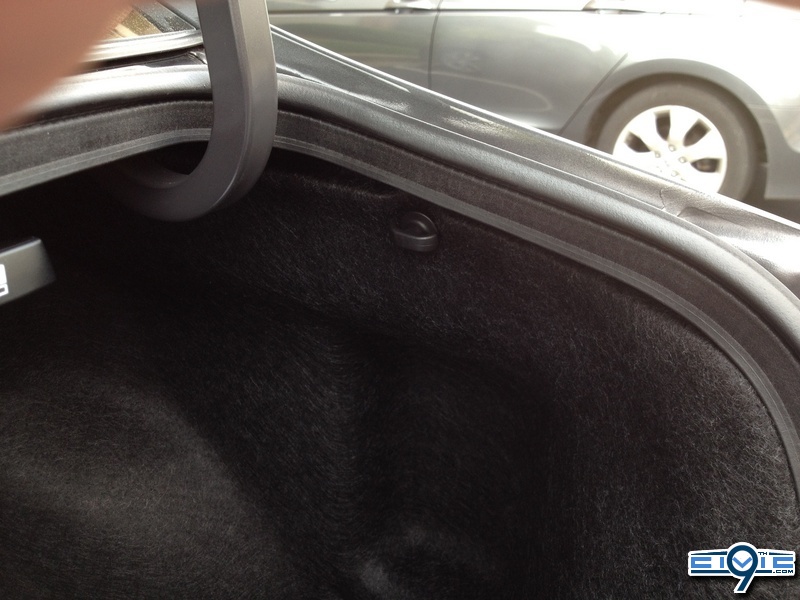
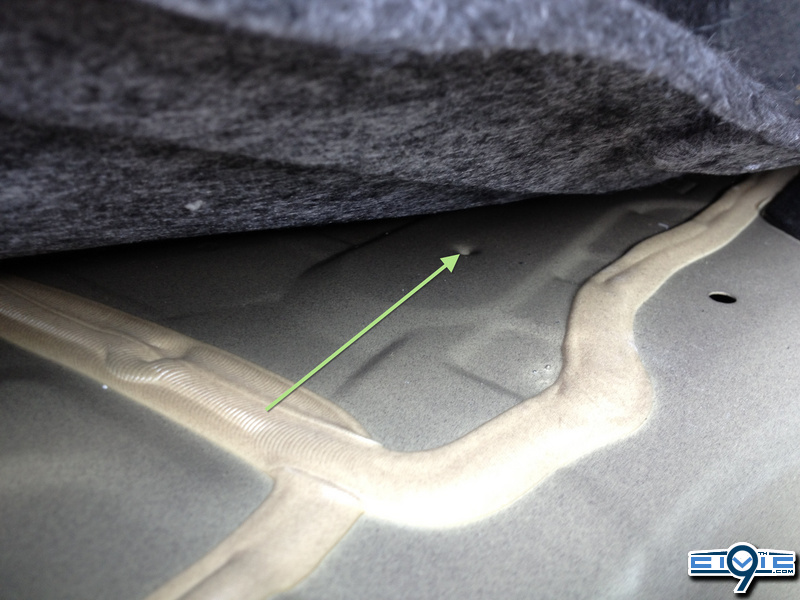
DIY Tip: As it just so happens, there are indentations in the body of the trunk at all four of the same spots that you marked with your push pin and felt-tip pen (shown in a photo below). I don't know if this was intentional by Honda or just a coincidence, but you use those indentations to verify that you have marked to correct spots before drilling.
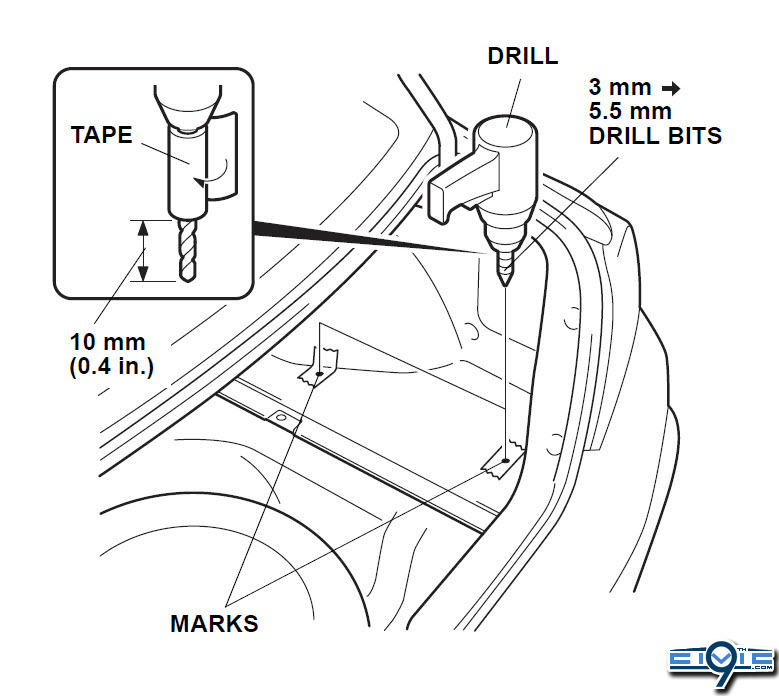
- Drill a 5.5 mm hole through the trunk side lining and the trunk floor at each mark.
Start with a 3 mm drill bit and finish with a 5.5 mm drill bit.
Remove any burrs, and apply touch-up paint to each hole.
To prevent drilling through the inner panel, wrap blue tape around each drill bit 10 mm (0.4 in.) away from the tip.
Before drilling, pull up the trunk side lining and check that the trunk lid opener cable is not under the places to be drilled.
- Repeat step 16 to drill the left side of the vehicle.
- Remove the pieces of tape. Install self-tapping screws/anchors B into each 5.5 mm hole you made.
NOTE: If tightening becomes difficult, protect the self-tapping screw/anchor B with a shop towel, and tighten it with pliers.
- Repeat step 18 to install two self-tapping screws/anchors B on the left side of the vehicle.
- Install the cargo net to the anchors in the trunk. You're all done!