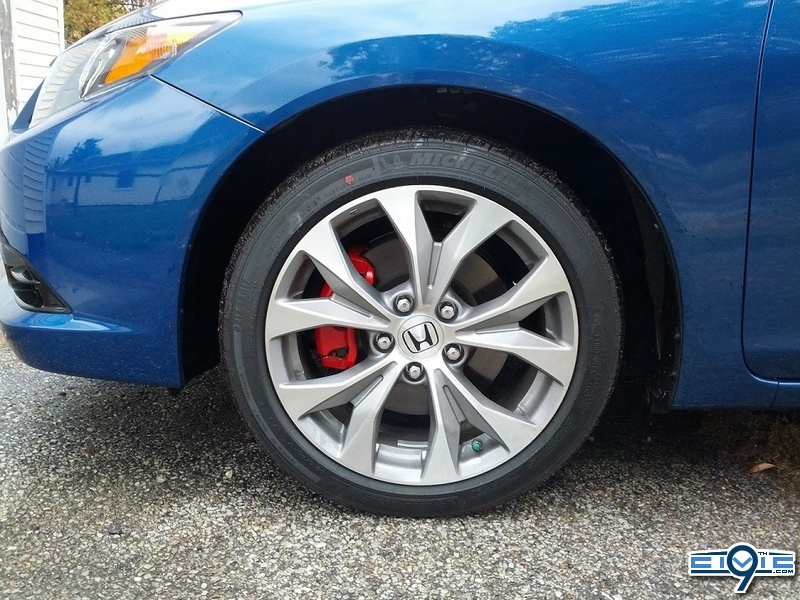
This thread will only provide pictures for the rear calipers, but distinction will be made in the directions where the front calipers differ. I kept the calipers on the car while I did this. However, if you are okay with working on brake systems and bleeding brakes, I HIGHLY recommend taking them off completely as you will get better coverage of the entire caliper. I not only look at this as an appearance modification, but as a way to protect the calipers from rusting.
I used a brush-based paint, not spray paint. I only suggest spray paint if you take the caliper off completely.
Warning: This DIY is loaded with large high resolution picture for the best detail as possible.
Tools needed:
Caliper paint - must be rated for high heat.
Brake Cleaner
Stiff and/or wire brush
Paint brush
Paint thinner or solvent of your choice
Masking tape
Jack
Jack Stands
12mm deep well socket
19mm socket
17mm wrench
Torque wrench
A flashlight may be helpful depending on your lighting situation
Possibly an impact driver-more on this later.
Step 1. Loosen your lug nuts if you do not have an impact wrench.
Step 2. Jack up the car and put it on jack stands. If you do not know where the jack points are, see the thread labeled Jack Points (forthcoming). I did the fronts one weekend and the backs another. If you are brave enough, go ahead and put it on four stands and have at it. It will definitely save time.
Step 3: Remove wheel and place it out of the way. Or use it as a seat like I did.
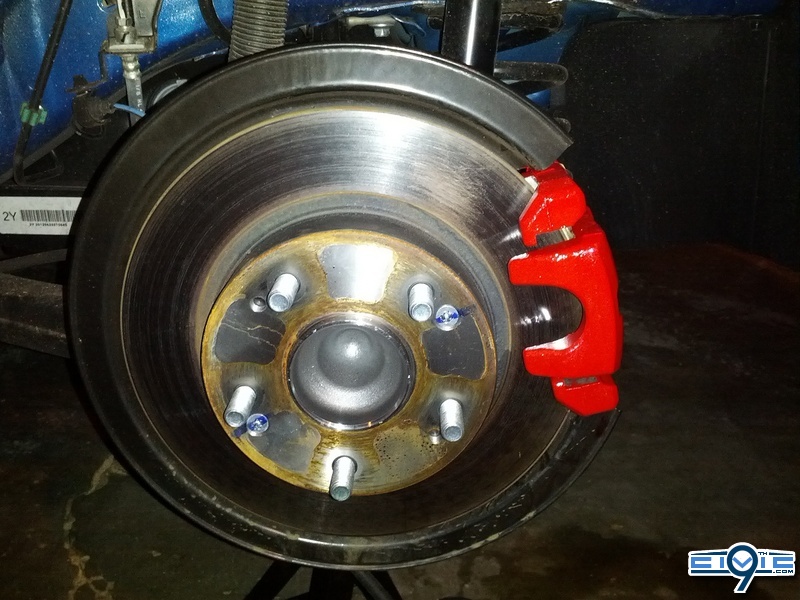
Step 4: Clean the rotors and calipers thoroughly using the brake cleaner and brush(es). Dry them thoroughly.
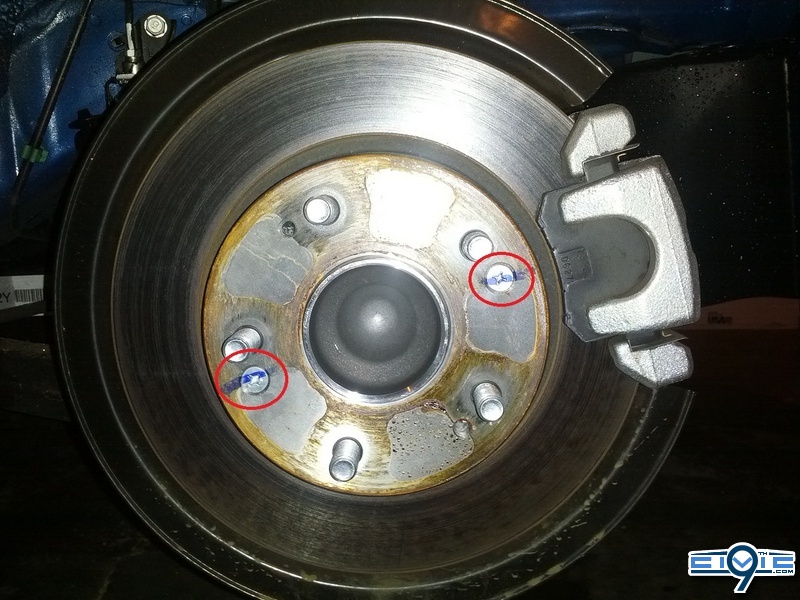
(As far as mentioning the impact driver, I have circled two screws below. I highly recommend removing them after you are done painting. These are a royal pain later on. Sometimes nearly impossible to get off without mutilating them or possible having to drill them out. They are only there to keep the rotors on the hub as it is going down the assembly line. They are not necessary for any other reason.)
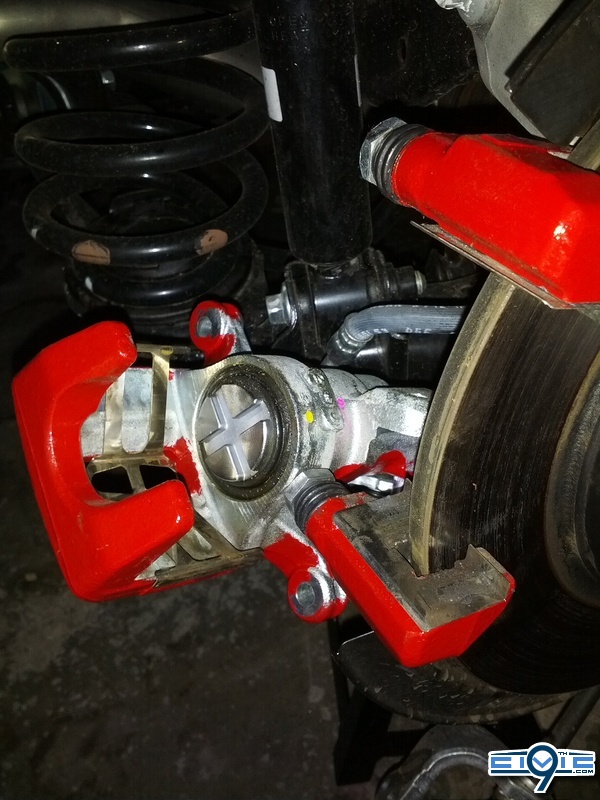
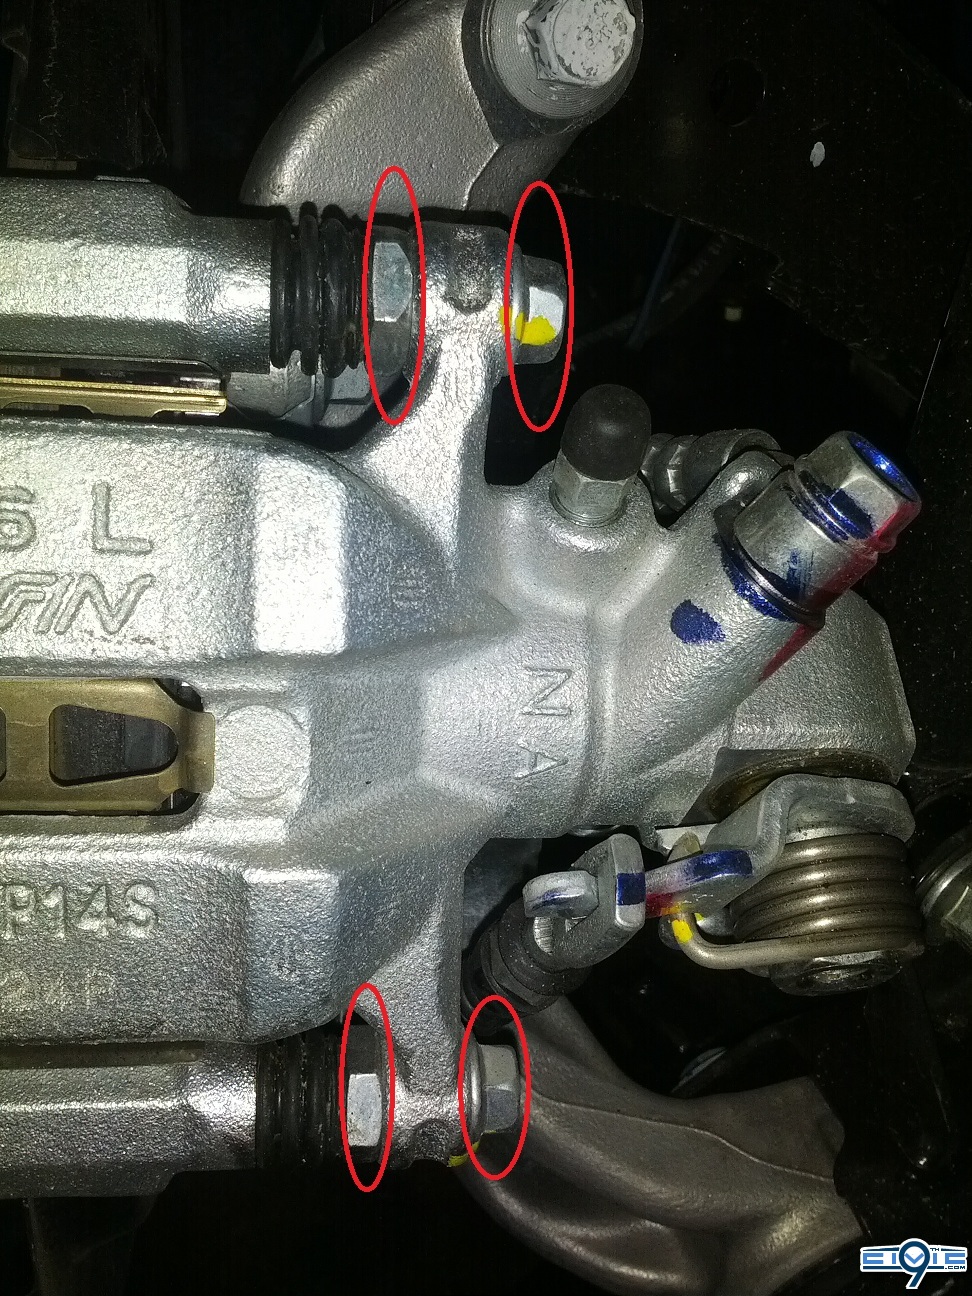
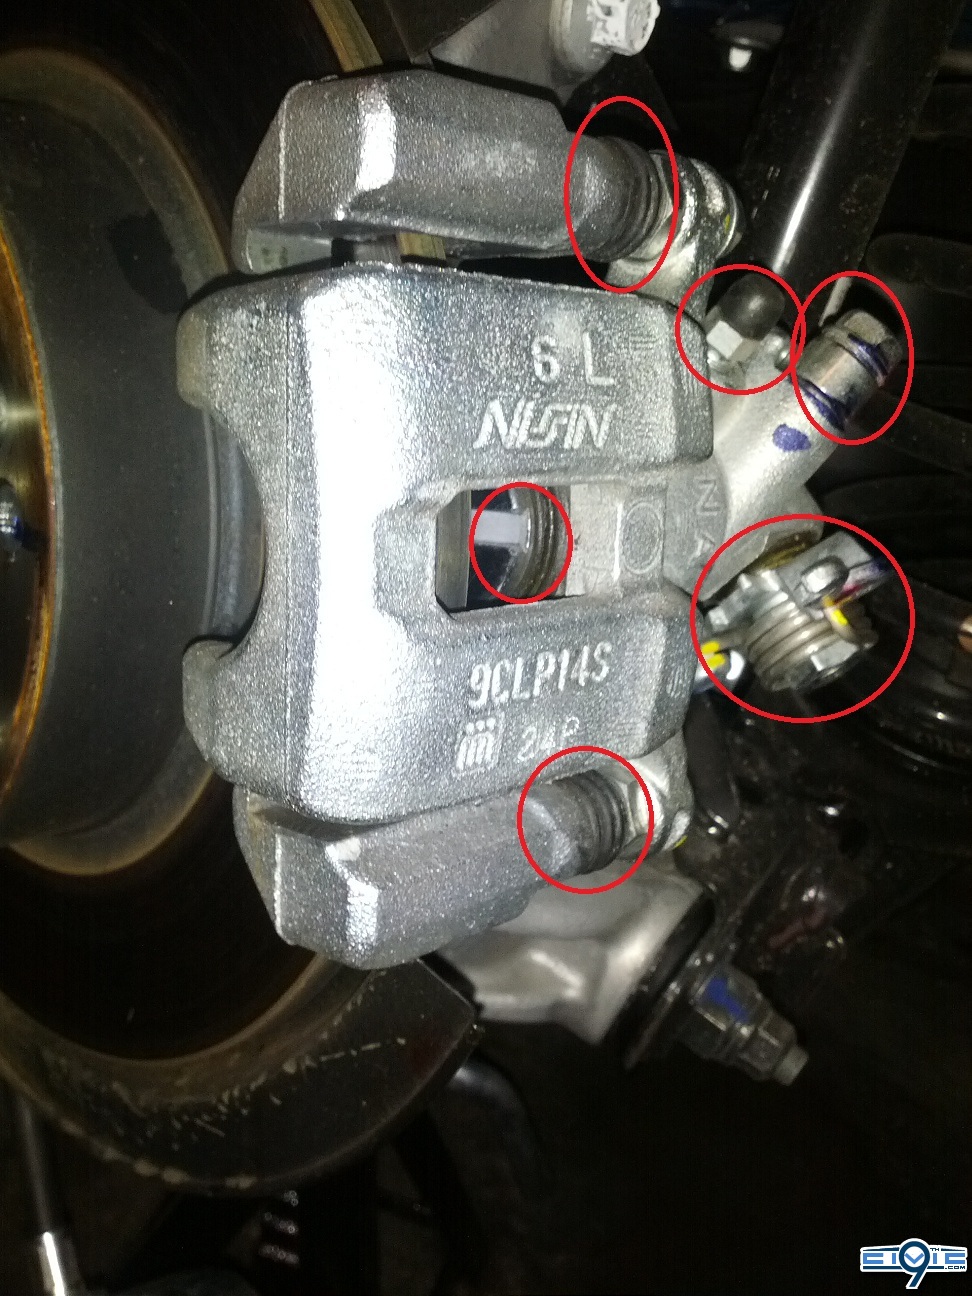
Step 5: At this point I removed the pads and shims so I could tape everything off better and be able to paint more of the calipers than would otherwise be possible due to the pads being in the way and getting paint on them. You will need the 12mm socket and 17mm wrench. At this point you will be removing the two bolts in the center of the picture. The 17mm wrench will be used to hold the nut in place next to the rubber boot. (WARNING: Do not damage the boot! If you do, replace it.) Otherwise, the bolt will just spin. (NOTE: the 17mm wrench is unnecessary for the front calipers as it is actually held in place due to the design of the caliper) Right now just loosen these bolts to the point where you can take them out by hand after the next step.
Step 6: Because the rear brakes are home to the emergency brake, it makes it a bit trickier to get the caliper off. With the front caliper you can simply remove the bottom bolt and loosen the top one and then just swing the caliper up. For the rears, you will have to remove both bolts and a couple of bolts to disengage the emergency brake line.

These bolts are behind the caliper just under the spot marked in the following picture.
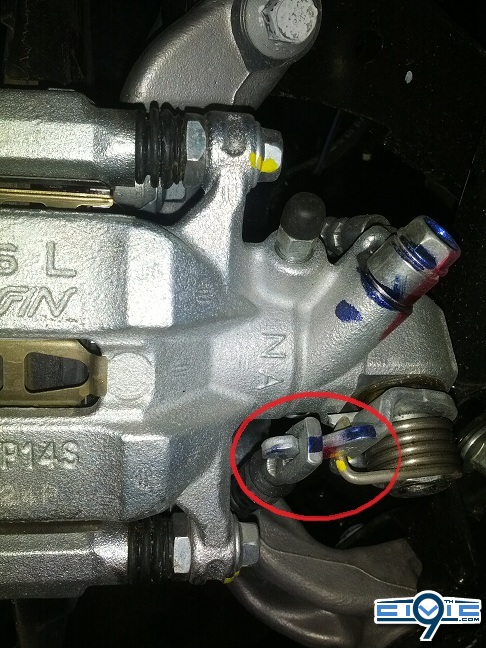
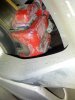
Once you remove these bolts, you will have to push down on the spring/lever to try and wiggle the line off. It takes a bit to get the angle right. Just be patient. You can just let the line dangle after you get it off.
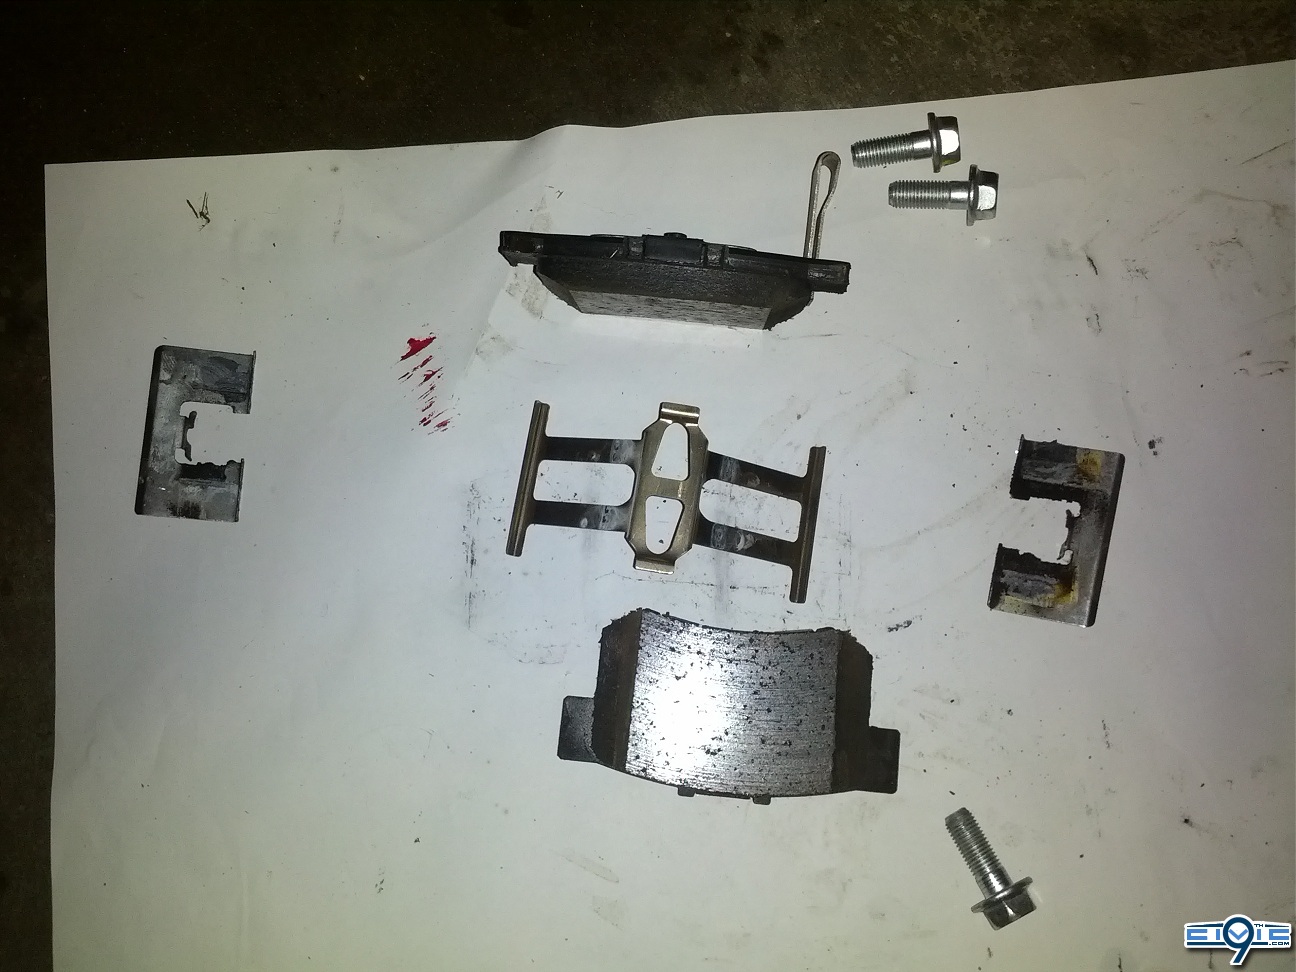
Step 7: Once get the emergency brake line disconnected, you can remove the caliper and take out the pads and shims. They all slide out easily. The middle shim may be a little tricky. (NOTE: the front caliper has two sets of small steel wire or rod connecting them inside of the caliper. They are there to keep the pads in place at the factory. They can be discarded) You should have everything you see in the following picture. I laid mine out on the ground where how they were placed in the caliper for reference. (WARNING: Do not push the caliper in! This can damage your brakes/system. Since the pads are not being replaced, the width will not change and you can simply put everything back together easily.)
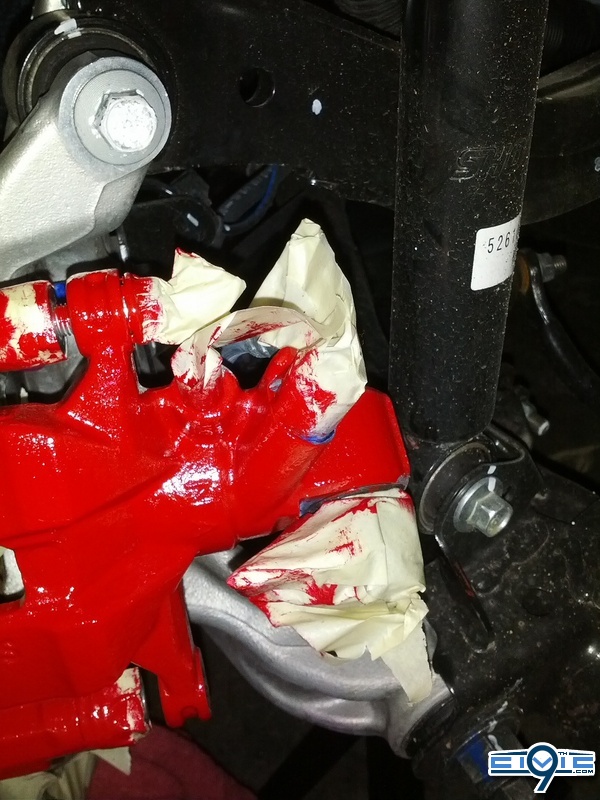
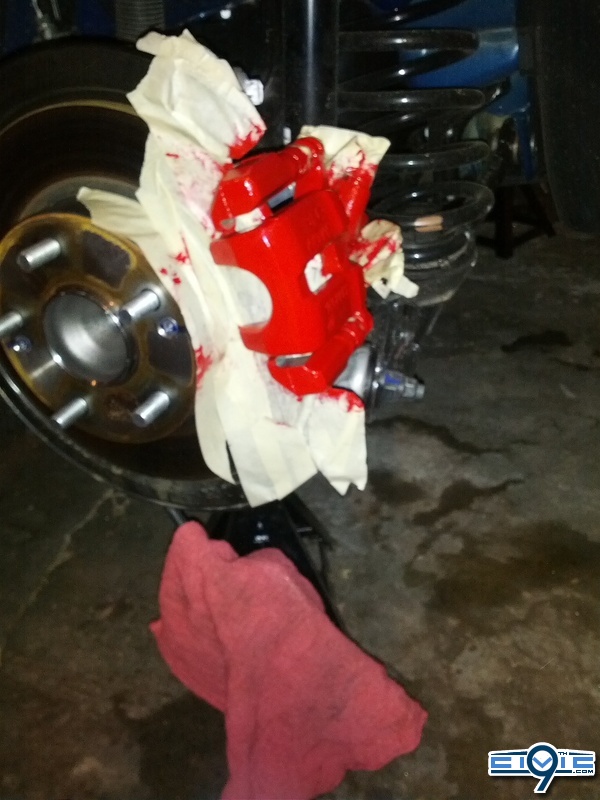
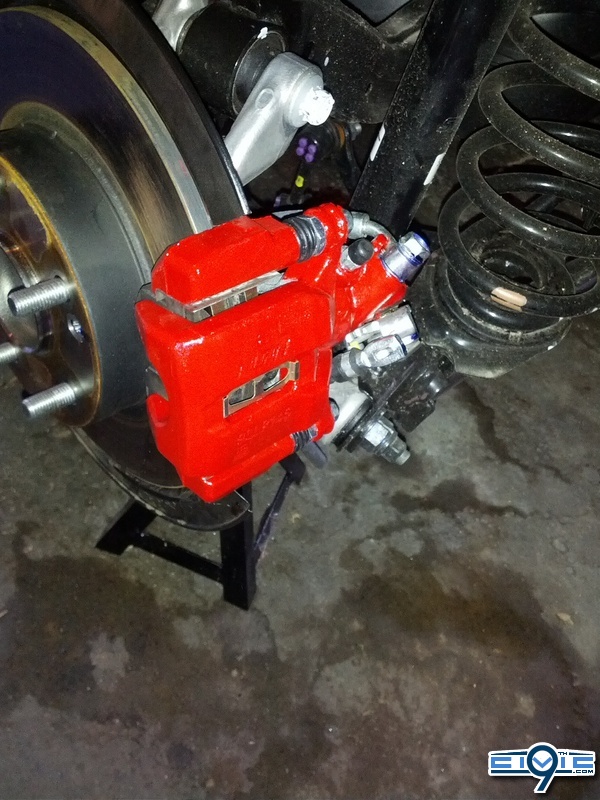
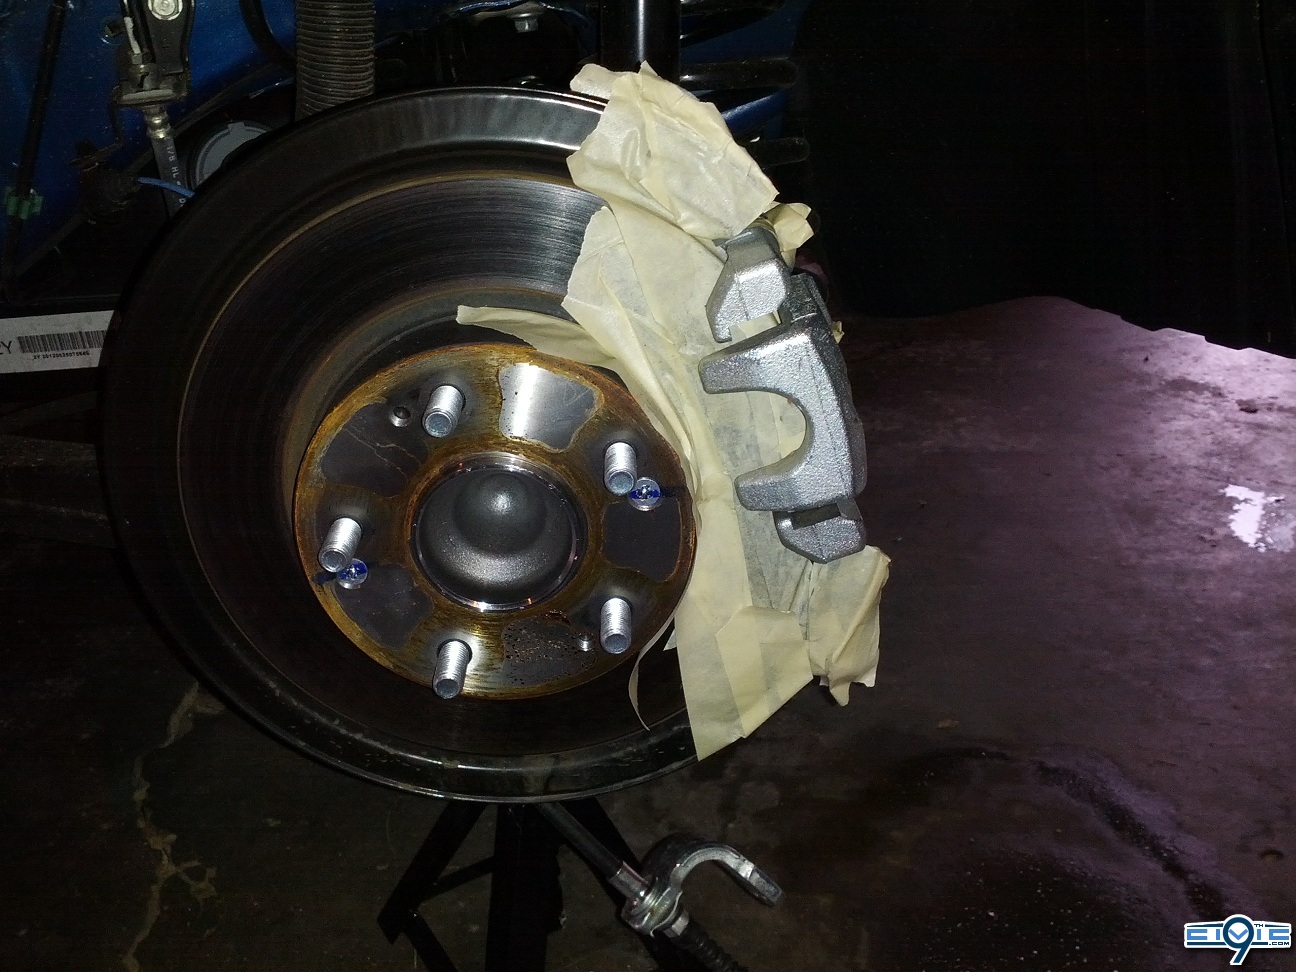
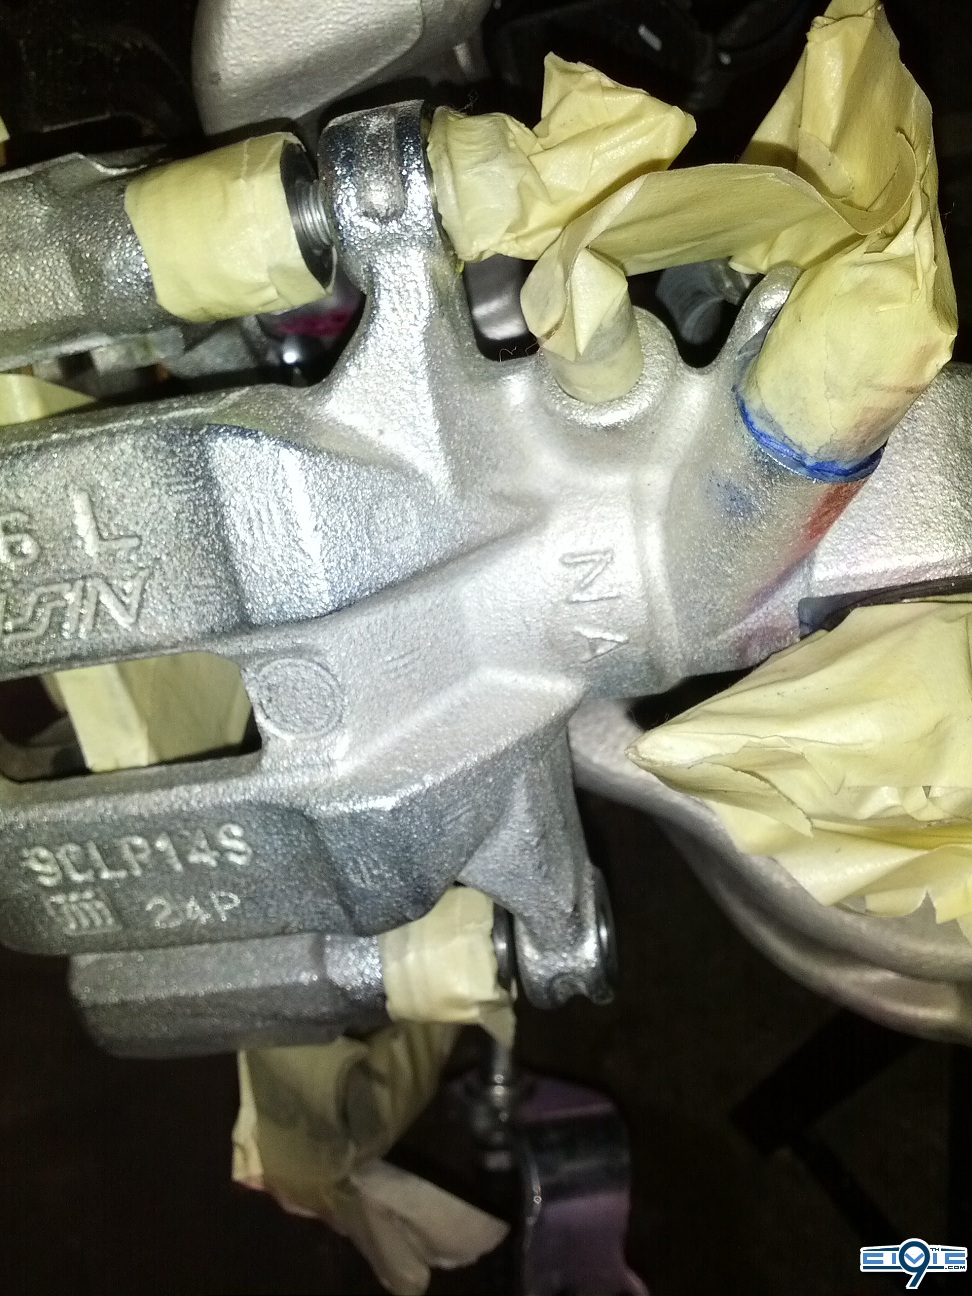
Step 8: Put the top bolt back in the caliper and thread just enough for it to catch and stay stable. This will allow the bottom side to hang out for easier painting. Now you can tape everything off. This includes any part of the rotor you may be concerned about getting paint on, the rubber boots, the bleed bolt, brake line connection, the actual caliper itself on the inside (the piece that touches the rear brake pad), and the emergency brake line connection mechanism. Take your time and be thorough trying to mask everything off.

To be continued in the next post.
I used a brush-based paint, not spray paint. I only suggest spray paint if you take the caliper off completely.
Warning: This DIY is loaded with large high resolution picture for the best detail as possible.
Tools needed:
Caliper paint - must be rated for high heat.
Brake Cleaner
Stiff and/or wire brush
Paint brush
Paint thinner or solvent of your choice
Masking tape
Jack
Jack Stands
12mm deep well socket
19mm socket
17mm wrench
Torque wrench
A flashlight may be helpful depending on your lighting situation
Possibly an impact driver-more on this later.
Step 1. Loosen your lug nuts if you do not have an impact wrench.
Step 2. Jack up the car and put it on jack stands. If you do not know where the jack points are, see the thread labeled Jack Points (forthcoming). I did the fronts one weekend and the backs another. If you are brave enough, go ahead and put it on four stands and have at it. It will definitely save time.
Step 3: Remove wheel and place it out of the way. Or use it as a seat like I did.
Step 4: Clean the rotors and calipers thoroughly using the brake cleaner and brush(es). Dry them thoroughly.
(As far as mentioning the impact driver, I have circled two screws below. I highly recommend removing them after you are done painting. These are a royal pain later on. Sometimes nearly impossible to get off without mutilating them or possible having to drill them out. They are only there to keep the rotors on the hub as it is going down the assembly line. They are not necessary for any other reason.)
Step 5: At this point I removed the pads and shims so I could tape everything off better and be able to paint more of the calipers than would otherwise be possible due to the pads being in the way and getting paint on them. You will need the 12mm socket and 17mm wrench. At this point you will be removing the two bolts in the center of the picture. The 17mm wrench will be used to hold the nut in place next to the rubber boot. (WARNING: Do not damage the boot! If you do, replace it.) Otherwise, the bolt will just spin. (NOTE: the 17mm wrench is unnecessary for the front calipers as it is actually held in place due to the design of the caliper) Right now just loosen these bolts to the point where you can take them out by hand after the next step.
Step 6: Because the rear brakes are home to the emergency brake, it makes it a bit trickier to get the caliper off. With the front caliper you can simply remove the bottom bolt and loosen the top one and then just swing the caliper up. For the rears, you will have to remove both bolts and a couple of bolts to disengage the emergency brake line.
These bolts are behind the caliper just under the spot marked in the following picture.
Once you remove these bolts, you will have to push down on the spring/lever to try and wiggle the line off. It takes a bit to get the angle right. Just be patient. You can just let the line dangle after you get it off.
Step 7: Once get the emergency brake line disconnected, you can remove the caliper and take out the pads and shims. They all slide out easily. The middle shim may be a little tricky. (NOTE: the front caliper has two sets of small steel wire or rod connecting them inside of the caliper. They are there to keep the pads in place at the factory. They can be discarded) You should have everything you see in the following picture. I laid mine out on the ground where how they were placed in the caliper for reference. (WARNING: Do not push the caliper in! This can damage your brakes/system. Since the pads are not being replaced, the width will not change and you can simply put everything back together easily.)
Step 8: Put the top bolt back in the caliper and thread just enough for it to catch and stay stable. This will allow the bottom side to hang out for easier painting. Now you can tape everything off. This includes any part of the rotor you may be concerned about getting paint on, the rubber boots, the bleed bolt, brake line connection, the actual caliper itself on the inside (the piece that touches the rear brake pad), and the emergency brake line connection mechanism. Take your time and be thorough trying to mask everything off.
To be continued in the next post.
Last edited: