- Thread starter
- #81
Navigation
Install the app
How to install the app on iOS
Follow along with the video below to see how to install our site as a web app on your home screen.

Note: This feature currently requires accessing the site using the built-in Safari browser.
More options
You are using an out of date browser. It may not display this or other websites correctly.
You should upgrade or use an alternative browser.
You should upgrade or use an alternative browser.
Dar-Dar's 1995 Avus Blue E36 M3 Project Car
- Thread starter Dar-Dar
- Start date
- Staff
- #82
- 55,520
- 23,812
....yet
- Thread starter
- #83
Dar-Dar
Mordorator
- 19,329
- 9,901
- Vehicle Model
- Civic Si
- Body Style
- Fiji Blue Pearl Coupe Coolest Member Since: May 15, 2011
I worked on the door panels for a bit. I used Dap contact cement to bond the leather to the fiber glass parts.
The first few pics were from a while back since the contact cement takes a full day to cure.
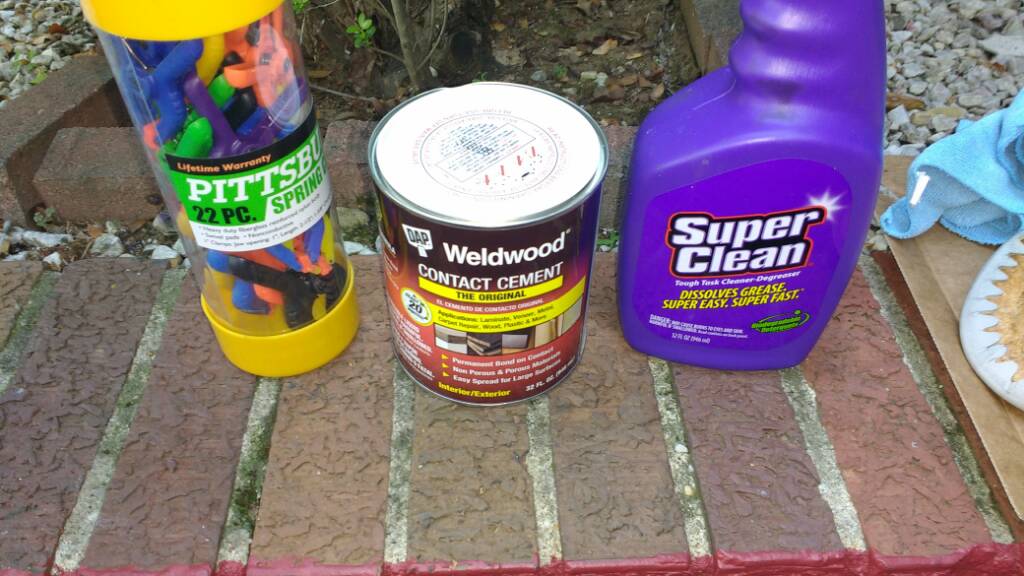

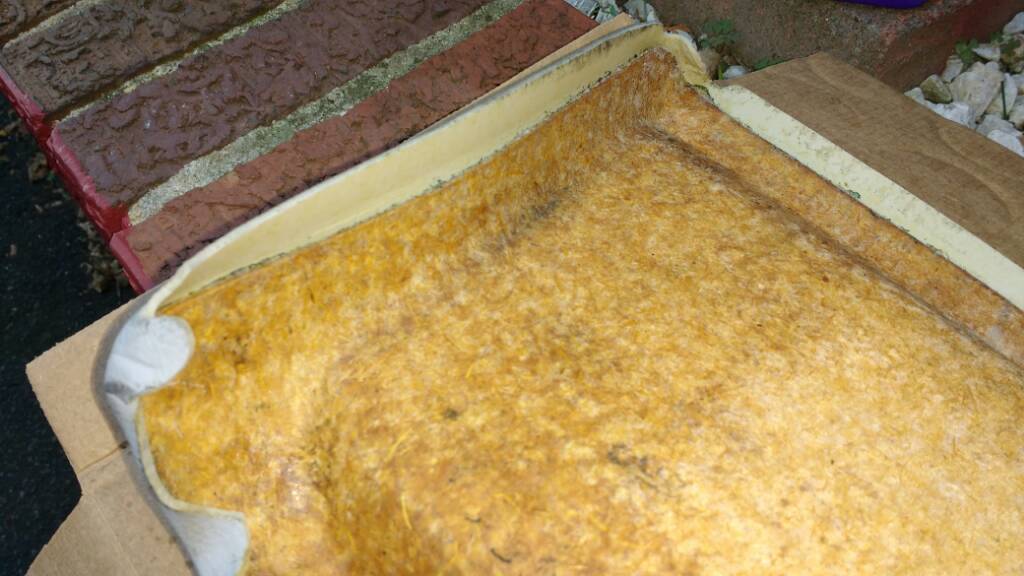
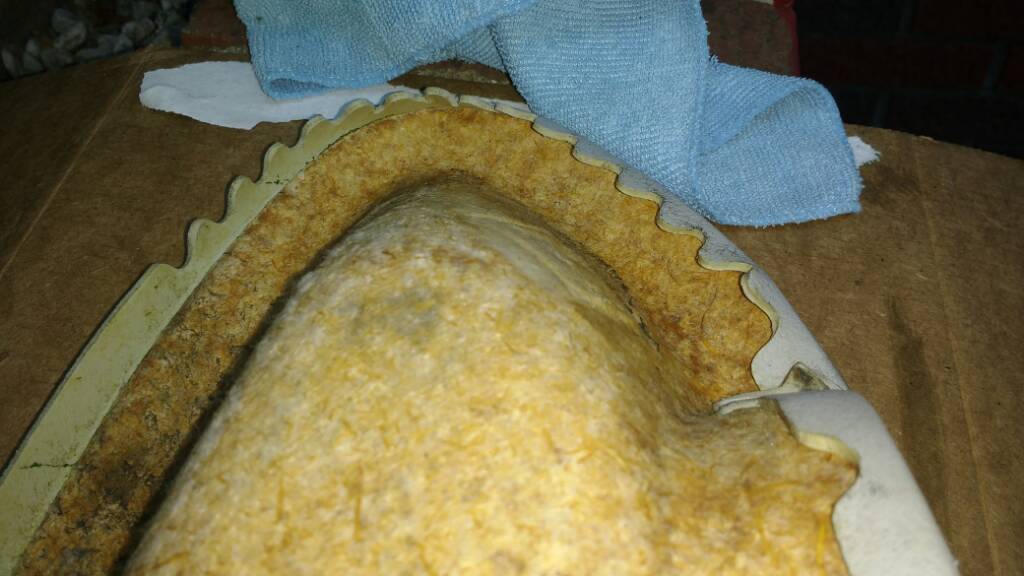
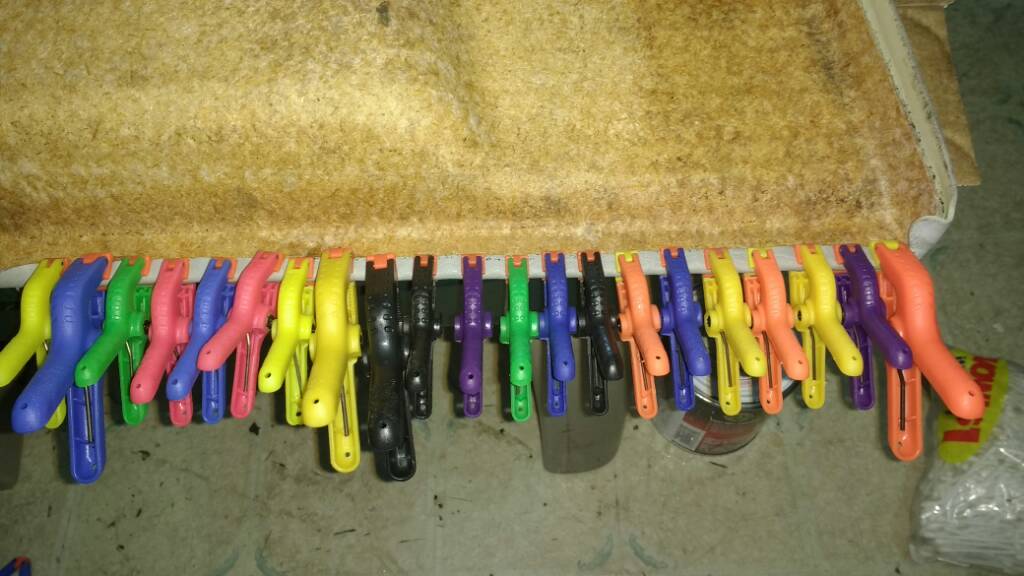
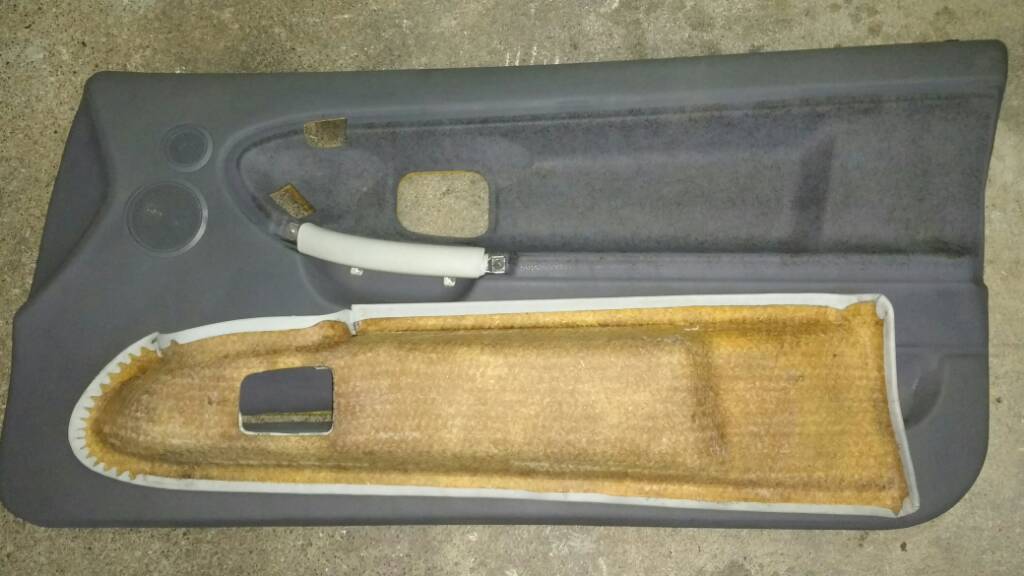
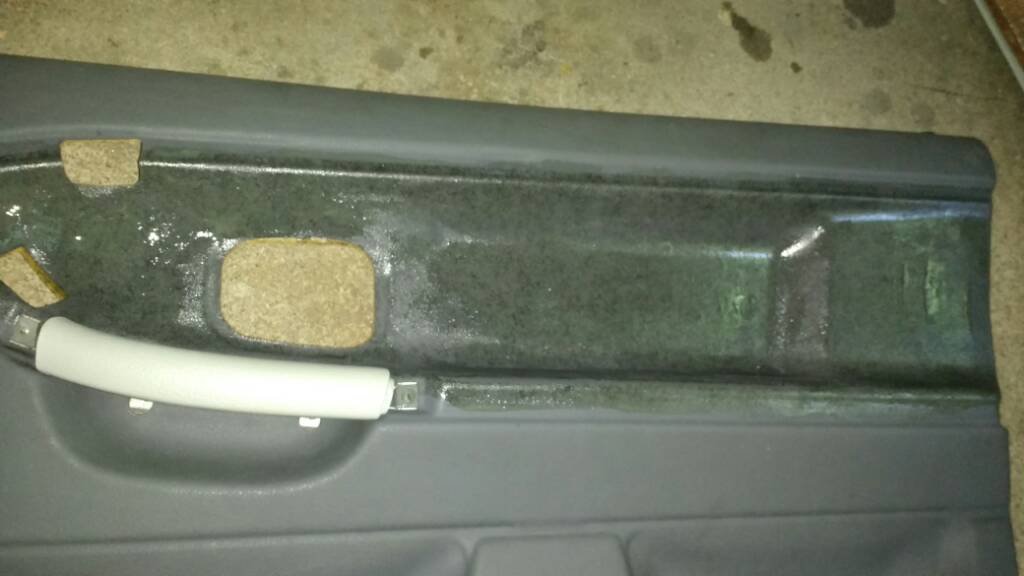
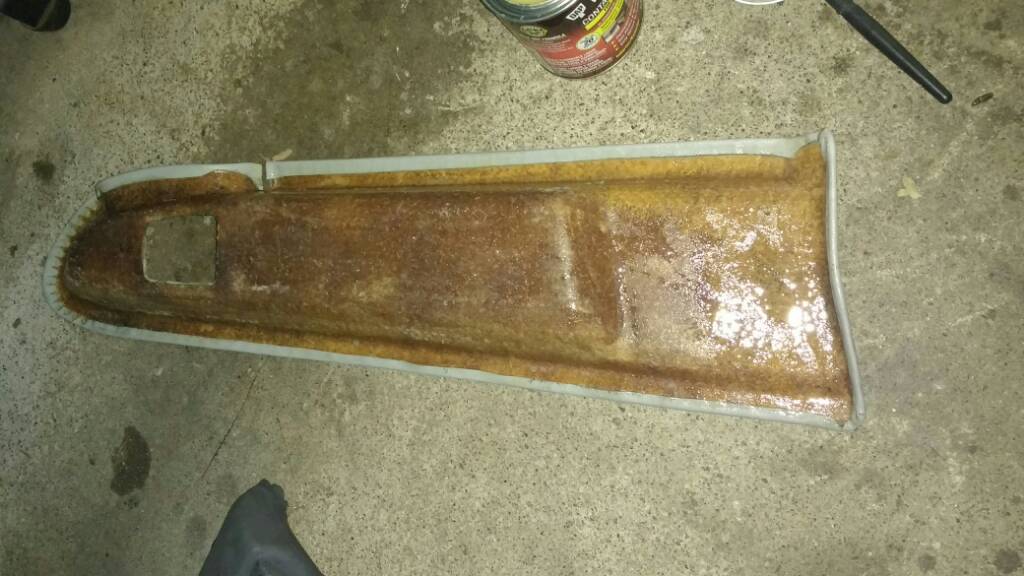
I added some weight so the contact cement can set and cure without leaving a gap in between the two panels.
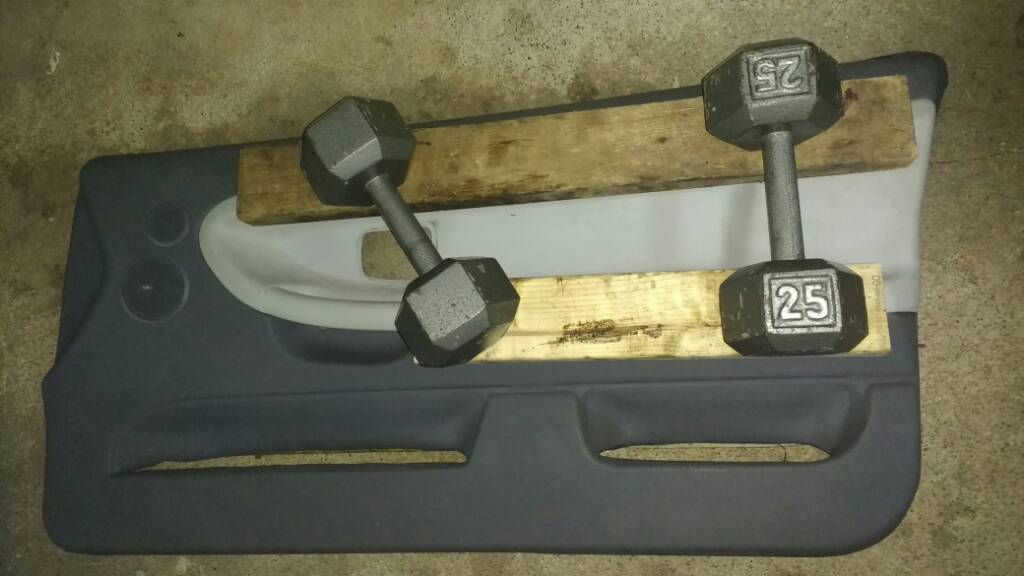
Sent from my MotoG3 using Tapatalk
The first few pics were from a while back since the contact cement takes a full day to cure.
I added some weight so the contact cement can set and cure without leaving a gap in between the two panels.
Sent from my MotoG3 using Tapatalk
- Thread starter
- #84

- Staff
- #85
- 9,711
- 6,680
- Vehicle Model
- Toyota Tacoma TRD Sport
- Body Style
- @bootyluvr hates hatches
Any reason why you used contact cement over the 3M spray glue?
I've used the 3M stuff for a few door panels and haven't had issues.
I've used the 3M stuff for a few door panels and haven't had issues.
- Thread starter
- #86
Dar-Dar
Mordorator
- 19,329
- 9,901
- Vehicle Model
- Civic Si
- Body Style
- Fiji Blue Pearl Coupe Coolest Member Since: May 15, 2011
I was doing research on the best bonding agent for bonding fiberglass to leather. Contact cement apparently works the best. It apparently works for sagging headliners too, which the M3 has.Any reason why you used contact cement over the 3M spray glue?
I've used the 3M stuff for a few door panels and haven't had issues.

Dude you put in serious work. Every day this thread has some major development.
- Thread starter
- #89
Dar-Dar
Mordorator
- 19,329
- 9,901
- Vehicle Model
- Civic Si
- Body Style
- Fiji Blue Pearl Coupe Coolest Member Since: May 15, 2011
Thanks! Yeah, the 25lb weights came in handy for this job haha.Puttin the 25lbs to good use. Cars coming along man!!!
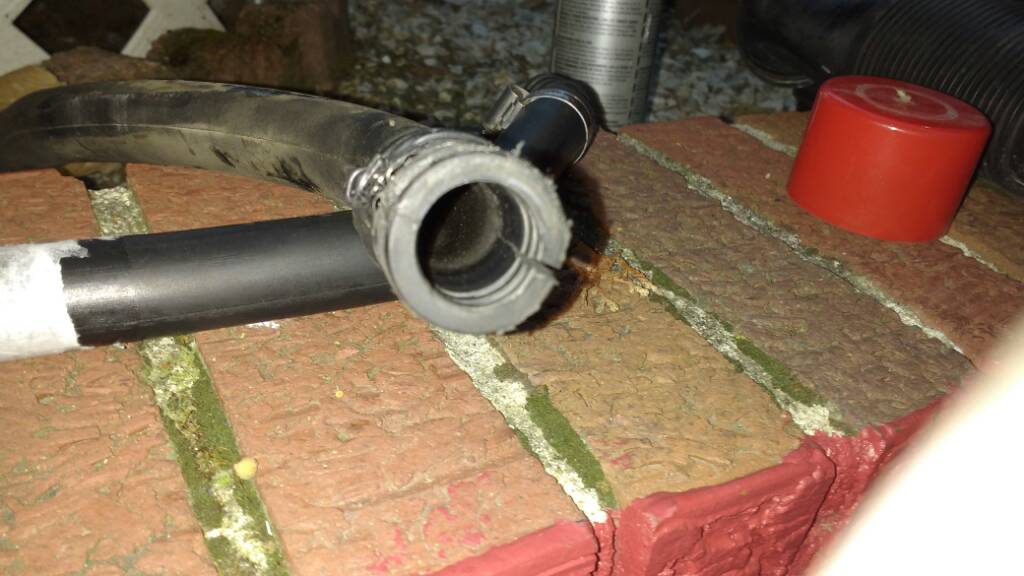
Thanks man. I wanted to drive it to work today, but when I was bleeding out the air from the cooling system yesterday by squeezing on the top and bottom hoses, the bottom hose decided to crack. Lol. The new hose should arrive tomorrow.Dude you put in serious work. Every day this thread has some major development.
Sent from my MotoG3 using Tapatalk
- Staff
- #90
- 9,711
- 6,680
- Vehicle Model
- Toyota Tacoma TRD Sport
- Body Style
- @bootyluvr hates hatches
I was doing research on the best bonding agent for bonding fiberglass to leather. Contact cement apparently works the best. It apparently works for sagging headliners too, which the M3 has.
Gotcha....I just hate how long the set time is on it.
- Thread starter
- #91
Dar-Dar
Mordorator
- 19,329
- 9,901
- Vehicle Model
- Civic Si
- Body Style
- Fiji Blue Pearl Coupe Coolest Member Since: May 15, 2011
Yeah, it's like 72 hours to completely cure.Gotcha....I just hate how long the set time is on it.
Sent from my MotoG3 using Tapatalk
- Thread starter
- #92
Dar-Dar
Mordorator
- 19,329
- 9,901
- Vehicle Model
- Civic Si
- Body Style
- Fiji Blue Pearl Coupe Coolest Member Since: May 15, 2011
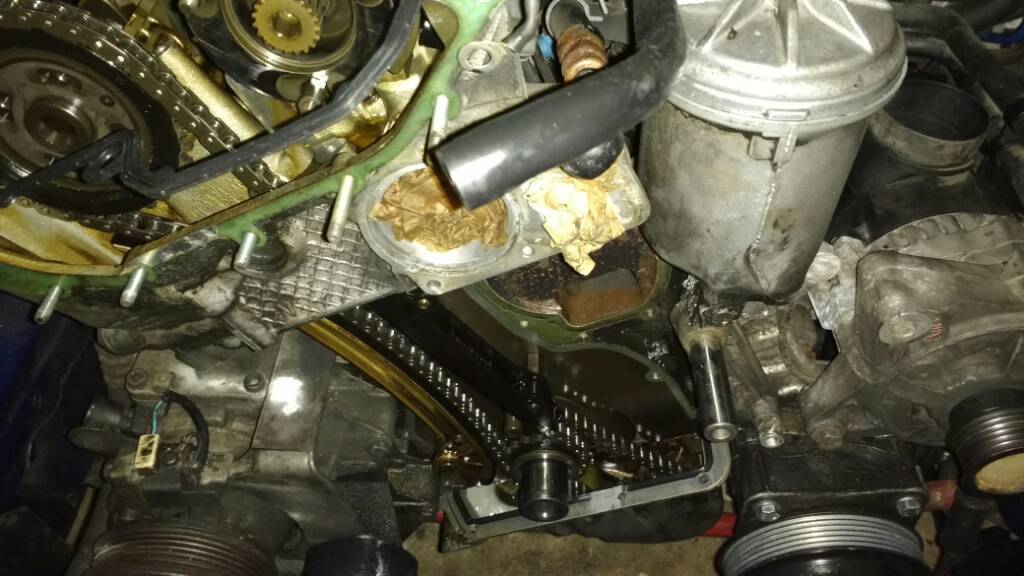
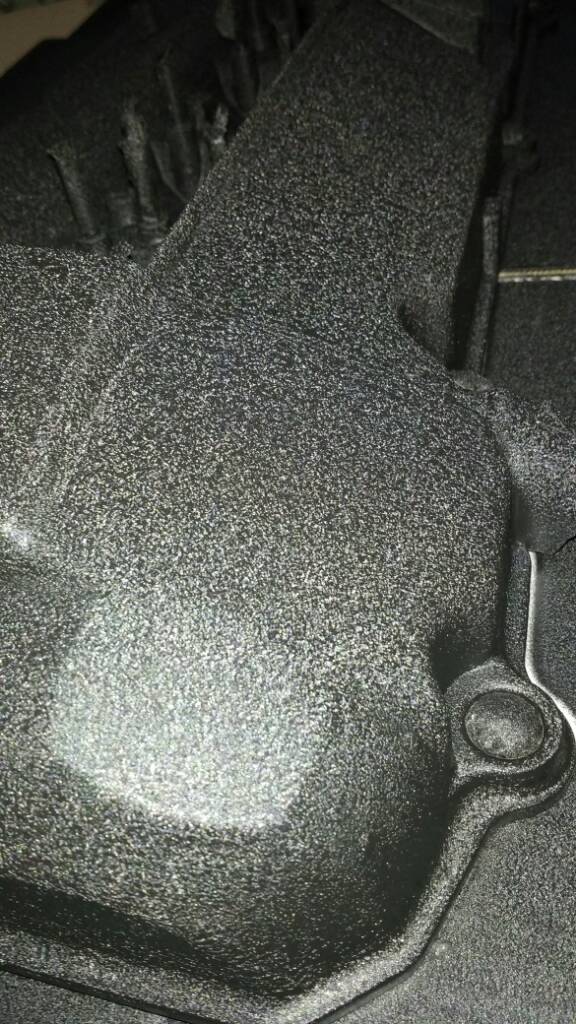
I haven't posted anything here for a while. But these are the latest updates. The engine was leaking some oil on the front location and I was positive that the timing chain cover gaskets were toast. So I worked on removing the timing chain cover. It took me around a week to do this. Most of the job was after coming home from work.
I first flushed the coolant, removed the radiator/radiator hoses and removed the auxiliary belts. I then removed the valve cover and turned the crank until the engine was at the top dead center. I used this BMW speciality tool to lock the engine at top dead center position. The tool goes through a hole in the back location of the engine and through a hole on the flywheel (when at top dead center position). I don't have a pic of the tool but it is a simple looking long rod.
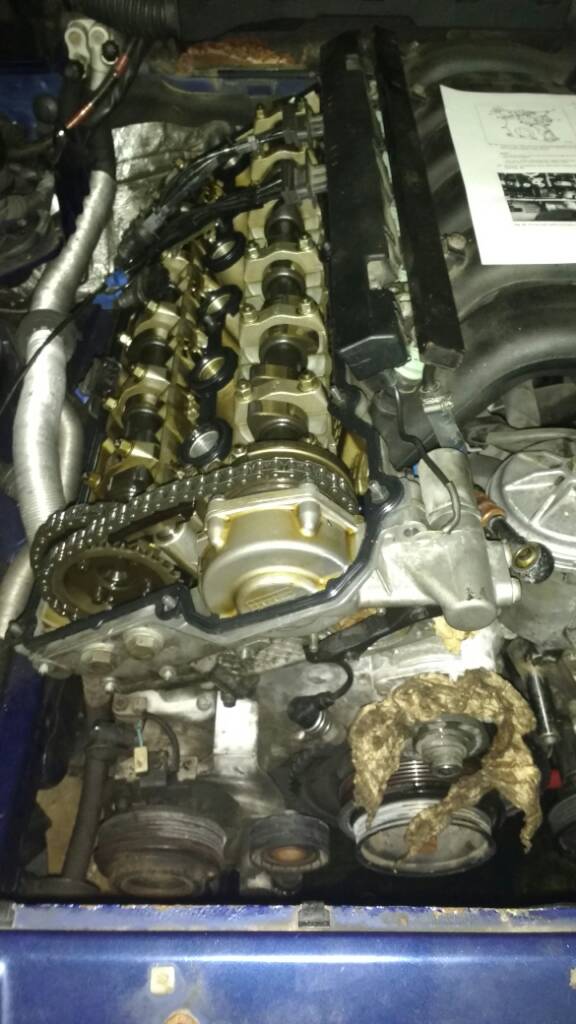
Removed the pulley tensioner, crankshaft vibration damper, crankshaft bolt.
I removed the Vanos control unit.
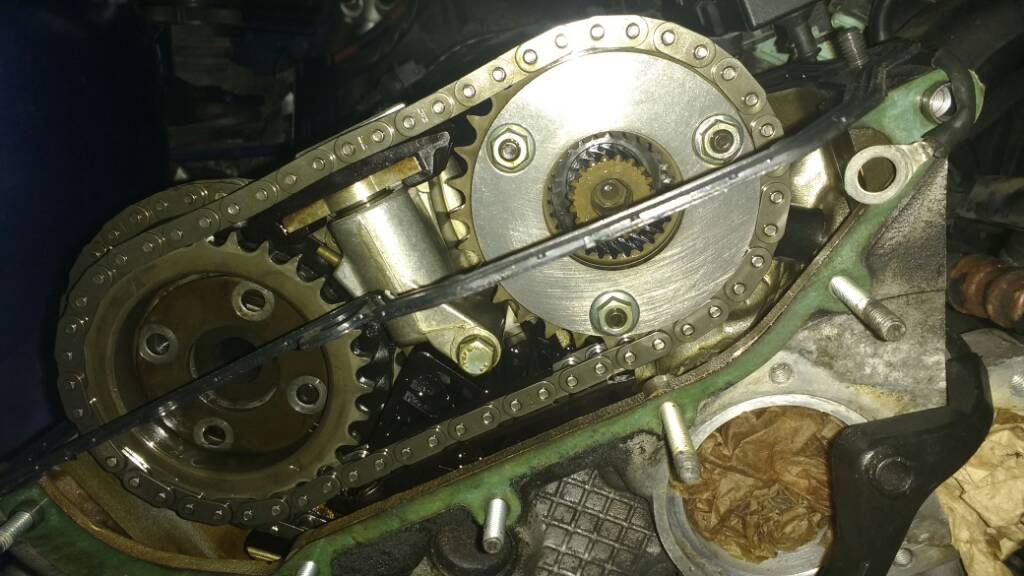
Removed the camshaft sprockets, chain, and chain tensioner to have access to the bolts holding the timing chain cover from the top.
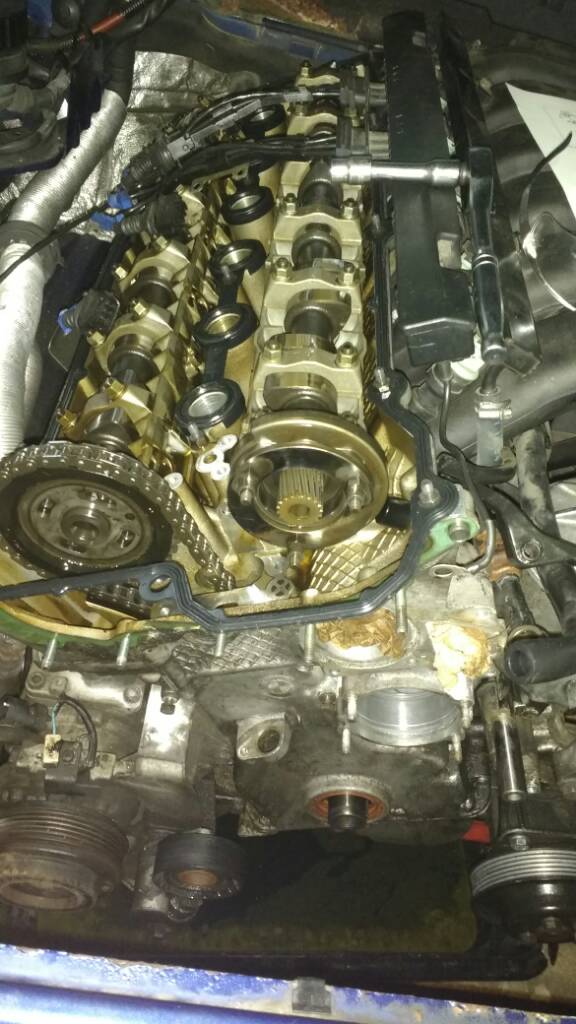
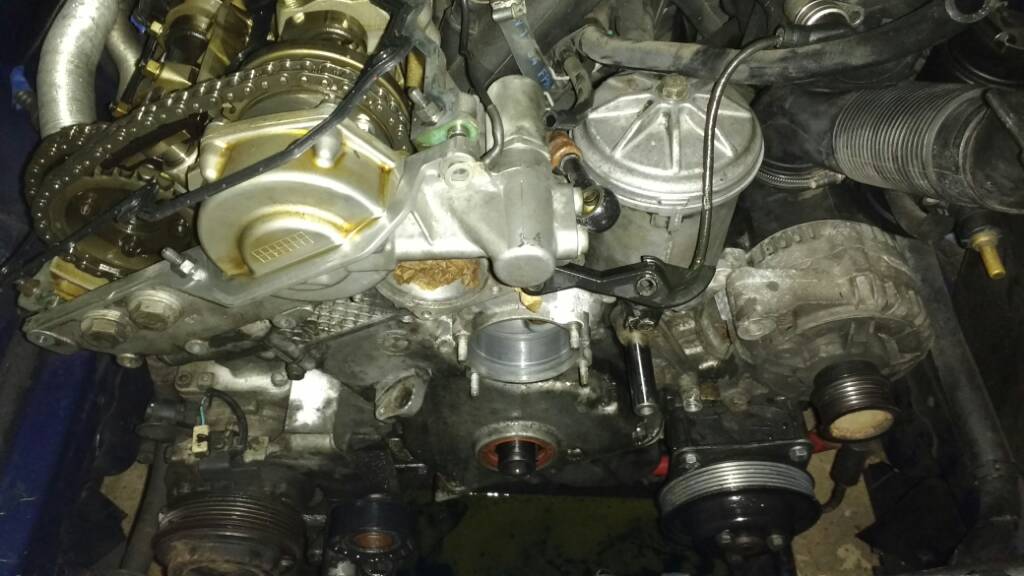
And the timing chain cover is out!
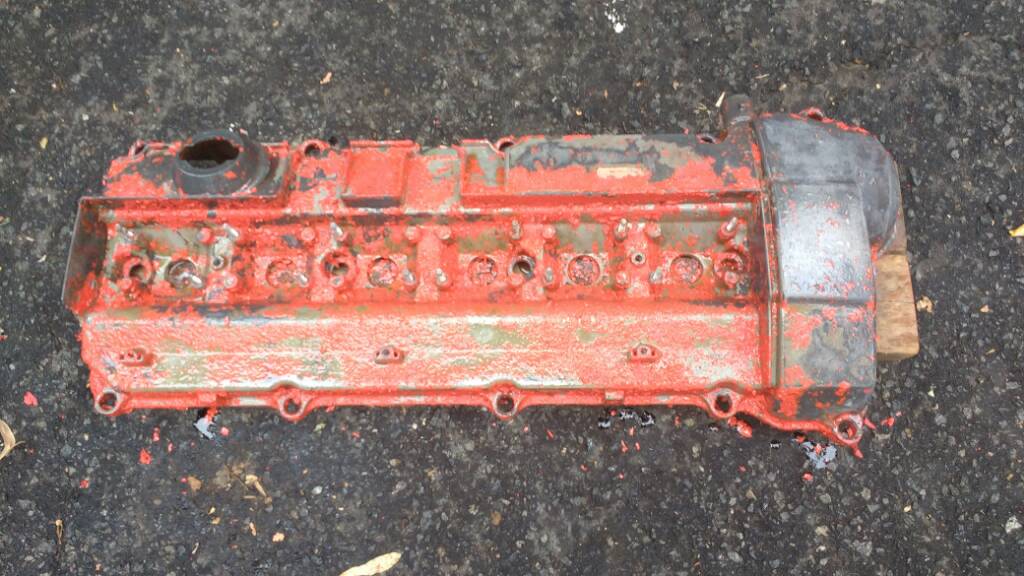
I gave it a good cleaning using a degreaser.
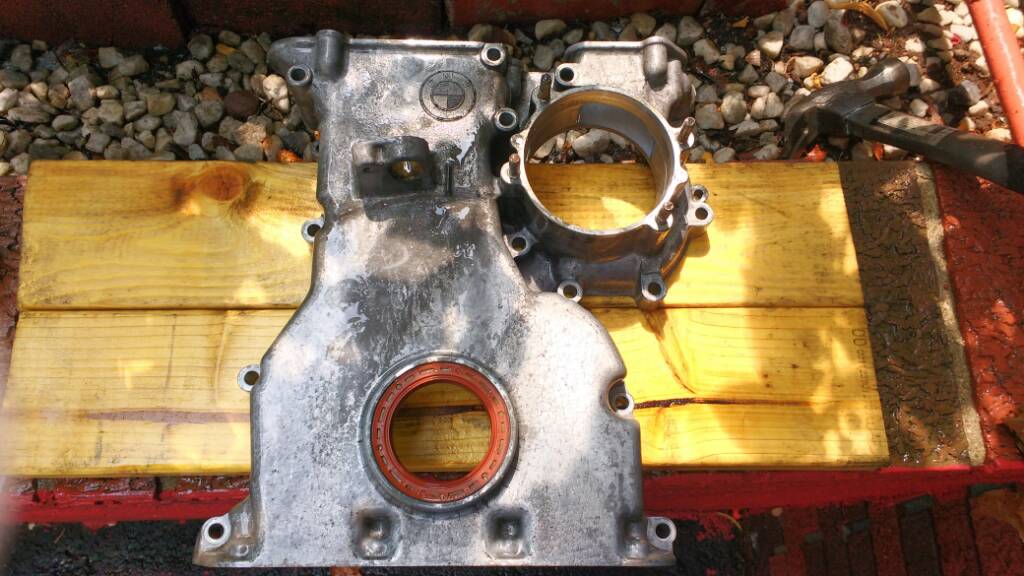
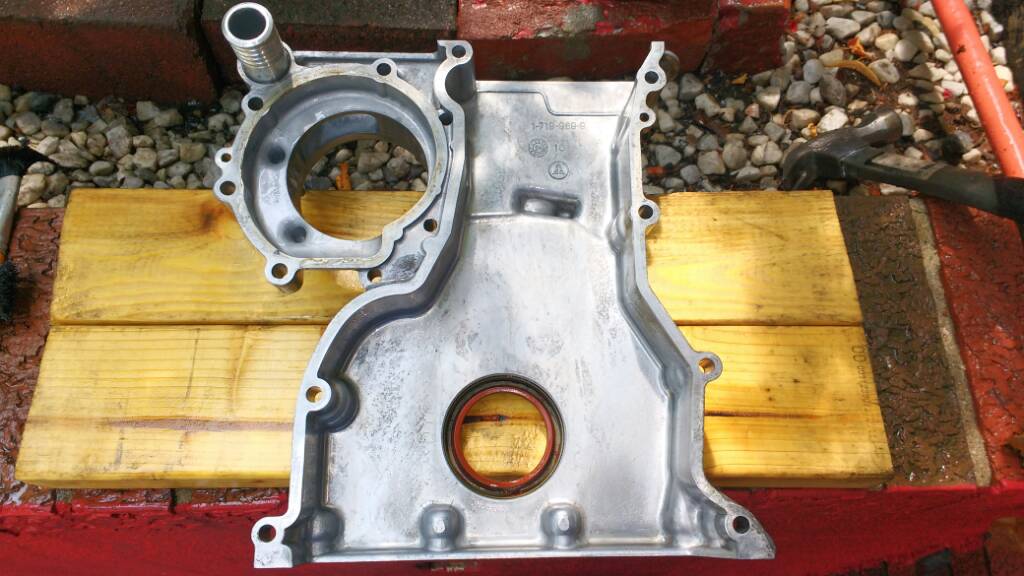
I had an issue where one of the gaskets didn't fit.

I ended up just using a permatex red silicone gasket maker and it got the job done. There's no more oil leaks!
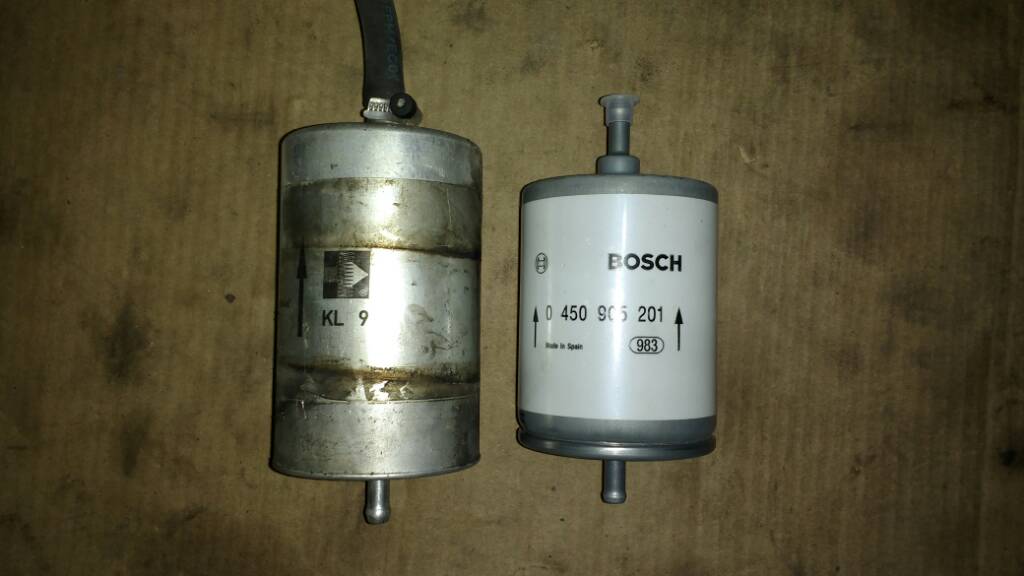
I replaced the fuel filter.
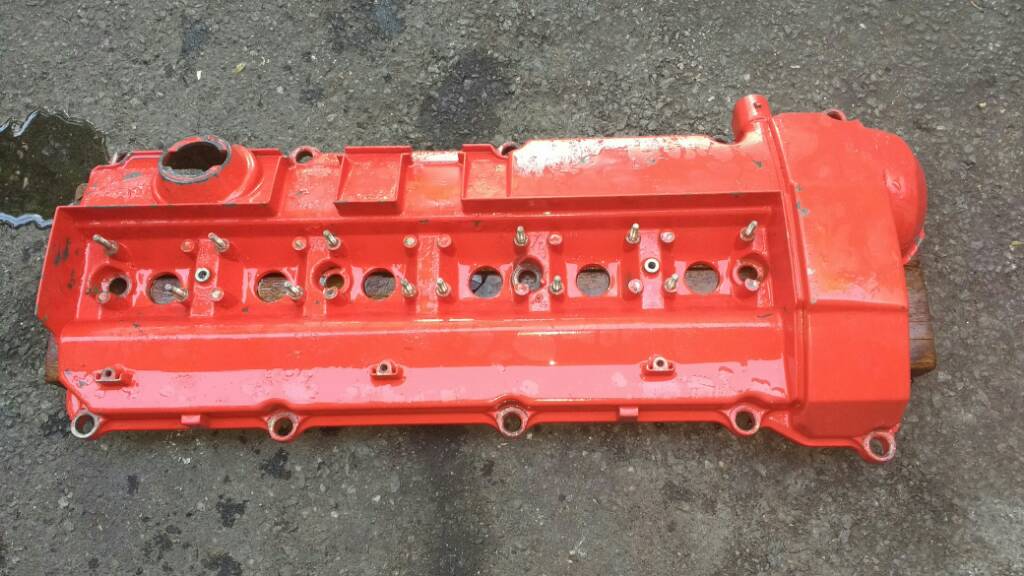
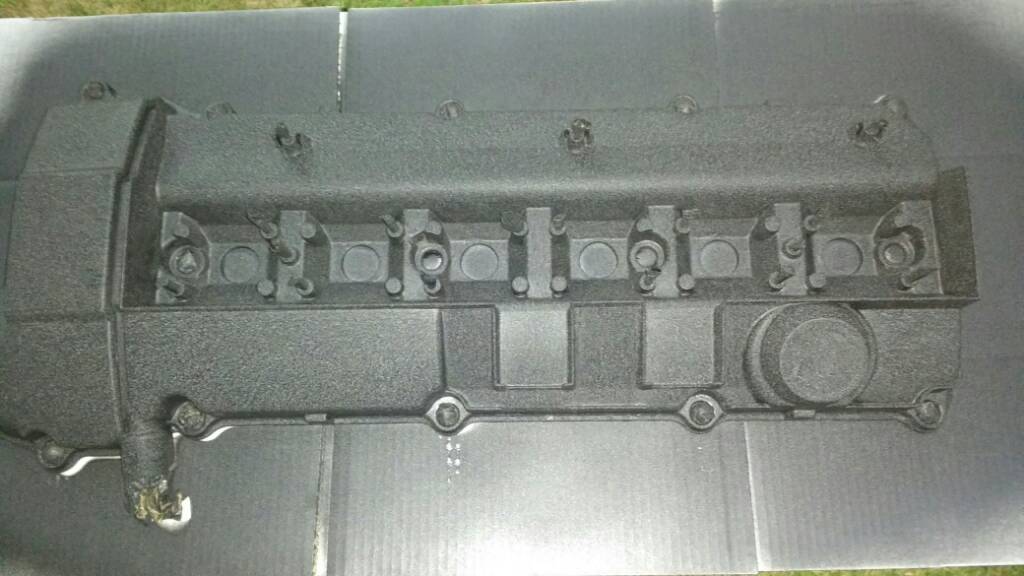
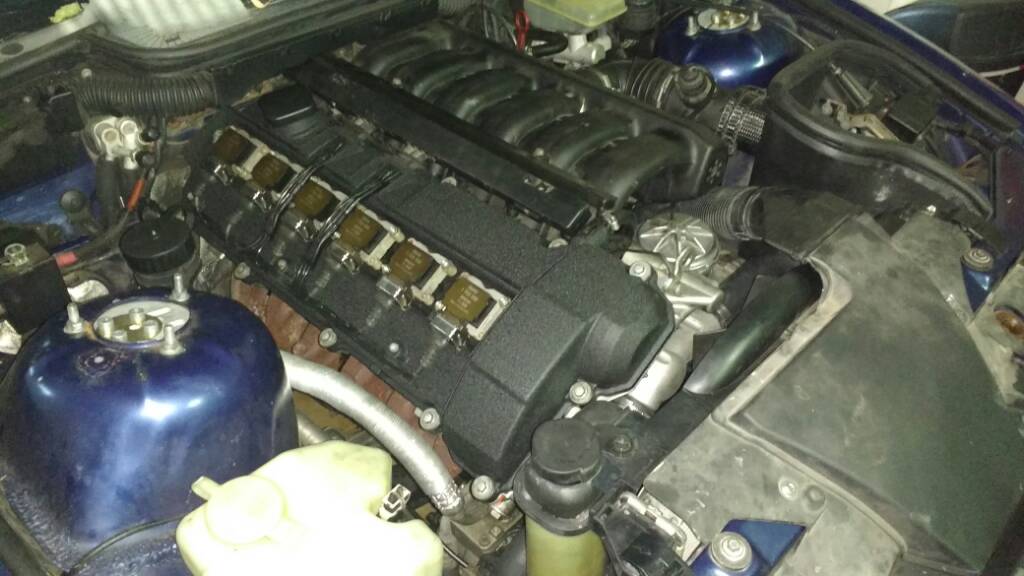
I also repainted the valve cover wrinkle black. The red had to go.

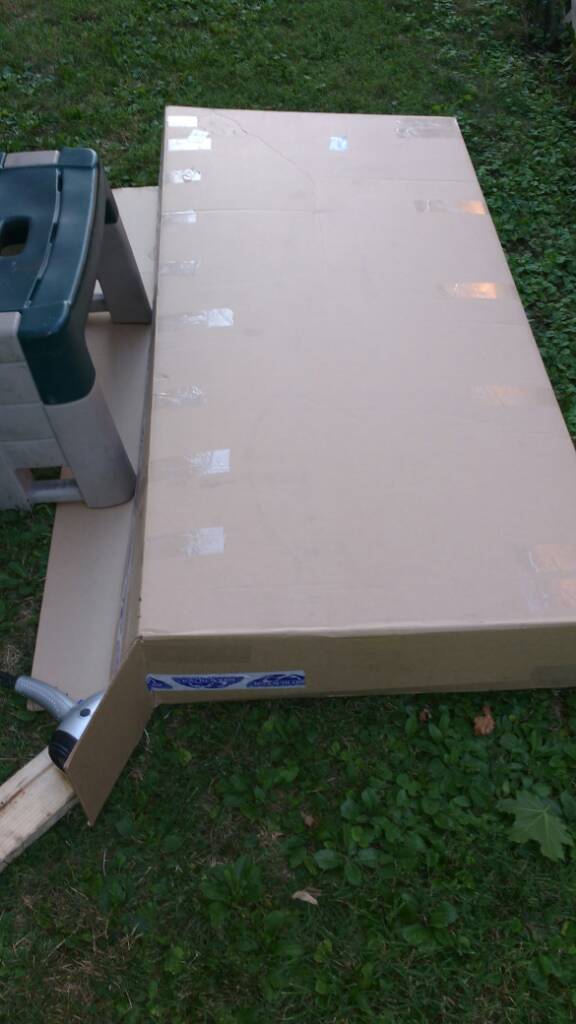
I used this big box as my baking oven to activate the wrinkling. Wrinkling only starts once heat is introduced. And the box and blow dryer method has worked wonders for me for a very long time.
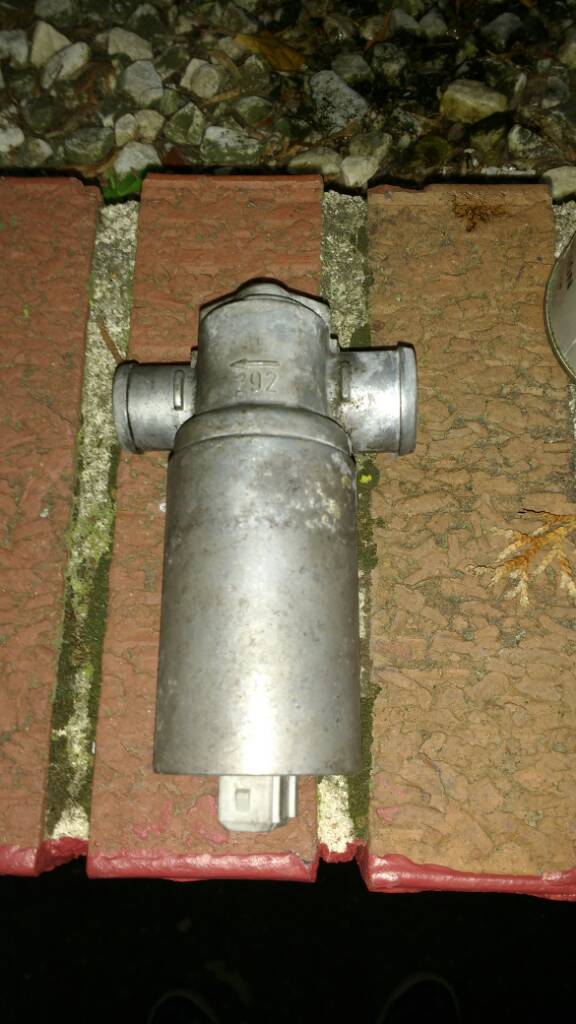
I was getting idle issues where the idle would hesitate and the rpm would fluctuate between 1k and 500 rpm. So I thought that it's the ICV(idle control valve) and possible vacuum leaks. I cleaned the ICV using a degreaser.
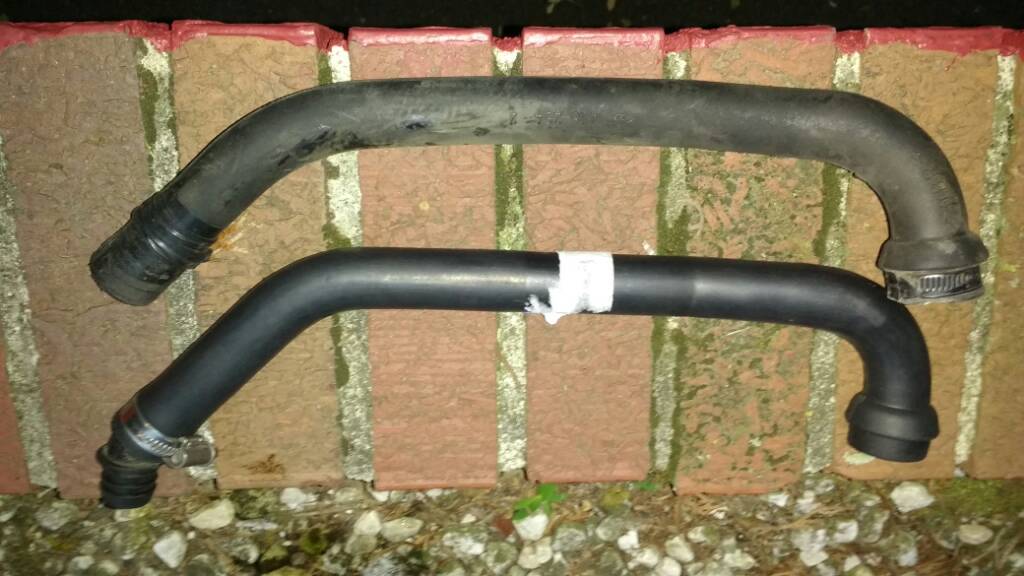
I also replaced this vacuum line that connects to the ICV and intake tube since the previous owner tried 'sealing' the crack with electrical tape.
The car is still having surging issues so I purchased a TPS (throttle position sensor) which should be delivered tomorrow.
Sent from my MotoG3 using Tapatalk
I first flushed the coolant, removed the radiator/radiator hoses and removed the auxiliary belts. I then removed the valve cover and turned the crank until the engine was at the top dead center. I used this BMW speciality tool to lock the engine at top dead center position. The tool goes through a hole in the back location of the engine and through a hole on the flywheel (when at top dead center position). I don't have a pic of the tool but it is a simple looking long rod.
Removed the pulley tensioner, crankshaft vibration damper, crankshaft bolt.
I removed the Vanos control unit.
Removed the camshaft sprockets, chain, and chain tensioner to have access to the bolts holding the timing chain cover from the top.
And the timing chain cover is out!
I gave it a good cleaning using a degreaser.
I had an issue where one of the gaskets didn't fit.
I ended up just using a permatex red silicone gasket maker and it got the job done. There's no more oil leaks!
I replaced the fuel filter.
I also repainted the valve cover wrinkle black. The red had to go.
I used this big box as my baking oven to activate the wrinkling. Wrinkling only starts once heat is introduced. And the box and blow dryer method has worked wonders for me for a very long time.
I was getting idle issues where the idle would hesitate and the rpm would fluctuate between 1k and 500 rpm. So I thought that it's the ICV(idle control valve) and possible vacuum leaks. I cleaned the ICV using a degreaser.
I also replaced this vacuum line that connects to the ICV and intake tube since the previous owner tried 'sealing' the crack with electrical tape.
The car is still having surging issues so I purchased a TPS (throttle position sensor) which should be delivered tomorrow.
Sent from my MotoG3 using Tapatalk
- Thread starter
- #93
Dar-Dar
Mordorator
- 19,329
- 9,901
- Vehicle Model
- Civic Si
- Body Style
- Fiji Blue Pearl Coupe Coolest Member Since: May 15, 2011
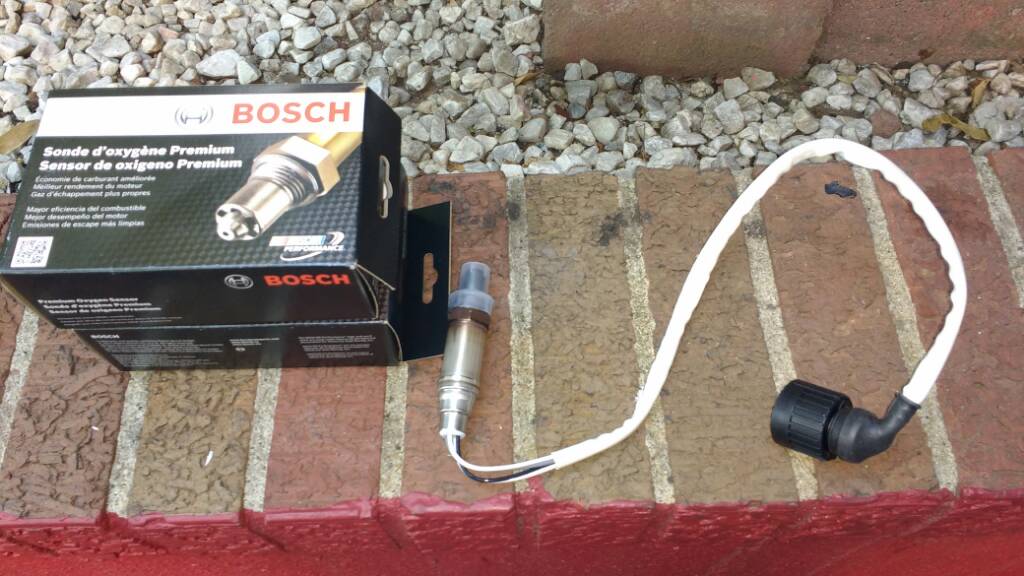
I also purchased two oxygen sensors. Then I only saw one from underneath the car. Apparently the 95 only has one and obdii(96+) E36s have two. I attempted to replace the oxygen sensor but the placement of the sensor was impossible to wrench. So I ordered an O2 sensor wrench and a 3/8 breaker bar for the reattempt.
Sent from my MotoG3 using Tapatalk
Sent from my MotoG3 using Tapatalk
- Staff
- #94
- 55,520
- 23,812
cover looks like it turned out really good man
- Staff
- #95
- 9,711
- 6,680
- Vehicle Model
- Toyota Tacoma TRD Sport
- Body Style
- @bootyluvr hates hatches
Yeah, cover looks nice. Nice work!
This project looks like fun. I like the paint job.
Biohazard
Well-Known Member
look forward to the updates
- Thread starter
- #99
Dar-Dar
Mordorator
- 19,329
- 9,901
- Vehicle Model
- Civic Si
- Body Style
- Fiji Blue Pearl Coupe Coolest Member Since: May 15, 2011
Too expensive at this time. Lol. It will be easier to work on the second time around at least.With what you have torn apart so far, you are well on your way to work on internals...
Sent from my MotoG3 using Tapatalk
Too expensive at this time. Lol. It will be easier to work on the second time around at least.
Sent from my MotoG3 using Tapatalk
Save money...consider it a learning experience.