First Try Mini H1 Retrofit

Nix

Jötunn Moderator
VIP Member
10,765
8,162
Lew-vul, KY
Body Style
It's A Fast Pig!
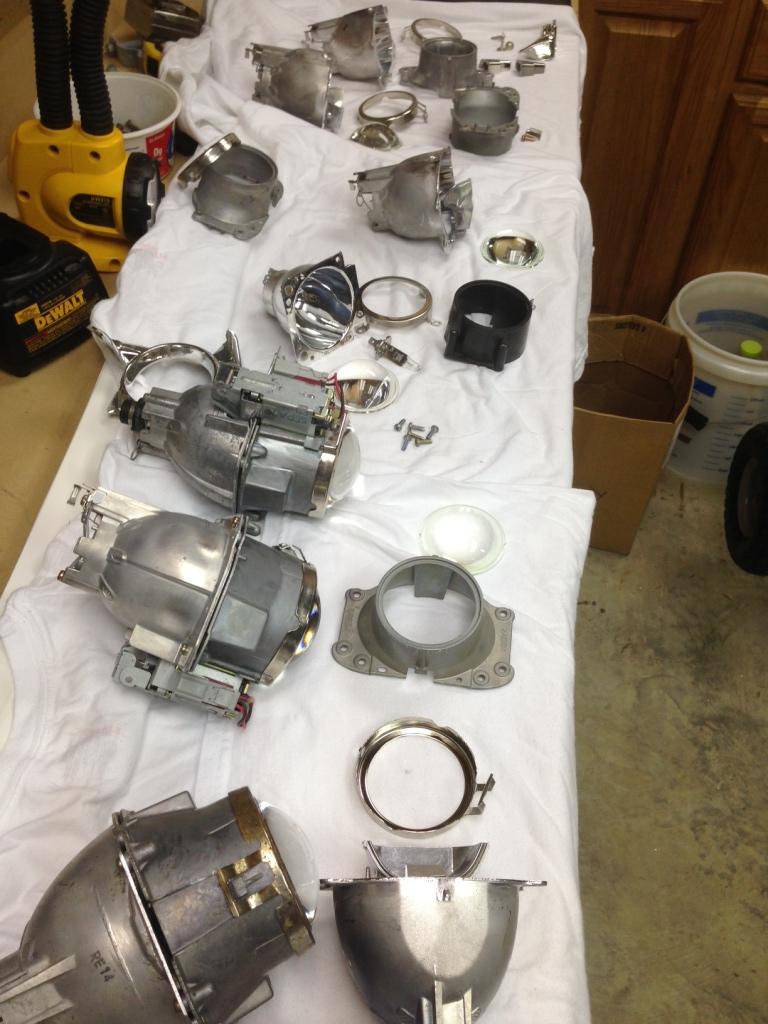
So I just got a package in the mail from one Mr.Webby containing new Morimoto Min H1 projectors.

I'll try and keep you guys up to date as I go and hopefully this will be useful to any one else attempting their first retro also. If anyone experienced wants to chime in and correct things Im doing wrong that would be much appreciated.

Morimoto Mini H1's are bi-xenon, meaning you can use them for hi and low beams. There is a solenoid inside that moves the shield to vary the light. For this retro im not going to use the solenoid as these will be low beams only.

What's in the box: 2 projectors, 2 Mini Gatling shrouds, fitment rings and bulb clips. All packaged very nicely.

packageng.jpg


The projector:
sideum.jpg


Test fit of the shroud: The wire you see with the black plug is for the solenoid inside the projector.
frontyn.jpg


The back:

backku.jpg


The side:

sideshroud.jpg
 
Shrouds: Mini gatling shrouds fit very well and have posts on the inside so you can screw the shroud to the projector without using glue/epoxy/adhesive to hold it on.

Side/Front:

minigatlingshroud.jpg


The back: You can see the mounting "posts" and the vents.

backinsideshroud.jpg


One thing to keep in mind is that the solenoid will be visible from the front if you look into the projector. I am going to paint this and the shield later on to make them less visible. This will probably ruin the solenoid, but it's not going to get used anyway and I don't foresee these projectors ever going into a different car.

The solenoid and shield: Shining a light into it so you can see it.

solenoidfront.jpg


How it looks not making it super visible...
frontcal.jpg


Closer:

solenoidclose.jpg


I had to put the plug in front of it to get the camera to focus.
wholerefocus.jpg
 
good stuff man. Can't wait to see how the retro turns out.
 
What type of bulbs go into these? I think the main problem you might run into is making a shroud extension(if needed). Everything else is pretty straight forward from what I have seen/heard.
 
Yup. H1 HID kit should be waiting for me when I get home. Im possibly going to run the new Panamera shrouds which are quite large. Or maybe gatling 2.0 if the panamera won't clear the housing. Ive got a second set of housings on the way also which will allow me to test fit and tinker without ripping apart the car.
 
So something I noticed test fitting the shroud is that the wiring for the solenoid is wrapped around the wire spring. It looks like it hits on the edge of the shroud preventing a smooth fit. If nothing else its a squeeze on the wires. I did not remember to get a pic of the tight fit.

I decided to unwrap the wires from the bar spring you see here.
80861906.jpg


To make it as easy as possible I wanted to de-pin the black solenoid plug so I could just slip them out.
67599119.jpg


To de-pin the wires you need a very small needlenose plier or other pronged tool. I used an accutome. This thing is sharp

79520648.jpg


The pins have a raised "barb" that holds them in. Fish around with your tool until you find the spot to compress the barb and the pin should slide out the back.
40287929.jpg


This is the pin close up so you can get an idea of the latch/barb mechanism.
19330186.jpg


Plug off the end and can be reconnected if you wish later. No cutting this way.
92815812.jpg
 
Next you have to release the bar spring from the shield to get a little wiggle room for the wires.

Looking at the side you can see the hole you have to slip the spring out of.
45613856.jpg


Spring out
38720366.jpg


Just squeeze from the sides and you should be able to finagle one side out. If it comes out of both holes its just trickier to get back in.
18714016.jpg


Get a little space on the spring and you should be able to slip the wires out.
37742578.jpg


They should fit with a little wigglin'
64978680.jpg


Here is the back with the shroud on and you can see how close it is. With the wires wrapped around the spring it was hitting lightly against the shroud. I think removing the wrap is easier than sanding the shroud.

10314814.jpg


More to come tomorrow!
 
any reason you went through that if you're not using them as bixenons?
 
Just to tinker and as reference for others. I was too excited not to play with everything!!!!
 
Excited for you man!

cant wait to see you finish them it will sway me on if i do mini H1 or a bigger TSX ect
 
I'm hoping to do some tests with tsx's, tl's, s2000, mini h1, and mini d2s here in the next few days. I just received the parts, so now I just need decent weather in the evening one night this weekend. I'll try to do some comparison shots between the projectors in the same location.
 
Excited for you man!

cant wait to see you finish them it will sway me on if i do mini H1 or a bigger TSX ect

Doing a TSX Retro involves doing alot more work. Cutting and fitting is involved. The minis are made to fit inside the reflector housing and thread through the bulbs hole to attach. The TSX projector would require the reflector housing and fit the projector in and attach it while keeping it levels.
 
Last edited:
I'm hoping to do some tests with tsx's, tl's, s2000, mini h1, and mini d2s here in the next few days. I just received the parts, so now I just need decent weather in the evening one night this weekend. I'll try to do some comparison shots between the projectors in the same location.

Trying to become a retro guru? Do you have sets of projectors or working with single projectors?
 
I'll be looking forward to this.
 
Back
Top