First Try Mini H1 Retrofit

wow dude.... what the heck does you garage look like?
 
Ethlar has a big box of stuff, and everything else is in another big box. All of them have been cut out of the original housings. I used to pick them up for some retrofitters.
 
I know this retro is gonna be pretty basic but I thought I'd document the stuff that I've read about on the HID Planet forums but couldn't visualize or couldn't see pictures of. Like the de-pinning on the solenoid wire. Read about it but didn't understand it until I had the projector in front of me.

I'm gonna paint the solenoid and shield flat black and put up some pics of that as well. I've been curious about how well painting would hide the solenoid and spring. I might also tinker and see if I can attach the shield and remove the whole contraption.
 
:giggle: doing some cleaning - there are a lot of "pairs". Almost everything is in pairs.

IAvaWKX.jpg


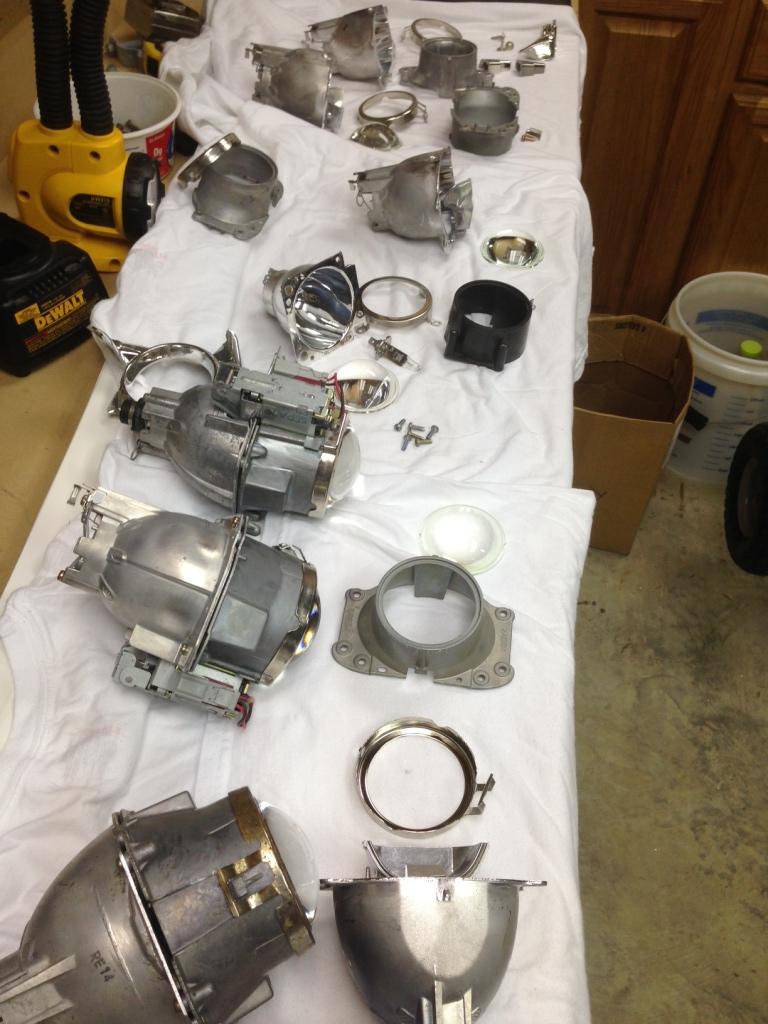
there are a LOT not pictured here.... :hiding:

When you feel like getting rid of the S2K or tsx projectors let me know. :thumb:
 
I'll be testing them this weekend.... I haven't test fired any of the tsx's that I have.
 
So today I started painting the cutoff shields. Went by home depot and picked up some rustoleum flat black BBQ grill paint.
After some reading, the flat black is supposed to help reduce glare and sharpen the cutoff slightly. I'm sure any of the VHT engine enamel or other high temp paints would work just fine also.

paintja.jpg


Painting the front of the sheild will make the projector look that color when it is off.
Not my pic. but this gives you an idea of what red would do.
IMGP0706.jpg


Whole thread on it here:
http://www.hidplanet.com/forums/showthread.php?33357-cutoff-shield-painting


To disassemble the projector it's simply removing 4 philips head screws. One on each corner.
projectoro.jpg


Then you get 3 pieces. The lens, the rear bowl, and the shield.

separated.jpg


Going to be painting this part:
shieldj.jpg


Movement of the shield with the solenoid:
shielddown.jpg


I decided to wipe them down with some alcohol squares first. Quite a bit of dirt came off. I don't believe they need to be primed but cleaning won't hurt.
squarevi.jpg


Quite a bit came off one of them, hardly any dirt on the other.
cleanit.jpg


First coat on. I am going to paint the whole solenoid and spring assembly. Hopefully that will hide it's appearance when im done. If you are going to use the highbeam capability of these then DO NOT PAINT THE SOLENOID AND SPRING. You only need to paint the curved part and the plate around it.

firstcoatx.jpg
 
Thanks man!

My goal for this thread is to be very complete with pics of everything. Especially of how each step is assembled and how the projector itself comes apart and back together. I was nervous of attempting this simply due to uncertainty in working with the parts. However, having parts in hand, it's much more obvious than forum/internet pics and info.

Here is one pic I should have taken and posted earlier.

When painting the shield, if you need to remove the solenoid there are two screws on the back of the plate it is attached to.
toremovesolenoid.jpg
 
I got my hands on a spare bulb so im gonna start light testing tomorrow, gonna take pictures along the way too so i can do side by side comparisons
 
So today I started painting the cutoff shields. Went by home depot and picked up some rustoleum flat black BBQ grill paint.
After some reading, the flat black is supposed to help reduce glare and sharpen the cutoff slightly. I'm sure any of the VHT engine enamel or other high temp paints would work just fine also.

paintja.jpg


Painting the front of the sheild will make the projector look that color when it is off.
Not my pic. but this gives you an idea of what red would do.
IMGP0706.jpg


Whole thread on it here:
http://www.hidplanet.com/forums/showthread.php?33357-cutoff-shield-painting


To disassemble the projector it's simply removing 4 philips head screws. One on each corner.
projectoro.jpg


Then you get 3 pieces. The lens, the rear bowl, and the shield.

separated.jpg


Going to be painting this part:
shieldj.jpg


Movement of the shield with the solenoid:
shielddown.jpg


I decided to wipe them down with some alcohol squares first. Quite a bit of dirt came off. I don't believe they need to be primed but cleaning won't hurt.
squarevi.jpg


Quite a bit came off one of them, hardly any dirt on the other.
cleanit.jpg


First coat on. I am going to paint the whole solenoid and spring assembly. Hopefully that will hide it's appearance when im done. If you are going to use the highbeam capability of these then DO NOT PAINT THE SOLENOID AND SPRING. You only need to paint the curved part and the plate around it.

firstcoatx.jpg

Not to be a nit pick, but most high temp BBQ paints won't cure without heat, they remain sticky. You might have to toss a heat gun on those pieces to get them to off gas and cure properly before re-installing them.
 
Michael Hurd thanks! That makes me feel so much better about what I just did. Dude I almost PM'ed you first cause I knew you would be just the guy to ask....

Guess what? The shields..... Just baked!
heatcured.jpg


I did some poking around and I found a gun forum with a guy who said he had called rustoleum directly and despite it not being on the can, they advised baking @350F for 1 hour. Some of them were having problems with it coming off too easy. Several car/MC forums advised heating any high temp paint to ensure proper curing and hardness.

edit: 350 Fahrenheit.
 
Last edited:
Dude... good thing you don't need the solenoids in your application... They would probably not work so good. Glad you figured it out!

I did a set of valve covers years ago for my engine with flat black BBQ paint, used the old BBQ to heat the covers up, came out mint.
 
  • Like
Reactions: Nix
Baking hopefully not only hardened the paint on these but also caused the solvents and other VOC's to vaporize. Baking/curing should remove this stuff and any other compounds that might "smoke" once the heat from the bulb is present in the housing. If you aren't careful you could cloud the inside of the lens.

baked.jpg


Fortunately these did not seem to smoke or offgas much. A light scent is present right in the kitchen but, I had the window wide open and a couple fans running just in case.
 
Last edited:
Reassembled with the painted shields. Some comparison shots before and after.

Flash on directly into the front so you can see the solenoid/spring:

Before:
p1020187p.jpg


After: Still visible with light shining right in but not as noticeable.
p1020251e.jpg


Now when it's just sitting there without trying to light up the solenoid assembly...

Before:
p1020192y.jpg


After painting.... No more spring/solenoid. Just a black eyeball.....
p1020252o.jpg


p1020253r.jpg


Came out pretty decent.

p1020186k.jpg


p1020254y.JPG
 
I wonder how much of that would be visible (without painting) when a shroud is on & the bulb is installed.
 
It really only shows if you paint the shield a light color. Painting blue/red really makes it stand out. The flat black is also supposed to help reduce some of the glare hotspots that the minis occasionally have. Cutoff is supposed to sharpen a bit from what ive read. We'll see once I get them powered up. Im also planning to install ccfl/led rings and I didn't want any of the light coming back in from that to make the spring more visible.
 
Back
Top