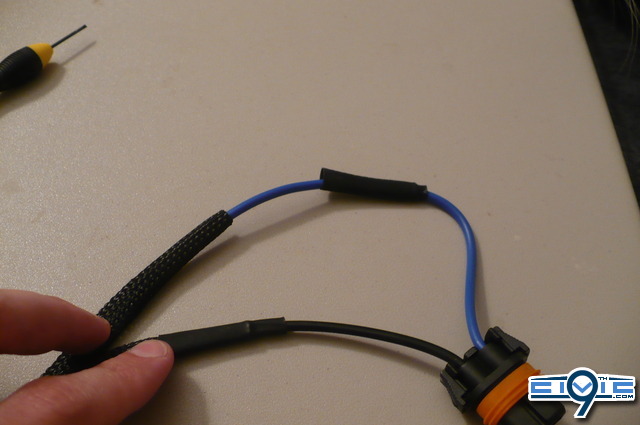
Ok so this is for anyone running any type of HID kit or projectors with HIDs. You should really be running a wiring harness between your stock system and your HID ballasts. Just get one. It will eliminate flickering and overloading the stock wires. There are other issues but those are the main ones.
In any case, go get your harness. Pick it up from where ever you like. They are for the most part very similar. For HID's on the low beams you will need a 9006 harness.
In this DIY I'm going to show you how to weatherproof your harness a little bit. It's pretty easy and should only take you a few minutes. Do it the night before you intend to install so everything is dry and ready to go.
OK lets get started.
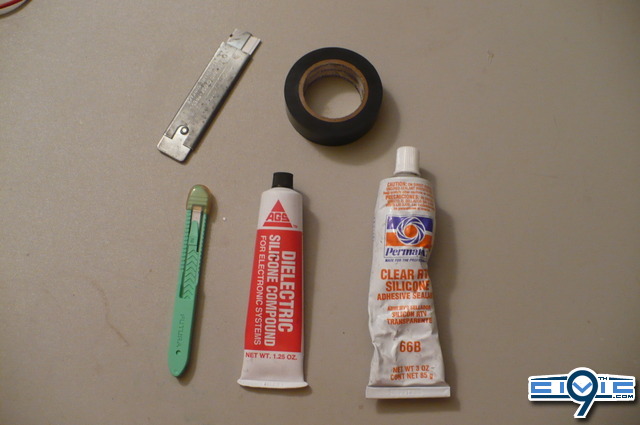
Items Needed:
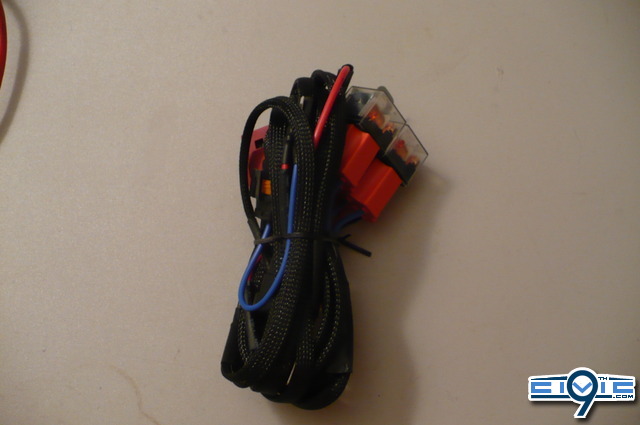
Harness - This particular one is from theretrofitsource.com
Lots of parts and useful information over there. I like their particular harness, it feels well made, has one of the thicker wire gauges for an off the shelf unit, and it has 2 relays. Yes, 2. One for each side. It's nice when the relay goes bad and you can still drive home with one light on.
A blade.
Electrical Tape.
Dielectric Grease - also labeled as dielectric silicone compound. This is an insulator. It does not conduct. I can't say this enough. IT DOES NOT CONDUCT.
A sealant. Or caulk, or whatever you like. I use the Permatex clear RTV sealant. (get it at autozone/pepboys)
Regular Screwdriver, as thin as possible. A jewelers/computer/eyeglass set is nice.
( I didn't take a pic. You know what they look like)
Let's start with the relays.
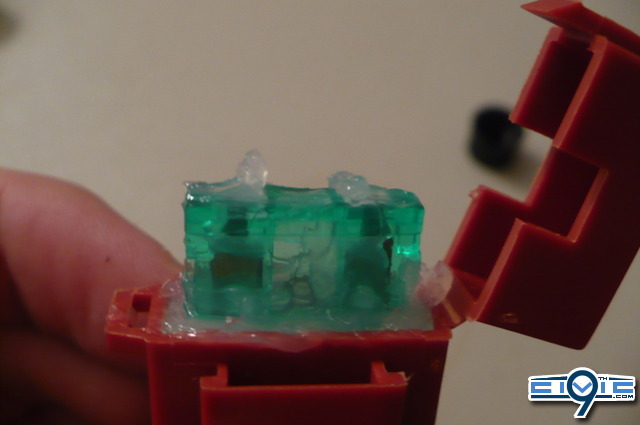
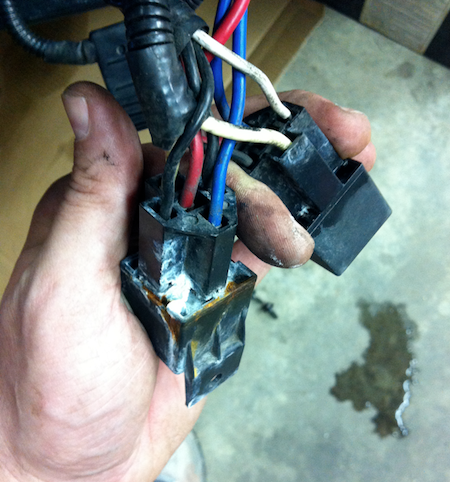
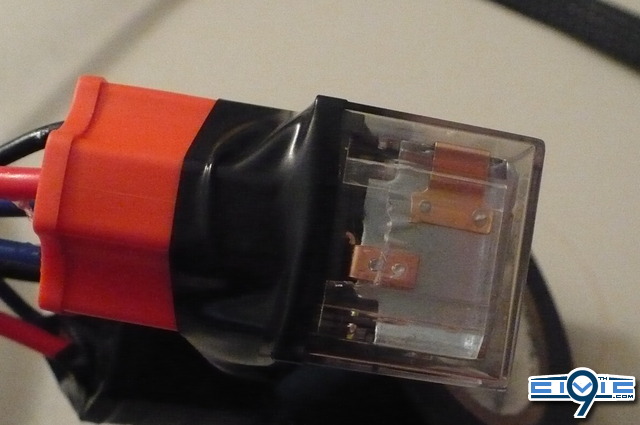
These clear boxes are the relay modules. They have a large metal bracket on the back holding them to each other. I hate this thing. It's coming off. If one relay goes bad you have to pull this thing off to change them. It's really hard to get the bracket off now, just wait until its in your engine bay and you're on the side of the road trying to get it out.
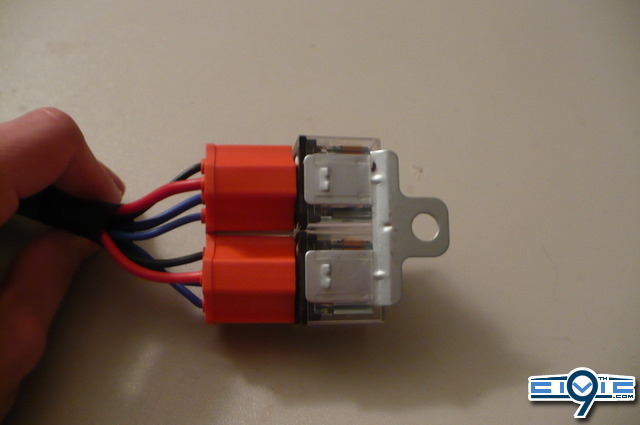
SO use a thin screwdriver or blade to lift up this plastic window. The metal "tab" you see sticking up prevents the bracket from sliding out easily. It looks like you can press it down and just slip it off. NOPE! I have yet to nicely remove one of these. So just bend the crap out of the plastic carefully.

Once you have bent the plastic you should be able to get the bracket off. Wait until you see how hard this actually is. Now just think. You could be elbow deep in a hot engine bay in the rain. Hahahah. Seriously. Remove this thing.
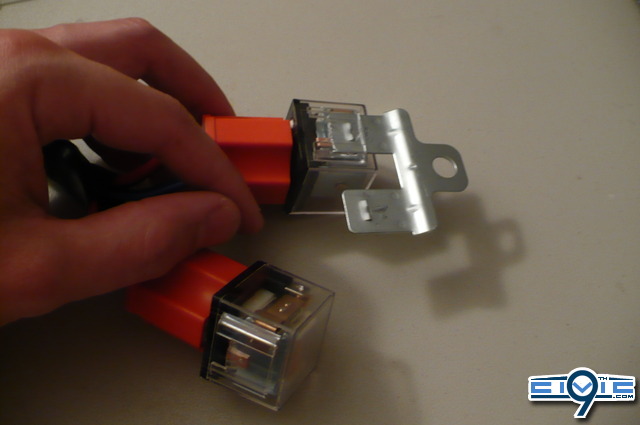
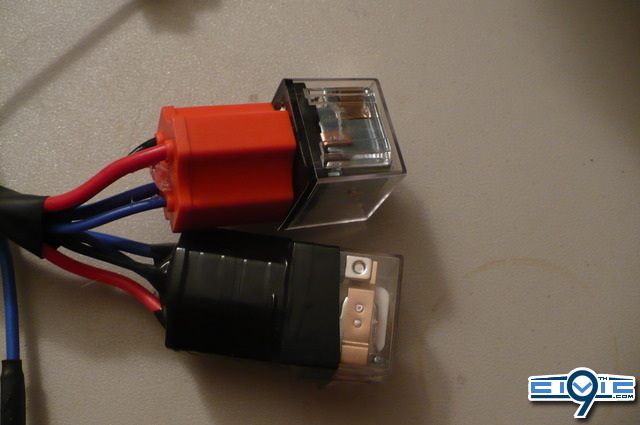
Now gently wiggle and pull the relays off of the harness. It is a tight connection. Be careful but firm.
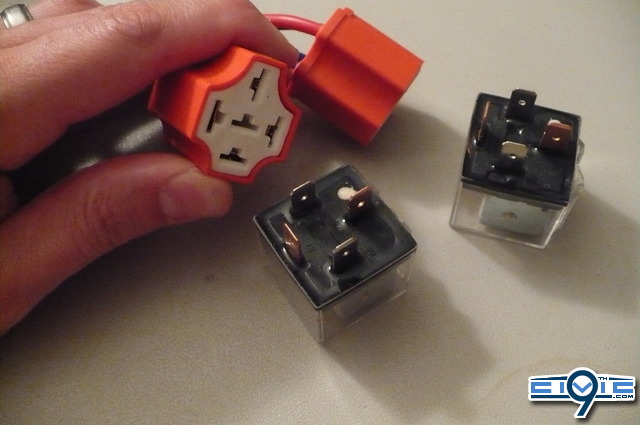
Oh crap! Did you just pull them both off? Did you keep track of which way they face? Dangit!
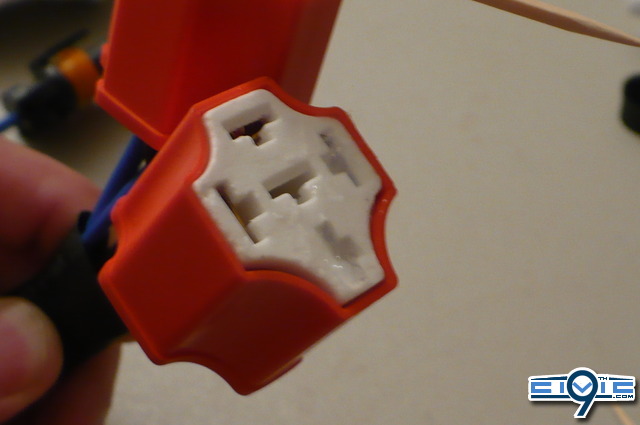
Haha, just kidding. They only fit one way. You see how one prong is turned differently than the others? You're safe.
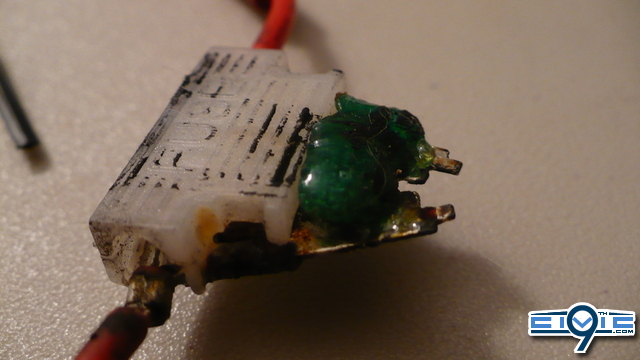
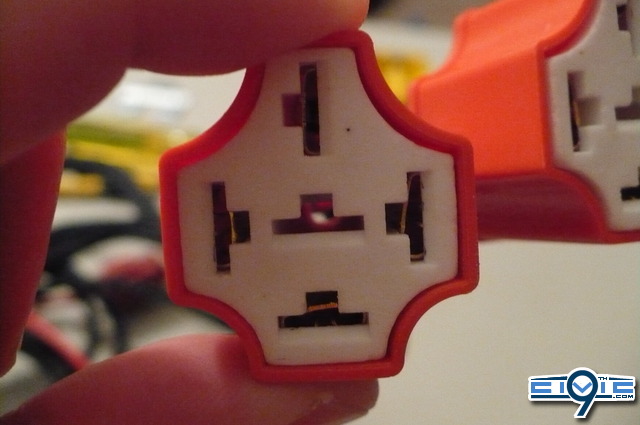
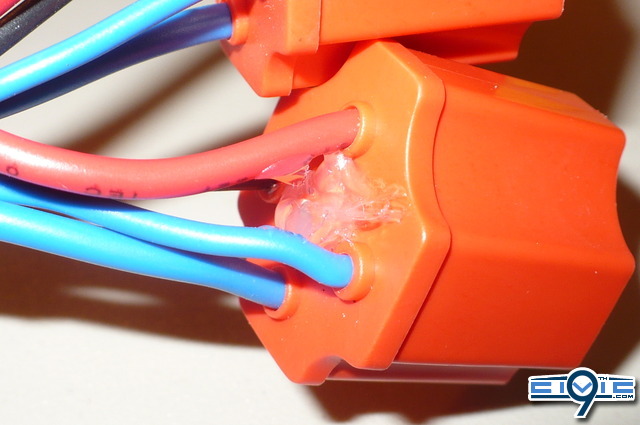
Now if you will look straight down the barrel of the piece you just took them off of. See that middle slot? Yep. Open. Straight through to the back. Water won't get in there and ruin your relays will it?
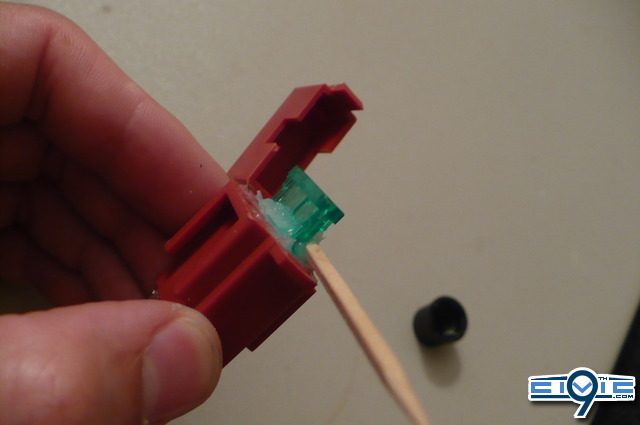
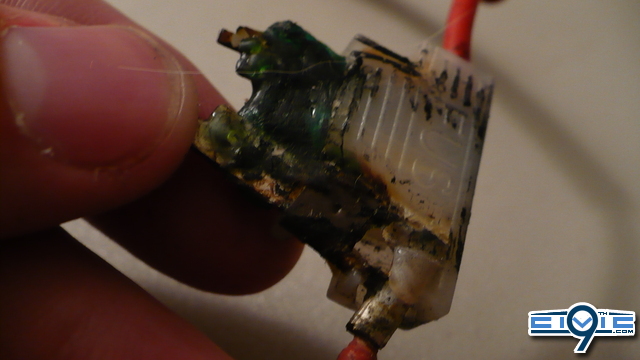
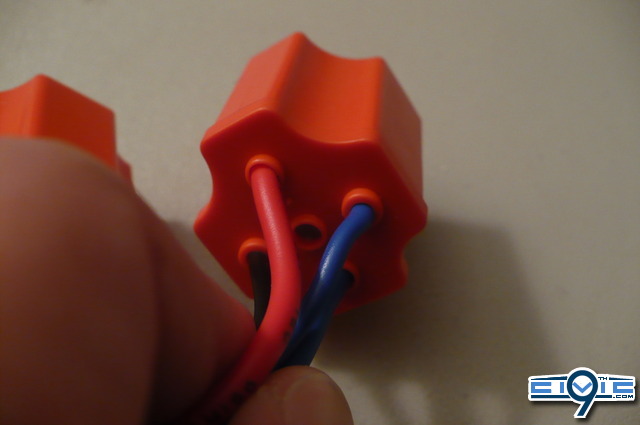
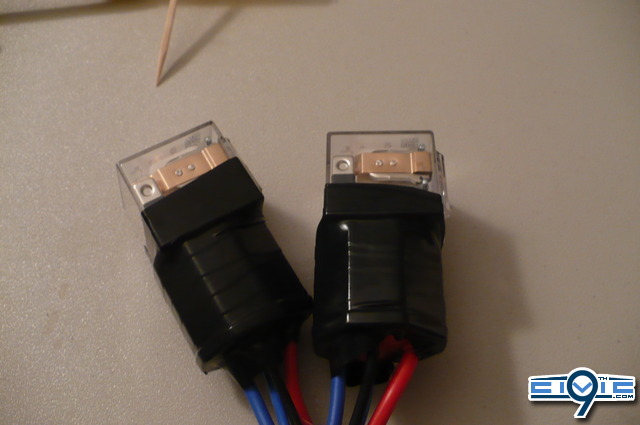
Ok look at the back and you will see that hole in the middle of the relay holder. We are going to seal that.
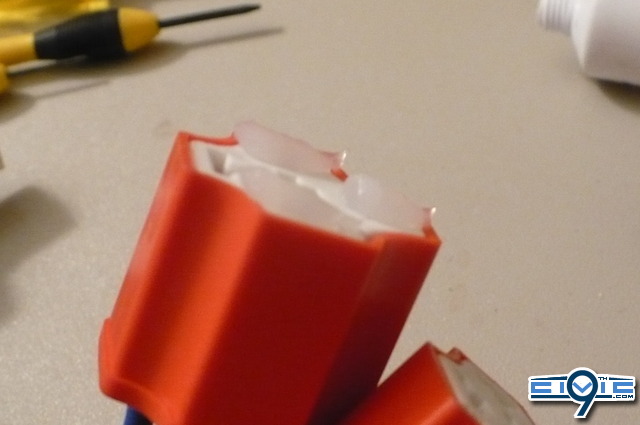
I like to use toothpicks. It keeps my fingers clean and fits nicely into small spaces. Get a little glob of your sealant.
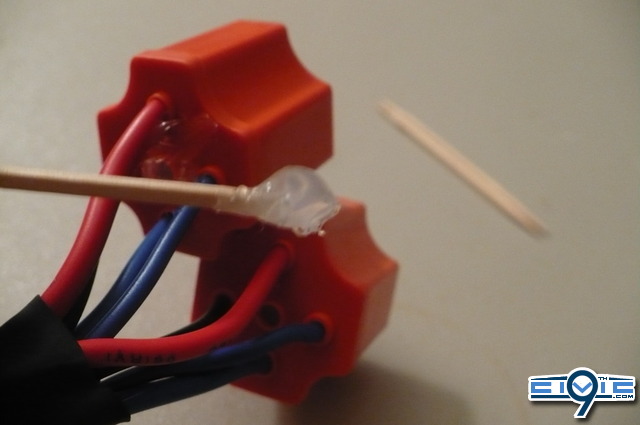
The stuff is sticky so just work it over that opening until you've covered it. This doesn't have to be pretty since no one will ever see it again. Hopefully.
BAM! Sealed!
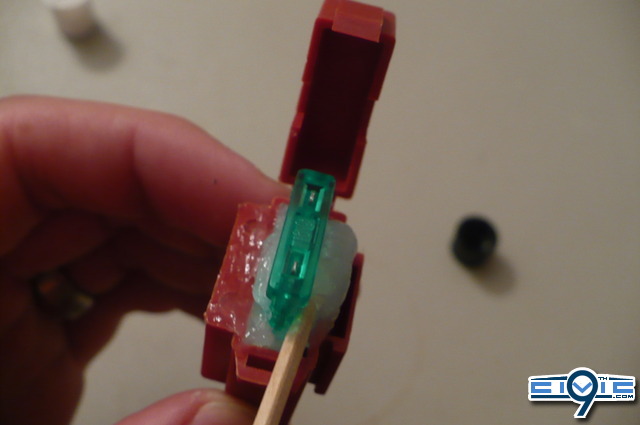
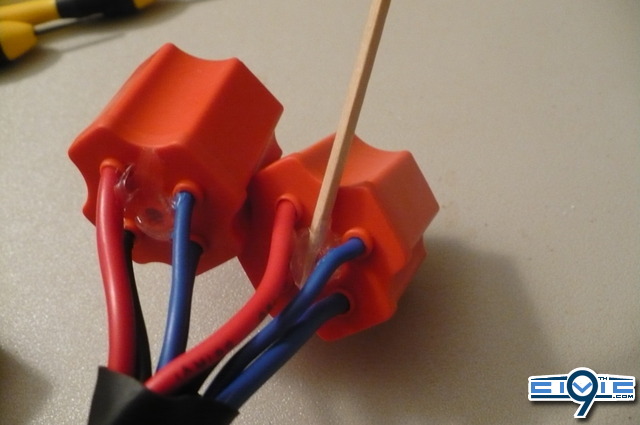
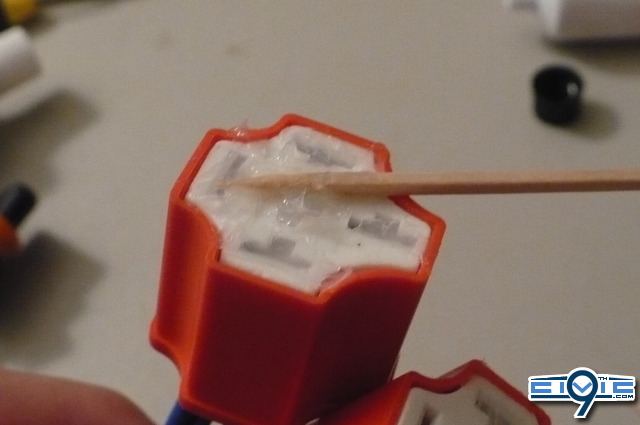
Now to the other end. Get your Dielectric Grease out. Lay a small bead over a couple of the openings. Not too much, not too little. Again just enough to cover the opening and get a thin layer down in the slot.
Toothpick time! Use a new one. Don't mix the sealant and the grease. Be sure and cover that center hole too. Just in case the sealant on the bottom comes off or something.
And get the other one too.
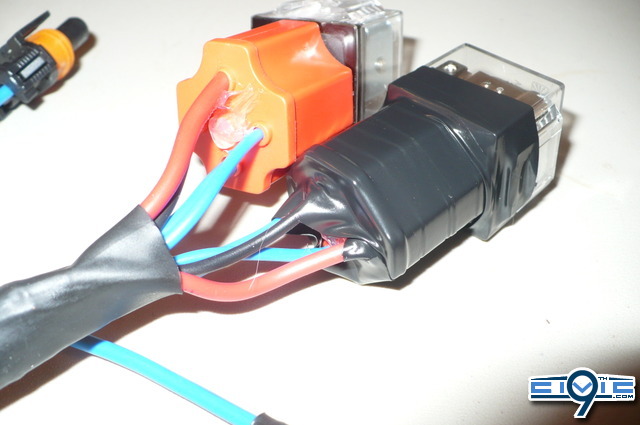
Ok all greased up? Push the relays firmly back on. Squeeze em on there nice and tight. The idea is that the grease will create a barrier to moisture and as the prongs make contact the friction will push the grease out of the way and you will have a secure, clean, sealed connection.
Next step. Taping up your relays.
Start at the side of the relay where you removed the bracket. It's just easier. Get the tape on that little area below the plastic. It will give you a nice seal there without the slot holding the tape up.
Keep pulling the tape. Electrical tape is stretchy. Get a nice tight wrap all the way around. Especially that area between the relay and the orange harness.
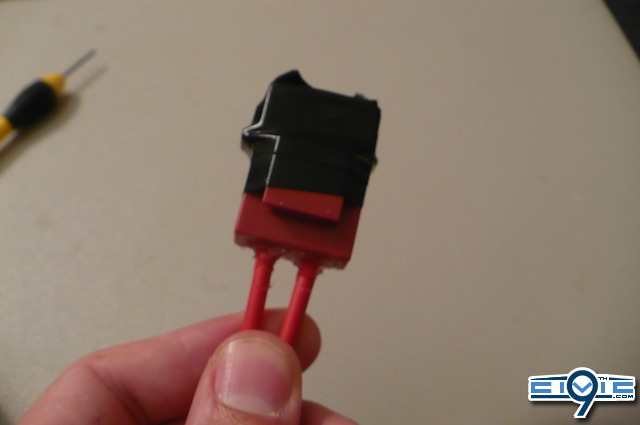
Spiral it all the way down. Nice and tight. You don't want any gaps for water to get in. The harness is a strange shape so go until you hit that little ridge at the bottom. Then overlap it by about half a tape width. Fold it over. Heres what the bottom should look like.
The ridge gives you a nice lip to pull the tape tight on so you can seal those low scalloped areas. Fold it up as best you can. Again, this is a large improvement from where it started. Don't worry too much about it. You can only do what you can only do.
That said, do the other one also.
Relay end is finished! Nicely done! Now onto the fuse......
In any case, go get your harness. Pick it up from where ever you like. They are for the most part very similar. For HID's on the low beams you will need a 9006 harness.
In this DIY I'm going to show you how to weatherproof your harness a little bit. It's pretty easy and should only take you a few minutes. Do it the night before you intend to install so everything is dry and ready to go.
OK lets get started.
Items Needed:
Harness - This particular one is from theretrofitsource.com
Lots of parts and useful information over there. I like their particular harness, it feels well made, has one of the thicker wire gauges for an off the shelf unit, and it has 2 relays. Yes, 2. One for each side. It's nice when the relay goes bad and you can still drive home with one light on.
A blade.
Electrical Tape.
Dielectric Grease - also labeled as dielectric silicone compound. This is an insulator. It does not conduct. I can't say this enough. IT DOES NOT CONDUCT.
A sealant. Or caulk, or whatever you like. I use the Permatex clear RTV sealant. (get it at autozone/pepboys)
Regular Screwdriver, as thin as possible. A jewelers/computer/eyeglass set is nice.
( I didn't take a pic. You know what they look like)
Let's start with the relays.
These clear boxes are the relay modules. They have a large metal bracket on the back holding them to each other. I hate this thing. It's coming off. If one relay goes bad you have to pull this thing off to change them. It's really hard to get the bracket off now, just wait until its in your engine bay and you're on the side of the road trying to get it out.
SO use a thin screwdriver or blade to lift up this plastic window. The metal "tab" you see sticking up prevents the bracket from sliding out easily. It looks like you can press it down and just slip it off. NOPE! I have yet to nicely remove one of these. So just bend the crap out of the plastic carefully.
Once you have bent the plastic you should be able to get the bracket off. Wait until you see how hard this actually is. Now just think. You could be elbow deep in a hot engine bay in the rain. Hahahah. Seriously. Remove this thing.
Now gently wiggle and pull the relays off of the harness. It is a tight connection. Be careful but firm.
Oh crap! Did you just pull them both off? Did you keep track of which way they face? Dangit!
Haha, just kidding. They only fit one way. You see how one prong is turned differently than the others? You're safe.
Now if you will look straight down the barrel of the piece you just took them off of. See that middle slot? Yep. Open. Straight through to the back. Water won't get in there and ruin your relays will it?
Ok look at the back and you will see that hole in the middle of the relay holder. We are going to seal that.
I like to use toothpicks. It keeps my fingers clean and fits nicely into small spaces. Get a little glob of your sealant.
The stuff is sticky so just work it over that opening until you've covered it. This doesn't have to be pretty since no one will ever see it again. Hopefully.
BAM! Sealed!
Now to the other end. Get your Dielectric Grease out. Lay a small bead over a couple of the openings. Not too much, not too little. Again just enough to cover the opening and get a thin layer down in the slot.
Toothpick time! Use a new one. Don't mix the sealant and the grease. Be sure and cover that center hole too. Just in case the sealant on the bottom comes off or something.
And get the other one too.
Ok all greased up? Push the relays firmly back on. Squeeze em on there nice and tight. The idea is that the grease will create a barrier to moisture and as the prongs make contact the friction will push the grease out of the way and you will have a secure, clean, sealed connection.
Next step. Taping up your relays.
Start at the side of the relay where you removed the bracket. It's just easier. Get the tape on that little area below the plastic. It will give you a nice seal there without the slot holding the tape up.
Keep pulling the tape. Electrical tape is stretchy. Get a nice tight wrap all the way around. Especially that area between the relay and the orange harness.
Spiral it all the way down. Nice and tight. You don't want any gaps for water to get in. The harness is a strange shape so go until you hit that little ridge at the bottom. Then overlap it by about half a tape width. Fold it over. Heres what the bottom should look like.
The ridge gives you a nice lip to pull the tape tight on so you can seal those low scalloped areas. Fold it up as best you can. Again, this is a large improvement from where it started. Don't worry too much about it. You can only do what you can only do.
That said, do the other one also.
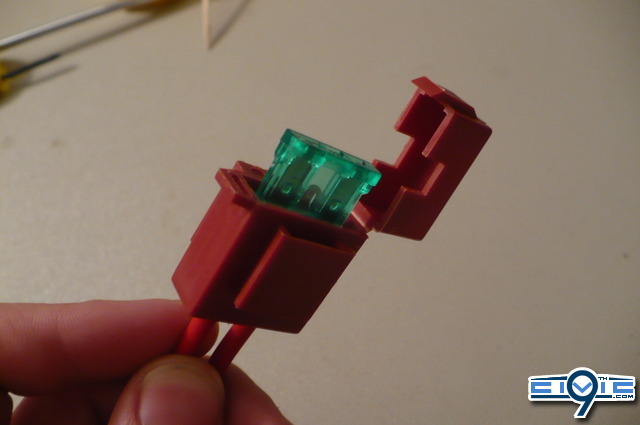
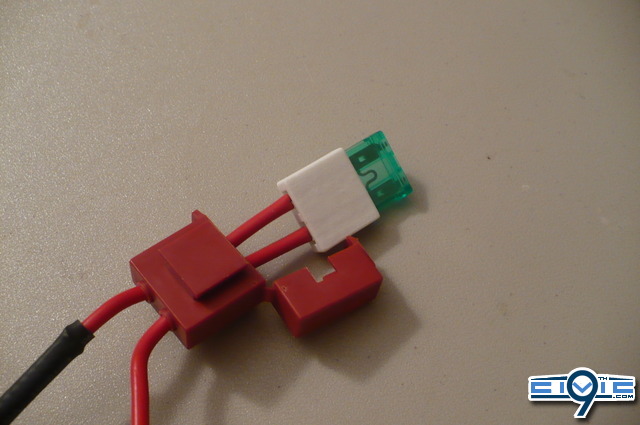
Relay end is finished! Nicely done! Now onto the fuse......