Mother Of All Whore Threads Non-VIP Edition v.1

Well. Confirmed it's not the amp. Installed the spare I have. Confirmed the stock sub is work.
The loc is turning on the sub but I'm not sure if the loc is bad or the subwoofer is bad at this point. I don't have a multimeter at home to test it.
did you test with a multimeter today?
 
did you test with a multimeter today?
No. I didn't have time. Maybe tomorrow. I think it's the loc though. I have another one but It doesn't have a remote wire to turn on the amp so if have to run a 12v wire to the amp to see if it works.
 
G09TmVto0F5plw7yhXxuzhL2QgomcPdr5vuDK0fe4H4okxQNzFn4yhcyyHabnCJpGJqcso4igbnd32xw3wgnoIY4jj6GpaQAAvbQzKBUlIlUZqCALkaEYh4aZVdBA2QM
 
So, this is a bit of a long one for what basically amounts to a simple modification to remove the factory boost gauge… which, if we’re being honest, has been about as helpful as a horoscope since I switched ECUs. Anyway, here we go.

Many years ago—somewhere around 2007, when flip phones still roamed the Earth—I ditched the factory ECU for an AEM EMS Series 1, which I’m still running to this day like the stubborn creature I am. Those of you who may be familiar with the 3/S platform, may know the factory boost gauge is relatively useless under ideal conditions. With an aftermarket ECU? It becomes actually useless. As in: dead. Decorative. A small, politely lit circle that contributes nothing to society.

Back when AEM still had forums (RIP), someone posted a write-up on how to make the factory gauge play nicely with the EMS. I didn’t save the info, because why would I do something practical like that? And now it appears to have been Thanos-snapped from existence forever. Probably. I spent a full zero seconds actually searching for it.

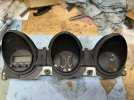
Fast forward to 2014. I scored a set of center gauges from a Euro 3000GT—basically the same as the GTO cluster but mirrored for LHD, so they practically drop into a USDM car. Like the RHD GTO version, the Euro one has that combo Boost-Temp gauge I didn’t want. So I started a project to replace the combo gauge with a US temp gauge. Simple, right?
7ace3482-1ee1-4889-874b-d33d828db4e9.jpeg

Well… in theory, yes. In practice? The project stayed “in progress” for about 10 years. In 2015 I packed it up for a move, shoved it in a box, and granted it the same attention most people give their treadmill after the first week of January.

Earlier this year, with the dash out for yet another unrelated reason, I figured “while I’m in there” (the four most dangerous words in any car project), I might as well resurrect this little archaeological artifact. And amazingly… I think I actually finished it. Probably. I’ve tested everything on the bench, but the car isn’t reassembled yet, so we’re at the “optimistic but fully prepared for shenanigans” stage.

Anyway—here’s what actually went into this. It looks simple. It is not simple:

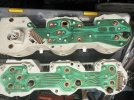
The US temp gauge now works using the signals from the plug. The signal pickups live in different places on the Euro combo gauge, because of course they do.
f0c69969-0bd0-4b52-8544-bae10fe07b17.jpeg

The gauge now lights correctly. The Euro light collector lives in a different spot (it is at the bottom of the gauge, where the US one is up and off to the side - see pic above), so you have to mount a bulb remotely inside the gauge like you're installing a tiny aftermarket sun.

The gauge now lights the correct color. This is actually where the project died for years. In 2014 I tried to stuff a white LED in there, but it turned everything a weird yellow that made the rest of the cluster look sickly. LED technology has thankfully evolved since then, so this problem is finally solvable without a séance.

The plug needed a full repin, because none of the OEM schematics matched what I was doing. Thankfully, the pins pop out easily, so this ended up being more “mild annoyance” than “existential crisis.”
26ceff28-fcad-46de-a9cb-3347bd2e1074.jpeg

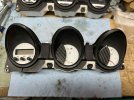
The inner bezel needed plastic surgery, using bits from two different gauge sets because the half-moon cutouts for the needles didn’t line up. Frankengauge was born.

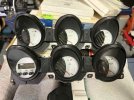
Cosmetic nostalgia: Back in 2014, you could still buy white faces that matched my setup. The companies that made them seem to have vanished sometime during COVID (moment of silence), so what I’ve got is what I’ve got. Same goes for the BS carbon-fiber stickers I slapped onto my original set years ago; I was able to get some at the same time to use for this project so it was an easy direct swap.

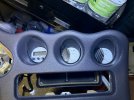
So, here are some final pics to compare things, the final unit, comparing to my cosmetically modified stock setup, and the installed look (dash is still out of the car though):
c5ec117e-1d50-4754-ba5e-b1719acb7792.jpeg 8ab3bd85-d2cc-449c-b9c8-bb222798267a.jpeg 0b0f3a6d-cbaa-45f5-99fd-57224c8e6469.jpeg

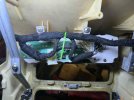
And, since this required a special pinout, I wired in both plugs to the dash harness (while also wiring in the plug for the clock) so I can switch back to my OEM unit pretty easily (if desired - or, I realize I have failed, it all goes up in smoke, and I have to put it back into a box for another 10yrs):
ae0590ab-ba5f-4cf5-8e6e-54f7c9e20635.jpeg
And . . . yes, I did cut that zip-tie, after the pic.
 
Back
Top