Not the first time lolCowl removal takes 10 minutes.
But after that yes
Follow along with the video below to see how to install our site as a web app on your home screen.
Note: This feature may not be available in some browsers.
Not the first time lolCowl removal takes 10 minutes.


Wow, that's what you call taking your car apart!I removed mine once... but the car was down to a mostly bare chassis. At that point I didn't really pay to much attention to how long it took to remove the cowl. If it only takes 10 minutes I would probably remove it from the top just for easy access after the cowl is off.
View attachment 41158 View attachment 41159 View attachment 41160
All that to change out the map lights! LOL!I removed mine once... but the car was down to a mostly bare chassis. At that point I didn't really pay to much attention to how long it took to remove the cowl. If it only takes 10 minutes I would probably remove it from the top just for easy access after the cowl is off.
View attachment 41158 View attachment 41159 View attachment 41160
sorry to bring up an old thread but how were you able to remove the stock downpipe without removing the windshield cowl? I recently purchased the rv6 catted downpipe.Not trying to jack a thread... I was just trying to save people hours of work for nothing. Removal/install took me less than 45 min.
I know you probably figured it out by now, but for the record you have to remove the cowl and heat shield to access the o2 sensor unless you are a wizard.sorry to bring up an old thread but how were you able to remove the stock downpipe without removing the windshield cowl? I recently purchased the rv6 catted downpipe.
Did you have to install a defouler on your secondary o2 sensor?Hey Ladies and Gents,
Just like I promised, here's the DIY for the downpipe, enjoy
D.I.Y. Install for RV6 Downpipe for 2012 Civic Si Sedan
This article will cover the install of the RV6 downpipe ONLY. I will not cover on how to remove the cowl. If a D.I.Y. is needed on how to remove the cowl, then I will cover that next time (but as a tip, you will need to completely remove the windshield wipers to remove the cowl). Last, but not least, I am NOT RESPONSIBLE for any damages you may cause to your car. I was very careful in doing this myself and caused no damage to the vehicle or parts. DO THIS AT YOUR OWN RISK. Do not be stupid and you will do fine. Remember, having the right tools will make your life so much easier. Do not try to take shortcuts. You have been warned. As a useful tip, read through this entire article once before starting, that way you know what you’re getting into. Set aside anywhere from 2-5 hours for this job. If you got the skills and extra tools, this could easily be done within an hour and a half.
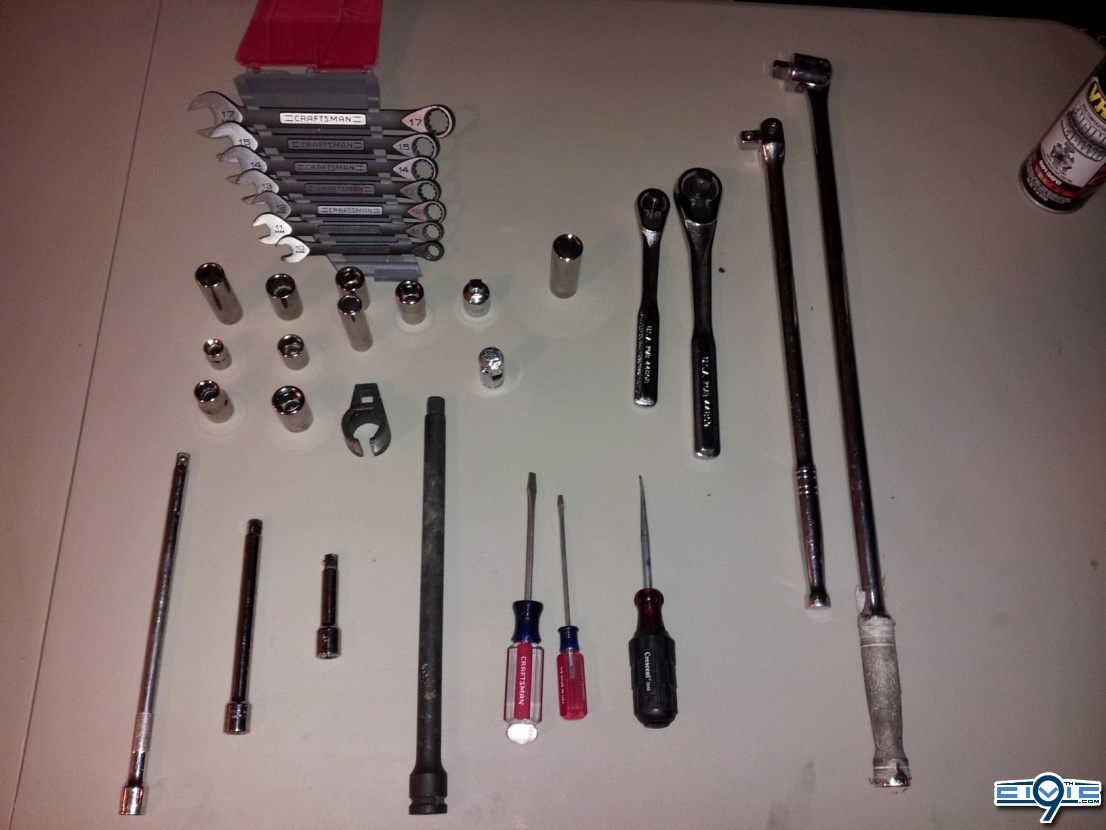
Tools needed:
· 3/8” socket wrench
· 1/2” socket wrench
· Various lengths extension bars for both socket wrenches
· O2 Sensor socket (will need to be filed down)
· 10 mm, 12mm, 14mm, and 17mm sockets
· 17mm combination wrench
· Jack with jack stands.
· Patience
· Elbow grease.
Optional tools:
· Breaker bars
· Pick (helped for removing the rubber hanger)
· Screwdrivers (also for removing rubber hanger)
Procedure:
1. First remove the cowl. As mentioned before, I will not cover how to remove in this section. It helps to tape or mark the position of the wipers because you’ll have to remove them to get the cowl off. As a tip, the wipers are operated by a gear, so each notch of that gear has its own position. This is why you need to mark the location of the wipers. If you had trouble removing the wipers like I did, then you can try to wiggle it back and forth with wipers in the up position.
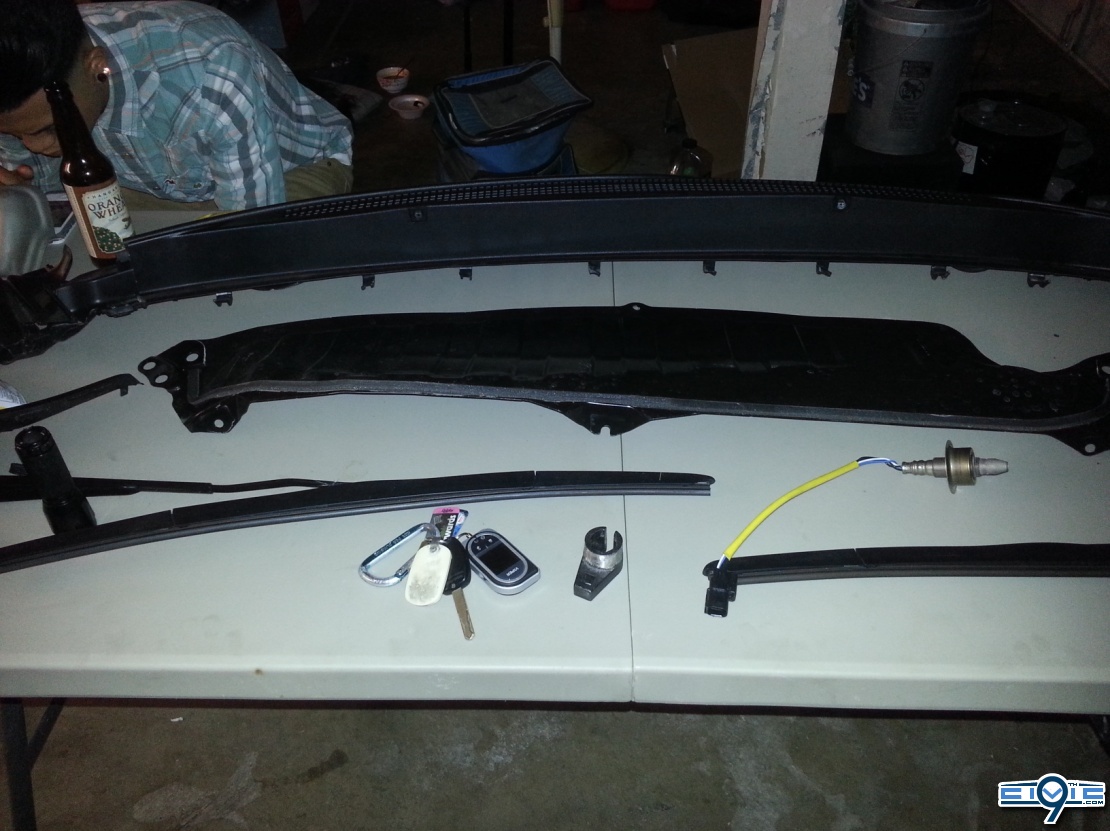
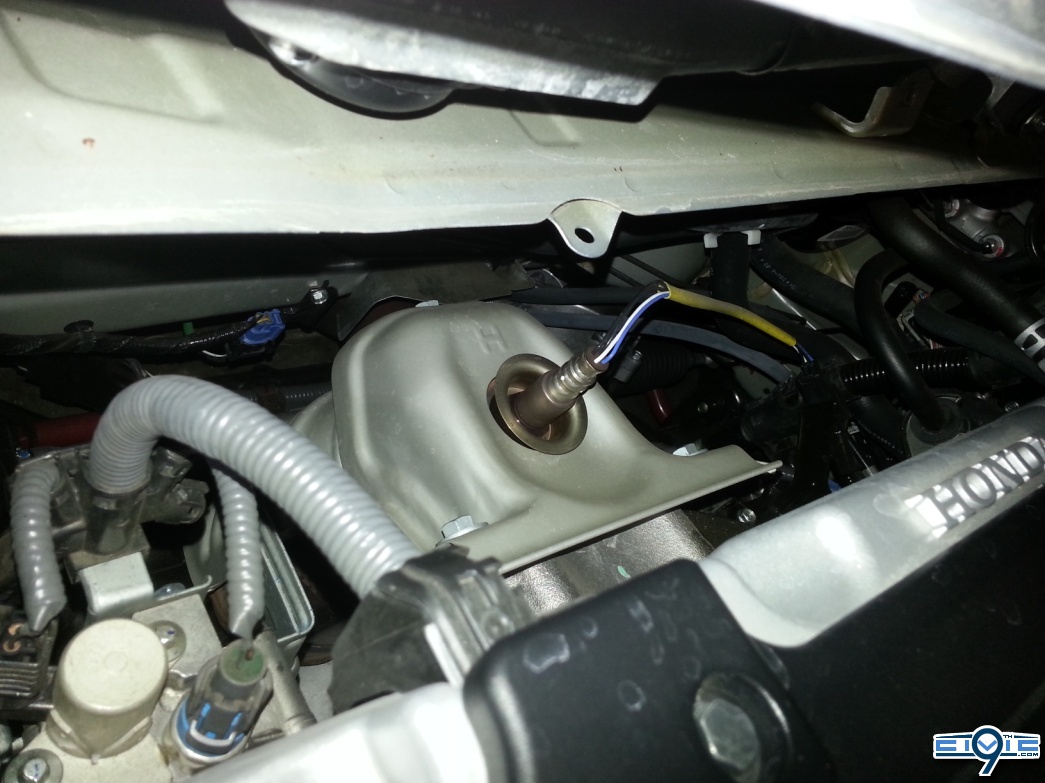
1. Secondly, you will need to remove the O2 sensor from the top of the downpipe. Remove the plug before unbolting the O2 sensor. There is a cup surrounding the nut of the O2 sensor which is why we needed to file down the O2 sensor socket to get it to fit.
The O2 sensor with the cup at the base
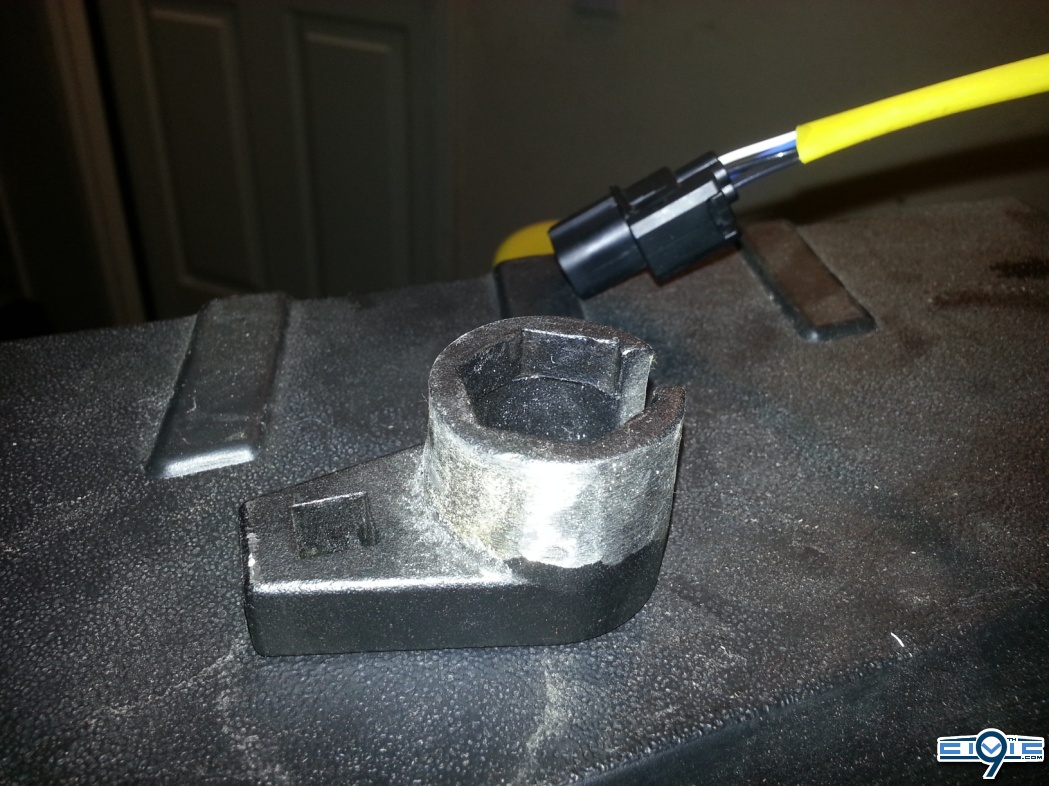
The O2 sensor socket that we had to grind down.
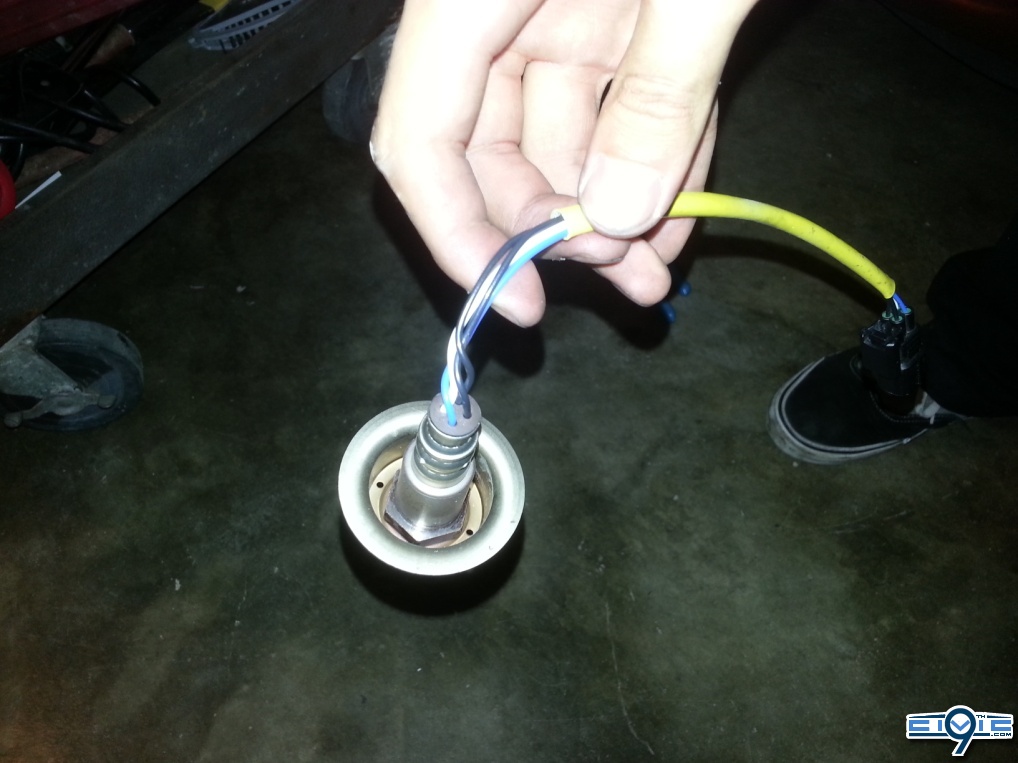
O2 sensor removed.
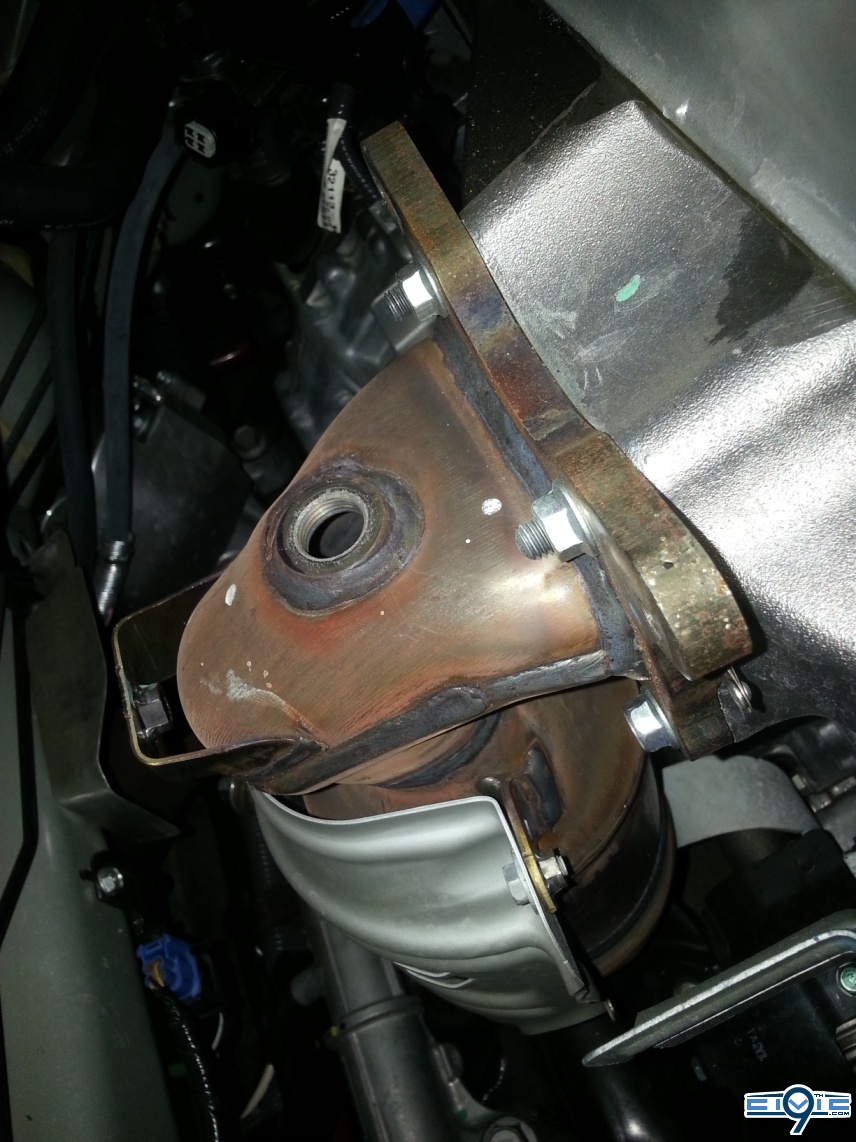
Next remove the three 10mm bolts on the heat shield and remove the heat shield. You will have to twist and turn the heat shield around to get it to fit out. The three 10mm bolts can be seen in the picture with the O2 sensor still bolted to the stock downpipe.
1. Now loosen the two top 12mm nuts and remove the two lower 12mm bolts from the downpipe. You want to keep the two top 12mm nuts on so you don’t drop the downpipe piece on your face when you’re working on it from below the car. Keep the 12mm bolts, we’re going to reuse them (same with the 12mm nuts, but it’s going to be on there until the end anyways).
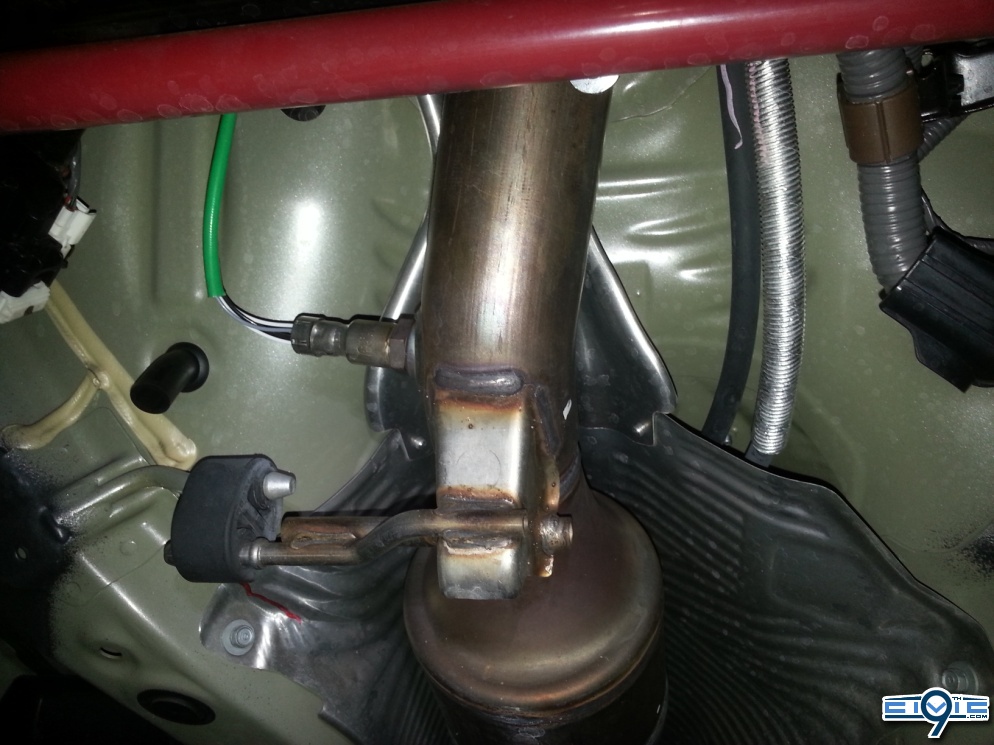
Jack up the car and place jack stands where appropriate (we placed them at the sides near the front doors). Unplug and remove the secondary O2 sensor from the catalytic converter (green wire in the picture). Set this sensor aside for reuse. Now remove the catalytic converter hanger from the rubber piece (not the hanger that’s attached to the car itself). I found inserting the pick all the way through the rubber piece and using the hanger as a fulcrum point to pry the rubber piece off of the hanger. The rubber piece seems to sustain itself very well and did not tear or rip when I tried this
 We’re going to disconnect the downpipe from the catalytic converter. There are two 14mm (can’t remember if it’s 14mm or 12mm) spring bolts and they’re a ***** to get a good angle to work at to unbolt them. Furthermore, the nuts they bolt into are welded nuts, so you can’t remove from that end (unless you want to impact drive that out). Also, they’re SPRING bolts, so there is going to be tension on these two bolts until you sufficiently drive them out of the welded nut. What that means is that you might get a little bit tired and a lot of elbow grease is going to be required. Honestly, this took the longest part
1
No I didn't have toDid you have to install a defouler on your secondary o2 sensor?
")