First off, a comparison with the stock mount:
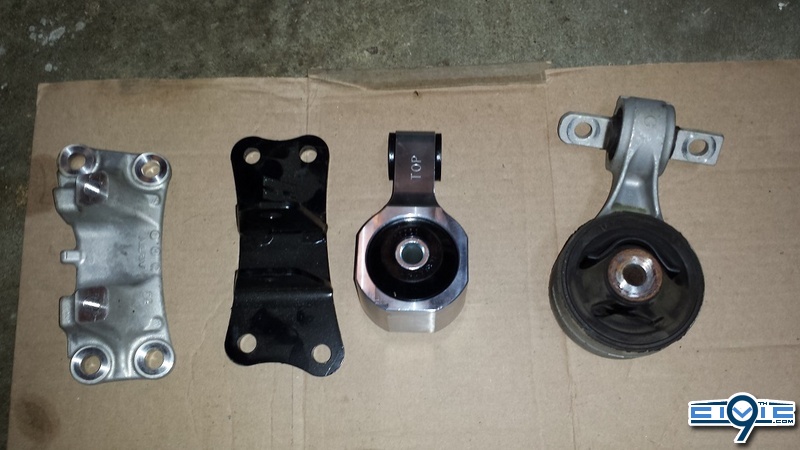
Part Needed:
Hasport Rear Motor Mount
Tools Needed:
Jack
Jack Stands
12-18" 2x4
17mm Wrench
17mm Socket (3/8" or 1/2")
3/4" Wrench
3/4" Socket
Torque Wrench
Flashlight (or phone with light app)
Quick note: The rear mount is located right next to the oil filter.
Step 1:
You can do this a few ways.
1. Use a lift.
2. Put your car on jack stands.
3. Just put the front of the car on jack stands...may not provide enough clearance though.
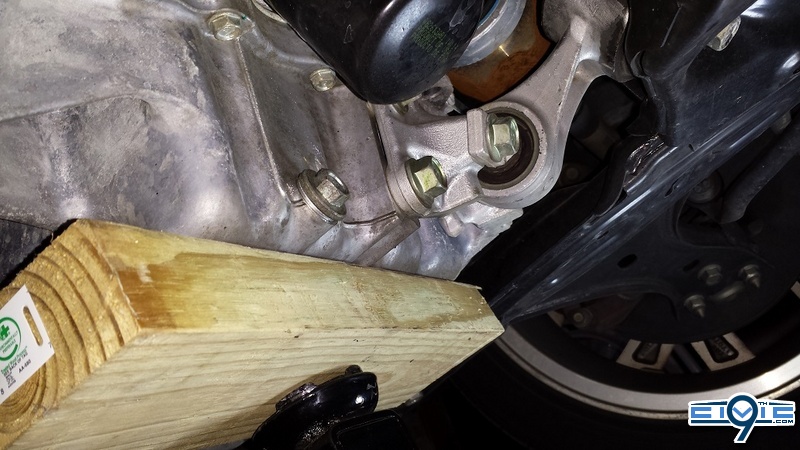
Step 2:
Place a 2x4 between the oil pan and jack inorder to provide some support for the engine. This will prevent damage to the oil pan and make it easier to get the bolts out as there will be no force on them.
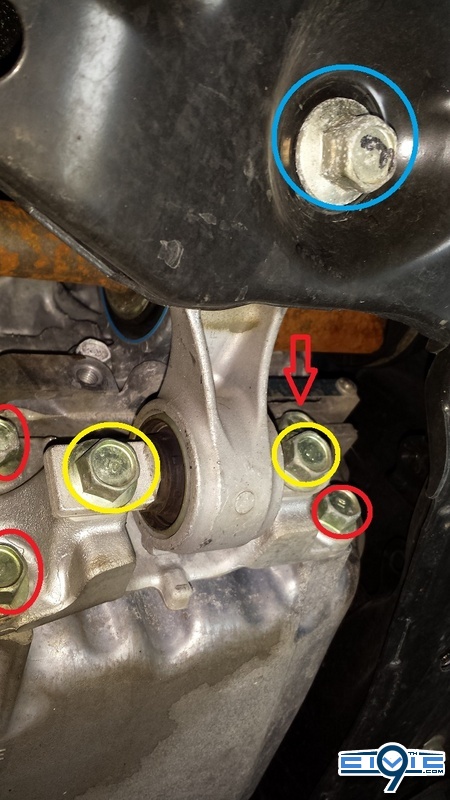
Step 3:
Remove the single 17mm bolt attached to the frame (blue circle). There is no nut on the other side. It is threaded into the frame.
Step 4:
Remove the two 17 mm bolts on the mount (yellow circles).
Step 5:
Remove the four 17mm bolts attaching the mount to the oil pan (red circles and arrow).
Be sure to loosen each one first using the every other method to prevent warping. (might not be necessary with something this heavy duty, but it is a good habit to get in to.
You will need to use a box wrench (preferably ratcheting) for the bolt by the arrow. There is very little clearance between the frame and the bolt.
Step 6:
The plate will drop down on its own. Remove the dogbone (albeit twisted). It will pull out fairly easily.
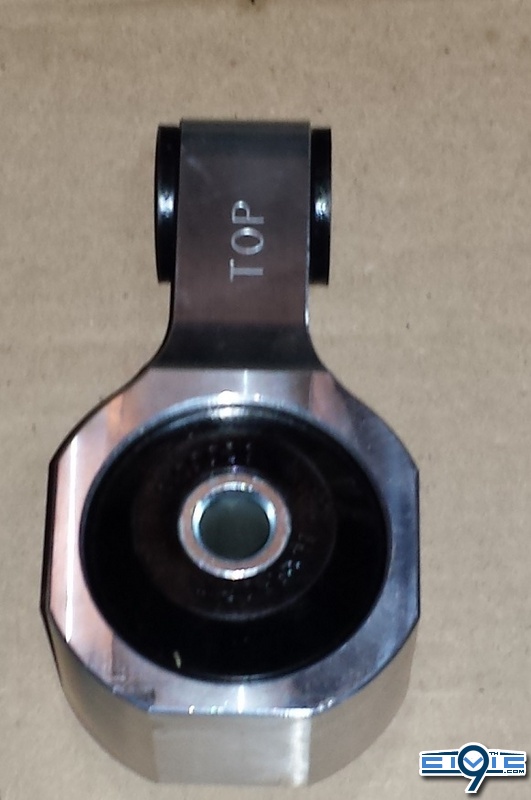
Step 7:
Take the new part of the mount that goes on the frame side and push it into the frame. Take note of the position as it is labeled top (as seen below)!!! It will be a bit tough to slide it in, but not overly difficult. You will most likely need a flashlight to see if it lines up correctly.
Step 8:
Put 17 mm engine frame bolt back in. (blue circle from above) Torque to 69 ftlbs
Step 9:
Align the bracket that goes onto the oil pan and thread all four of the bolts (red circles and arrow above) in by hand to get started. Tighten them up using the every other method and then torque to 62 ft lbs.
Step 10:
Align the holes for both pieces of the mount and insert the bolt that came with the new mount. The bolt and nut are both 3/4". You may need to adjust the jack to get them to line up correctly. You may also need to pull the engine back a bit towards the rear of the car. Surprisingly, it does not require that much force. No known torque specs so I just went somewhere between 62 and 69 ft lbs.
Side note on torquing: Be sure to torque all of the bolts properly. DO NOT skip this step!!! If you use a jack and jack stands, you will not have much clearance for the length of the toque wrench!
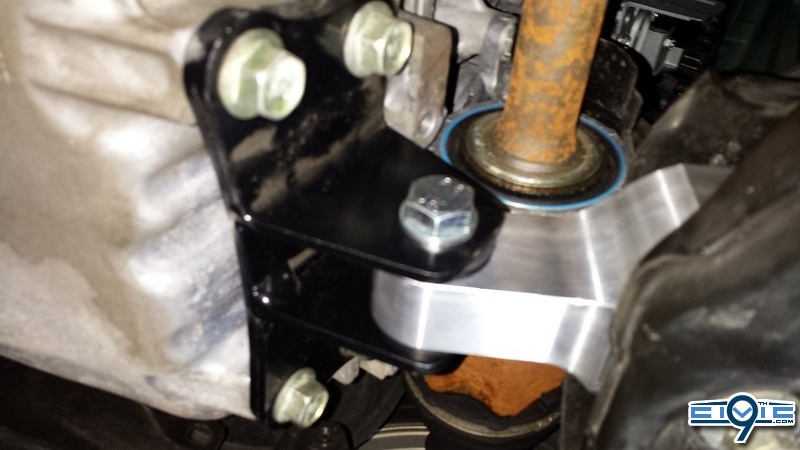
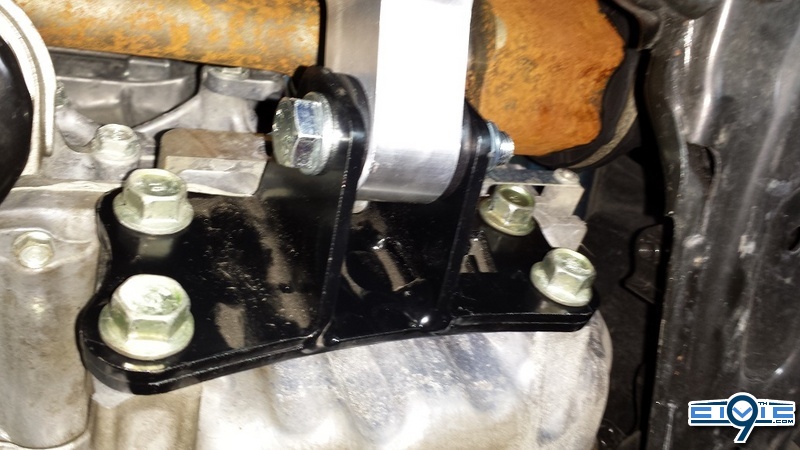
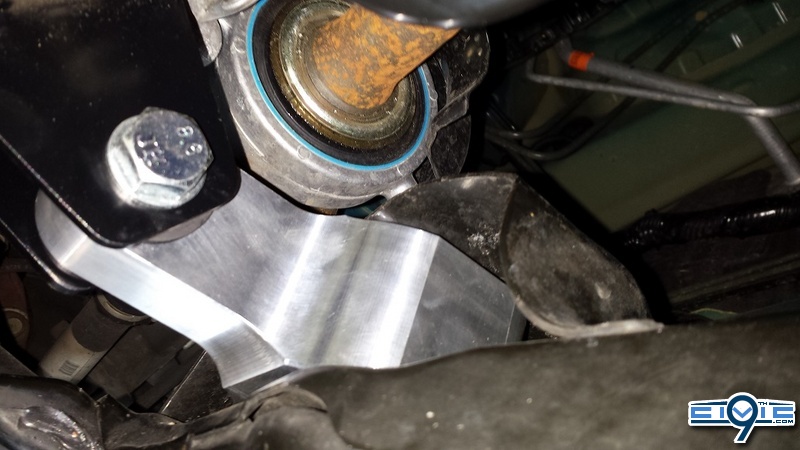
Installed Pics:
As usual, feel free to ask questions!
Part Needed:
Hasport Rear Motor Mount
Tools Needed:
Jack
Jack Stands
12-18" 2x4
17mm Wrench
17mm Socket (3/8" or 1/2")
3/4" Wrench
3/4" Socket
Torque Wrench
Flashlight (or phone with light app)
Quick note: The rear mount is located right next to the oil filter.
Step 1:
You can do this a few ways.
1. Use a lift.
2. Put your car on jack stands.
3. Just put the front of the car on jack stands...may not provide enough clearance though.
Step 2:
Place a 2x4 between the oil pan and jack inorder to provide some support for the engine. This will prevent damage to the oil pan and make it easier to get the bolts out as there will be no force on them.
Step 3:
Remove the single 17mm bolt attached to the frame (blue circle). There is no nut on the other side. It is threaded into the frame.
Step 4:
Remove the two 17 mm bolts on the mount (yellow circles).
Step 5:
Remove the four 17mm bolts attaching the mount to the oil pan (red circles and arrow).
Be sure to loosen each one first using the every other method to prevent warping. (might not be necessary with something this heavy duty, but it is a good habit to get in to.
You will need to use a box wrench (preferably ratcheting) for the bolt by the arrow. There is very little clearance between the frame and the bolt.
Step 6:
The plate will drop down on its own. Remove the dogbone (albeit twisted). It will pull out fairly easily.
Step 7:
Take the new part of the mount that goes on the frame side and push it into the frame. Take note of the position as it is labeled top (as seen below)!!! It will be a bit tough to slide it in, but not overly difficult. You will most likely need a flashlight to see if it lines up correctly.
Step 8:
Put 17 mm engine frame bolt back in. (blue circle from above) Torque to 69 ftlbs
Step 9:
Align the bracket that goes onto the oil pan and thread all four of the bolts (red circles and arrow above) in by hand to get started. Tighten them up using the every other method and then torque to 62 ft lbs.
Step 10:
Align the holes for both pieces of the mount and insert the bolt that came with the new mount. The bolt and nut are both 3/4". You may need to adjust the jack to get them to line up correctly. You may also need to pull the engine back a bit towards the rear of the car. Surprisingly, it does not require that much force. No known torque specs so I just went somewhere between 62 and 69 ft lbs.
Side note on torquing: Be sure to torque all of the bolts properly. DO NOT skip this step!!! If you use a jack and jack stands, you will not have much clearance for the length of the toque wrench!
Installed Pics:
As usual, feel free to ask questions!

 What benefits are you getting?