Andres Munoz
Well-Known Member
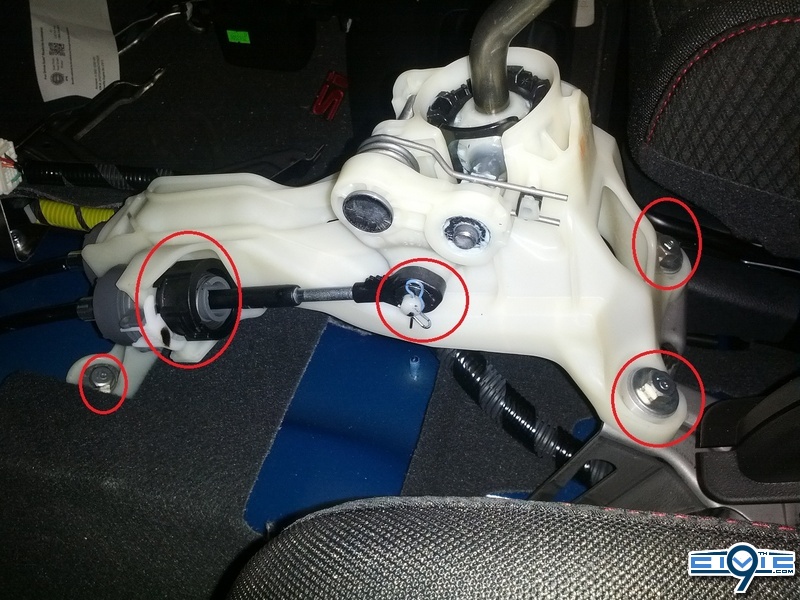
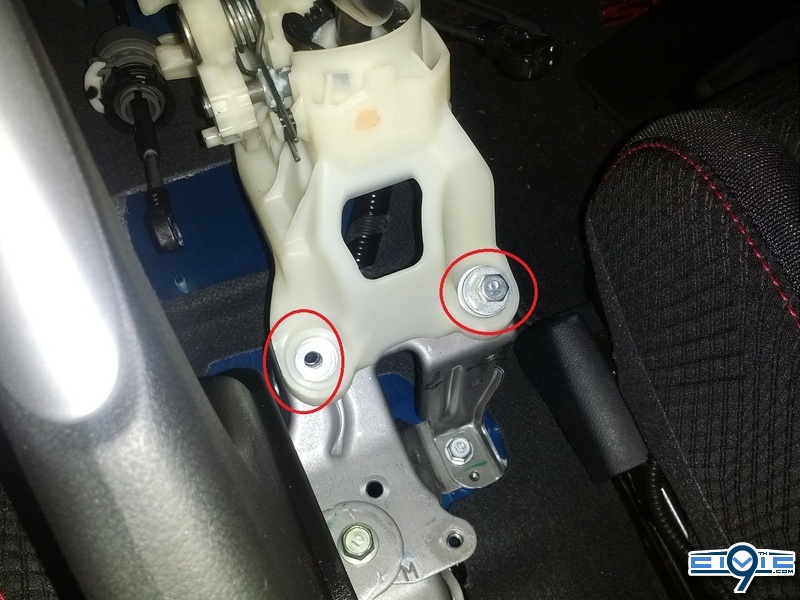
9. With a 12mm socket, the four bolts holding the mechanism can now be removed and the mechanism can be pulled out. Only three are visible in the following picture. ( Please ignore the circles on the shifter cable as I took this picture after I put it back together. You may also notice the new bushings are in, too.) Warning: Be careful not to drop these bolts as they can slip under the carpet and get lost. This will require A LOT of work to retrieve them.
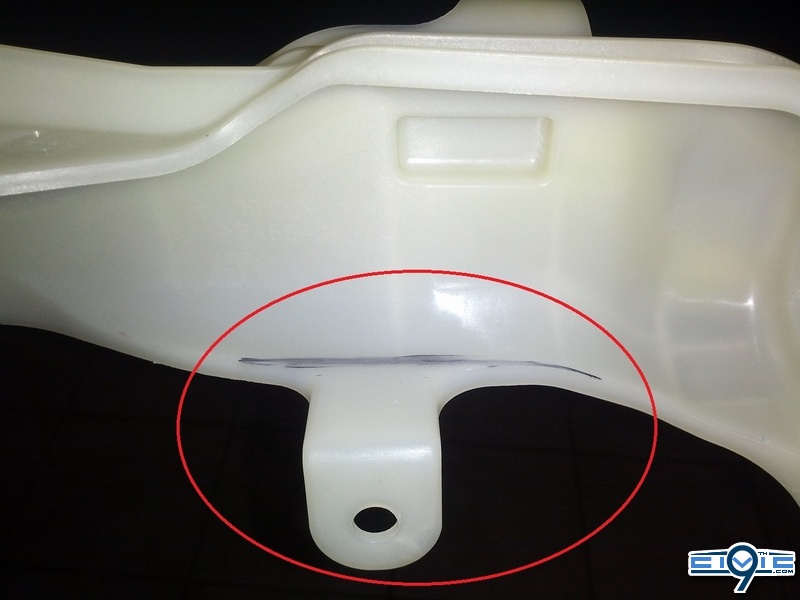
10. While the shifter mechanism is out, you will need to do three things. The first is to shave off a part of the plastic. I used a Dremel to do this. Just mark a line as seen below and cut.
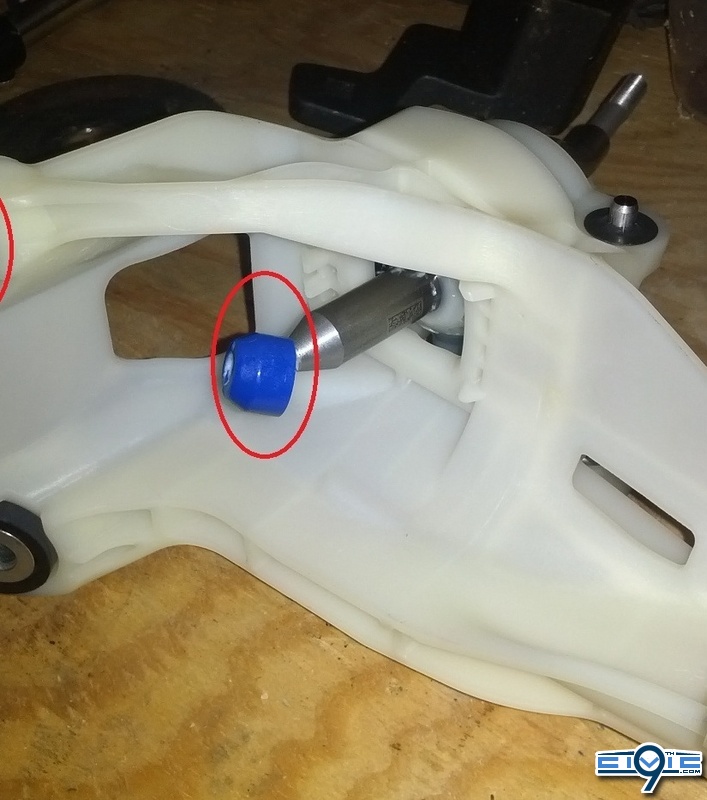
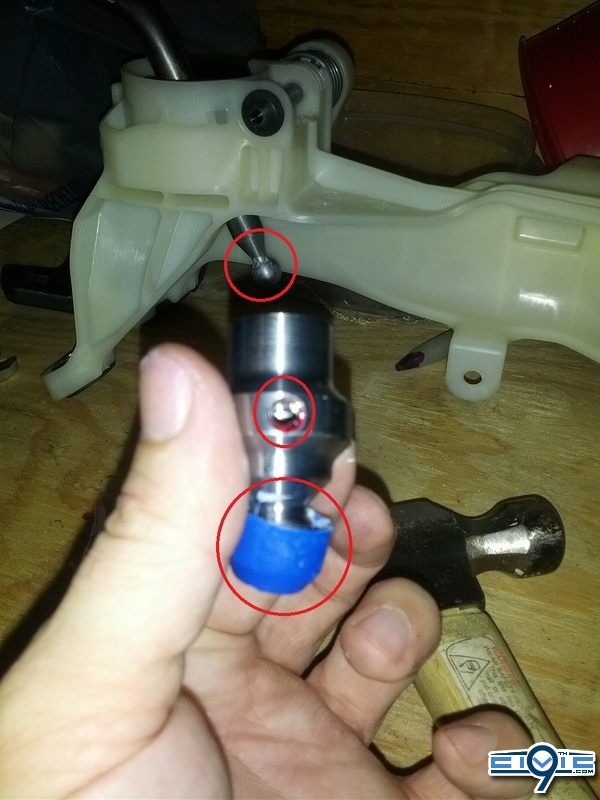
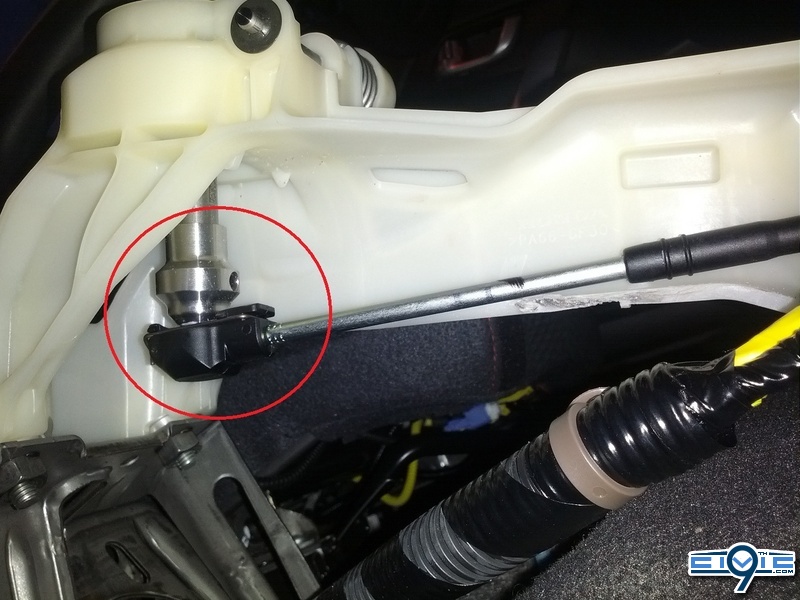
Next, you will need to remove the blue cap on the end of the shifter itself. In order to do this, I used a 7/16 open end wrench and a hammer. Placing the shifter mechanism flat on the bench as it would sit in the car, I lined the wrench up and rested the bottom on my bench and hit it with a hammer a few times until it popped off.
11. Now you can put the short shift adapter on. You will need to put the blue cap on the adapter. I just used a hammer to do this. Do not strike the cap itself, but rather strike the top of the adapter itself while holding it against the bench. (Alternatively, you could use a vice) Remove the retaining bolts with a hex wrench and put Loctite in the threads. Put the retaining bolts back in and slide the adapter over the end of the shifter. Alternate tightening the bolts until it is snug. I found it easiest to make sure one of them was accessible from the back of the shifter mechanism.
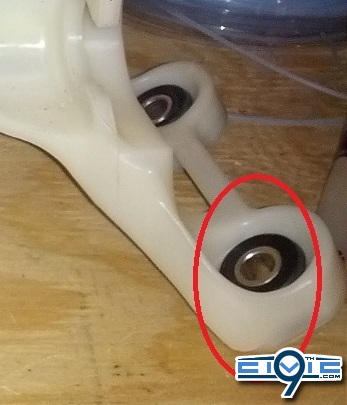
12. Before you put the shifter mechanism back in, you will need to remove the stock base bushings if you are upgrading. I used a flat head screwdriver to first push out the metal piece from the top and then pulled the rubber piece out from the bottom. It is not possible to put the new bushings in until you reassemble the mechanism.
13. Assembly everything in reverse order.
A note on installing the base bushings:
There are two bushings for each point. You will put one bushing on each side of the hole with the beveled side in. I found it easiest to start with the rear points as it is easier to slide them in without losing them. Do not completely tighten them down until the front ones are in. This will allow just enough room to slide the front ones reducing the risk of losing them. Warning: Be careful not to drop the bushings as they can slip under the carpet and get lost. This will require A LOT of work to retrieve them.
Sorry for the lack of pictures for the two front bolts, but that would have required three hands.
Completed pics
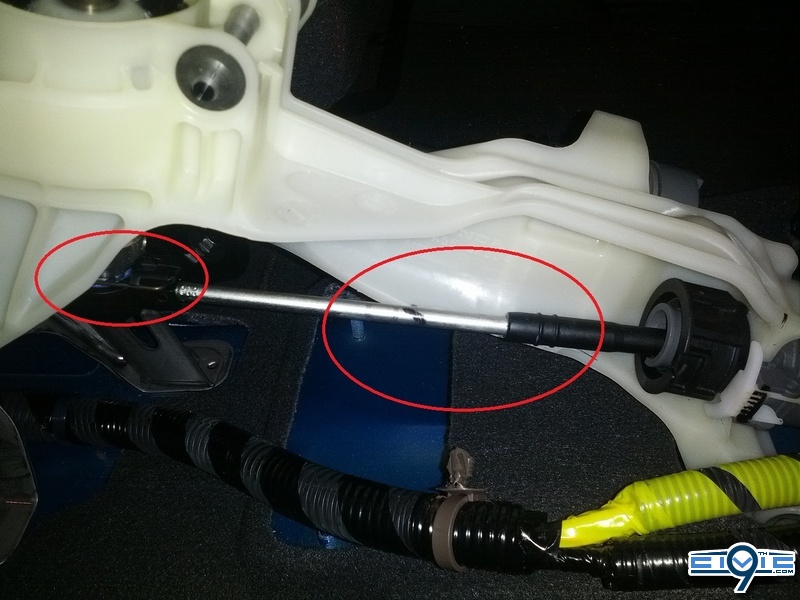
Notice the placement of the right shifter now and how low it is in relation to the clearance of where the cable bundle was clipped to the shifter mechanism. The cable bundle will sit off to the side on the floor with no problems.
As I had no reference for torque specs, just use your best judgement based on how hard it was to take them out.
As always, if anybody has any questions or needs further clarification, please ask.
Is it possible for this to stretch the shifter cables the adatpter byitself?