Parts Needed:
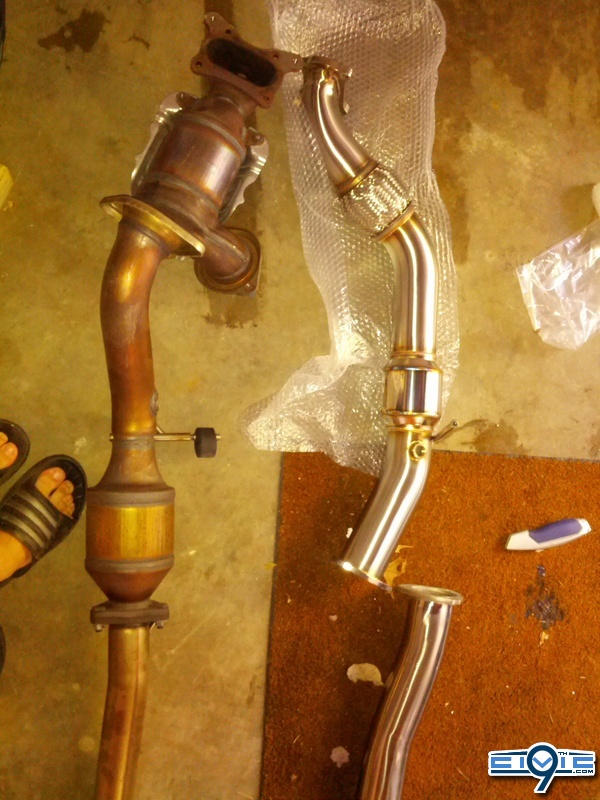
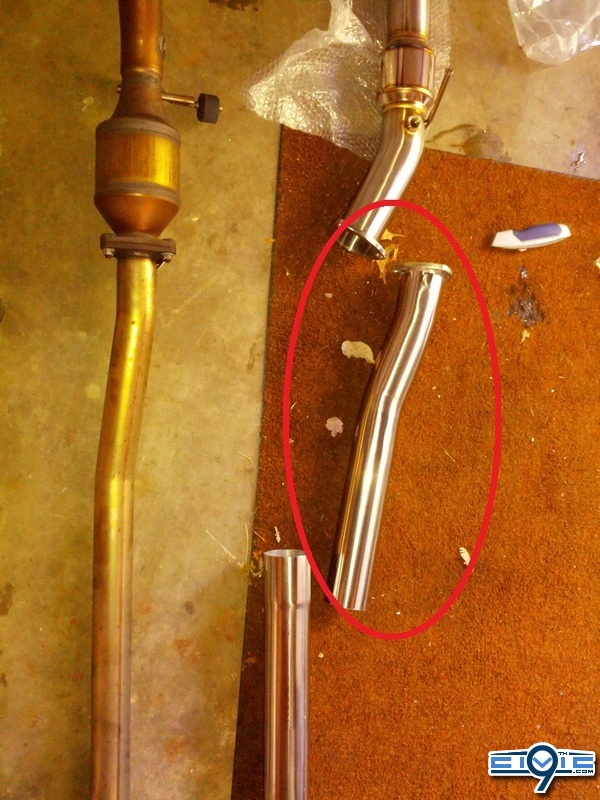
Full-Race Downpipe (catted or catless)
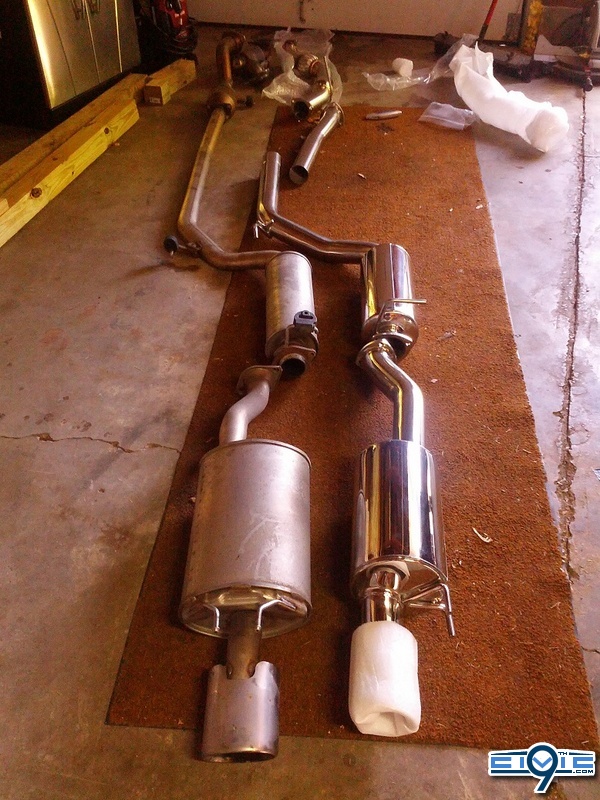
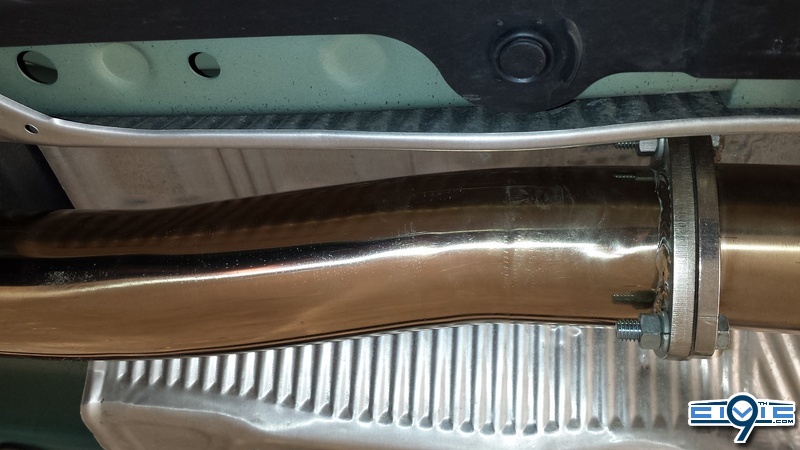
Full-Race Exhaust
2 gaskets (supplied)
6 bolts (supplied)
6 lock washers (supplied)
6 nuts (supplied)
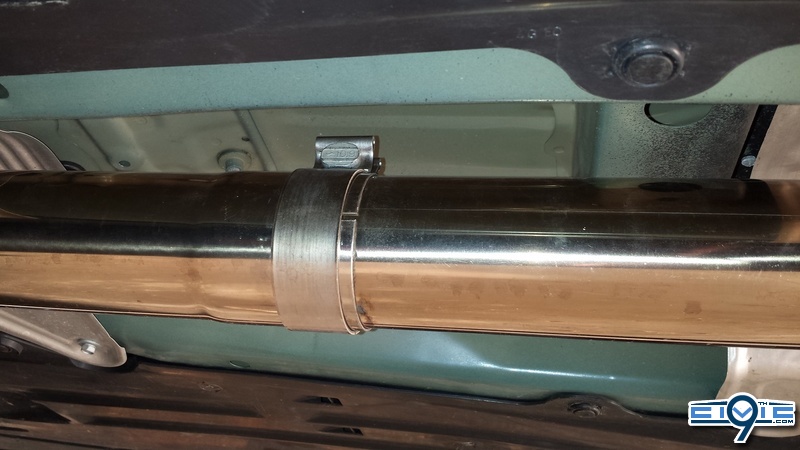
Clamp with adjusting bolts (supplied)
Optional Parts
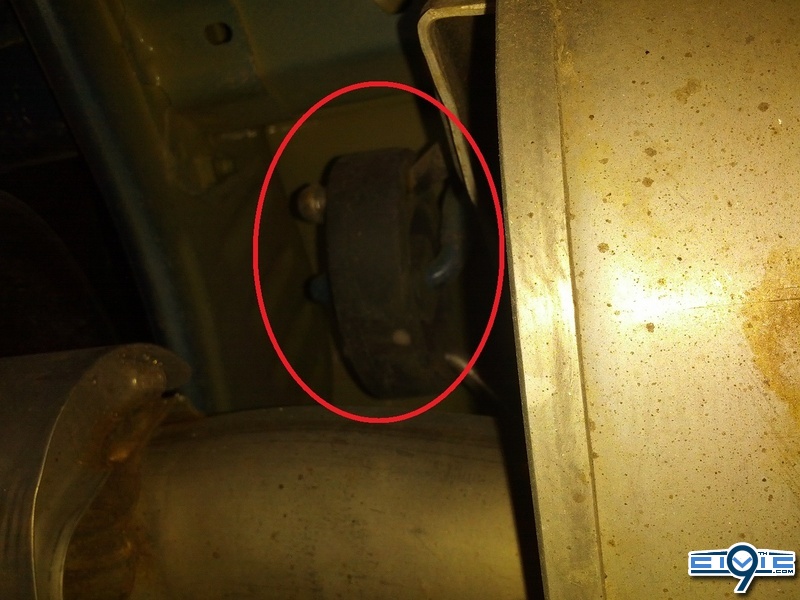
Rear Motor Mount - highly recommended, but not absolutely necessary
Tools Needed:
Jack
Jack Stands
3/8" Ratchet
1/2" Ratchet
1/4" Ratchet
Torque Wrench
Various Extensions
10-19 mm Sockets
9/16" Socket
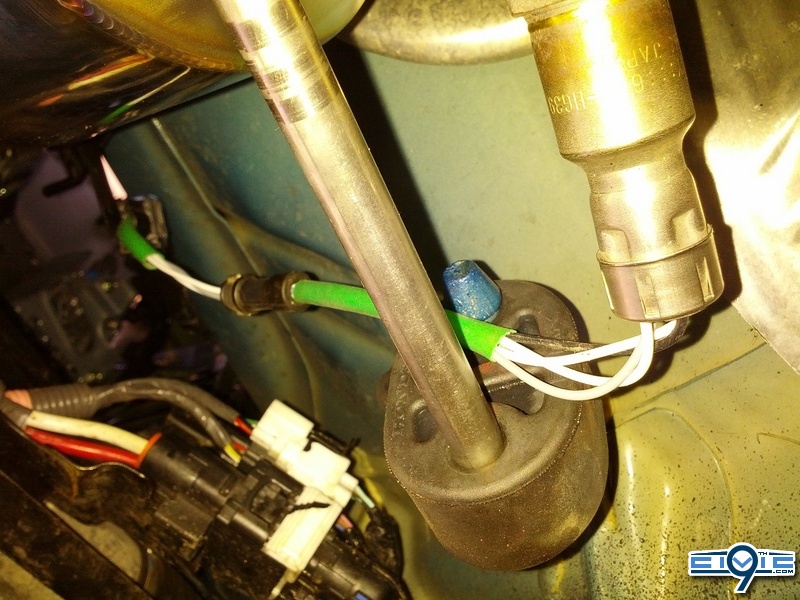
O2 Sensor Socket
WD-40, Liquid Wrench, or Grease of choice.
Masking Tape
Trim/Clip Removal Tools
Rags
High Temp Anti-seize
Disclaimer: I do not have torque specs. Use your best judgement.
Step 1:
You can do this a few ways.
1. Use a lift.
2. Put your car on jack stands.
3. Lift the front and rear of the car as necessary. Not recommended as this would be a hassle, but doable if it is your only option. Make sure to use some wheel chocks if you chooses this method.
Step 2:
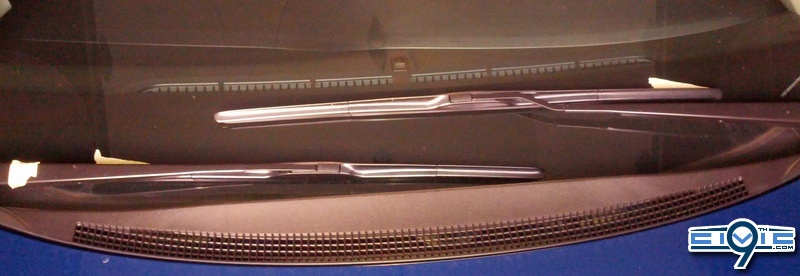
Cowl Removal - You will need to mark your windshield wiper placement with masking tape in order to make sure you get them back on in the correct position. I also marked the left one with a piece of tape since the wipers are different sizes.

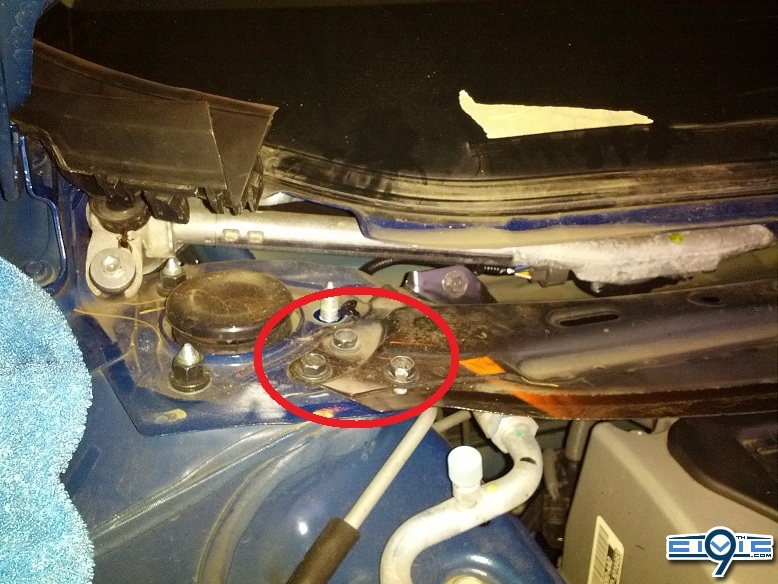
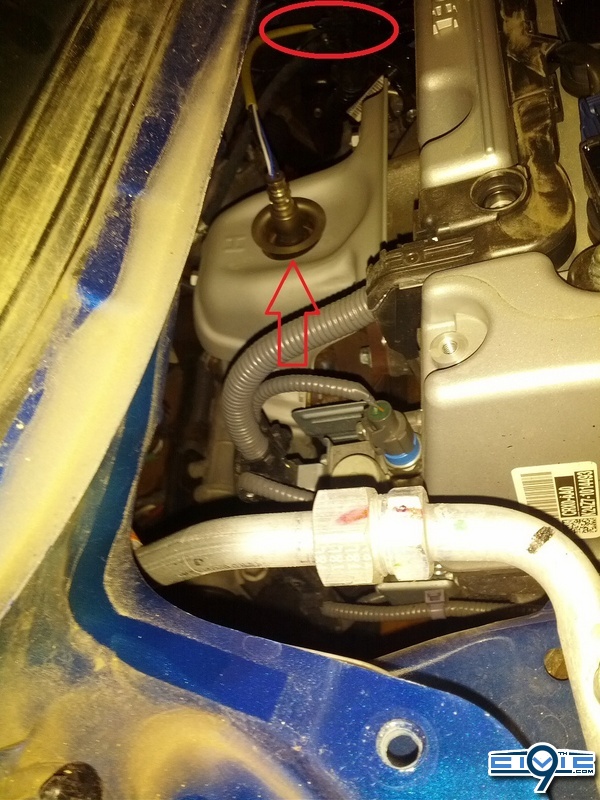
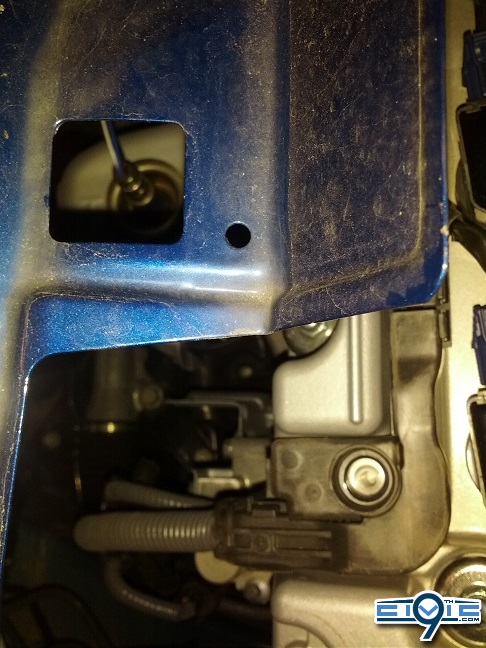
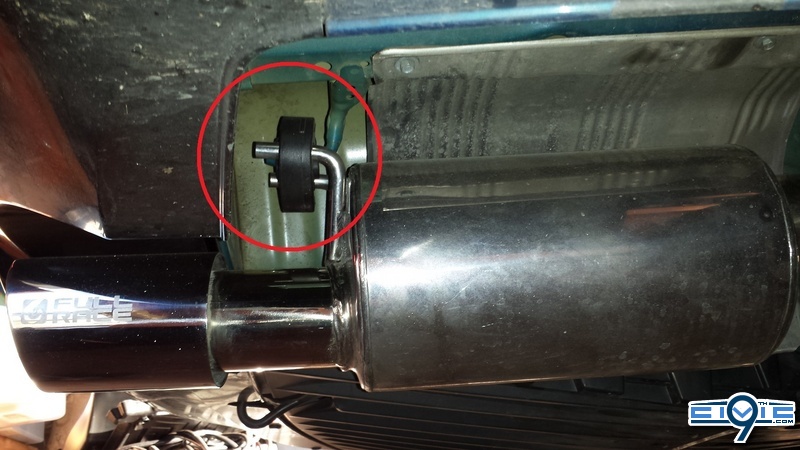
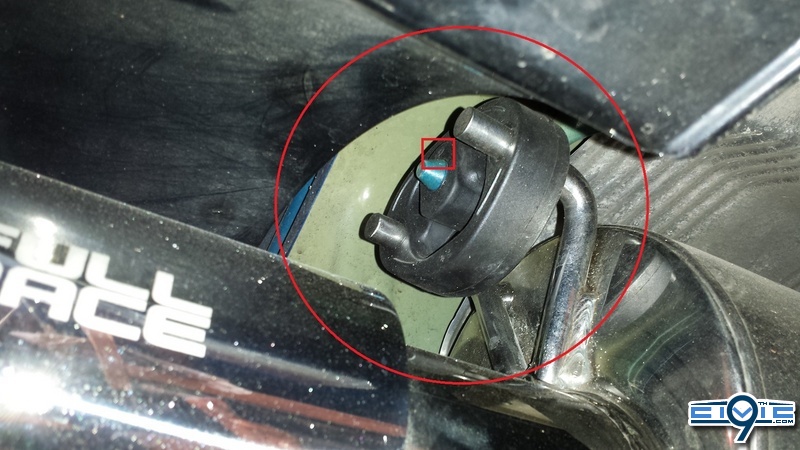
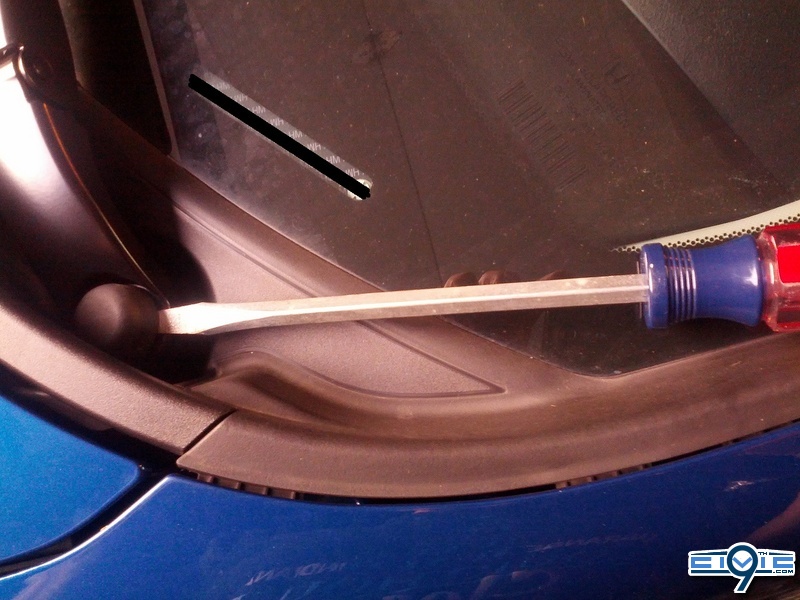
Next, you will need to do is remove the caps to the nuts on the windshield wipers. You can use a screwdriver or one of the trim piece removal tools. They are pretty simple to wedge off.
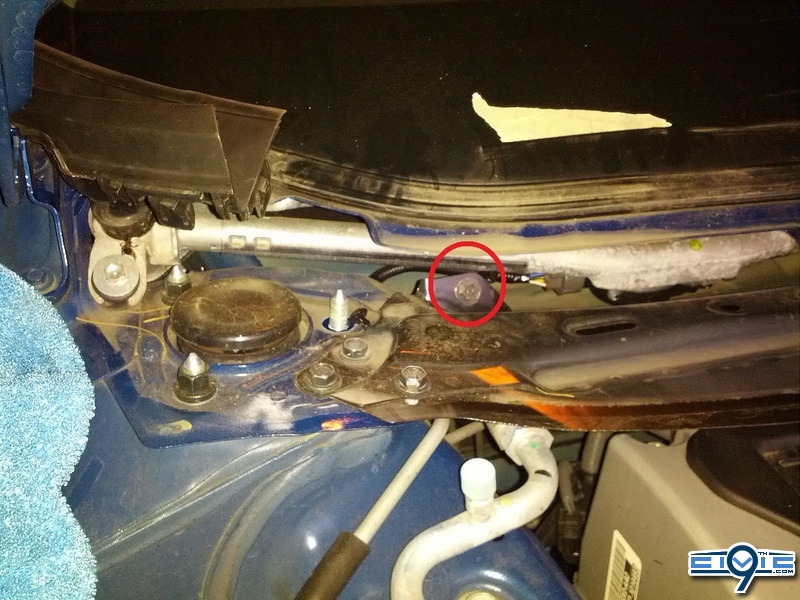
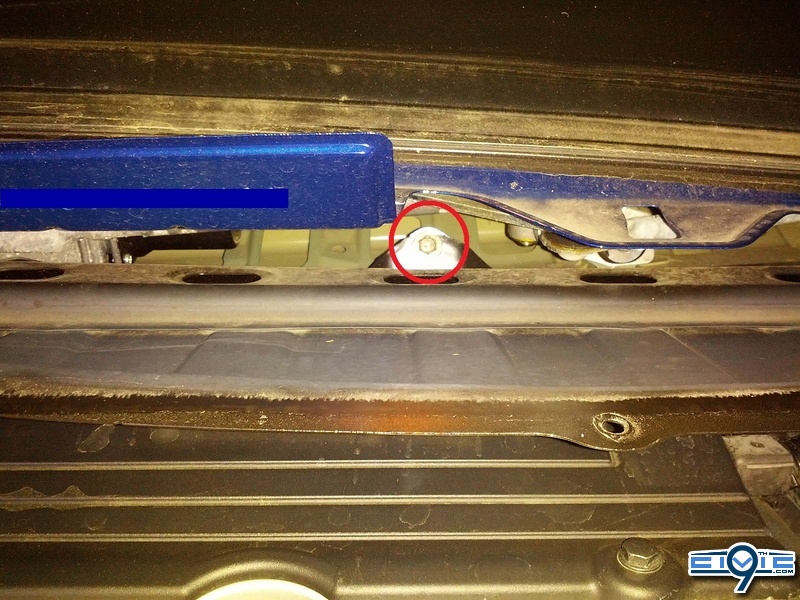
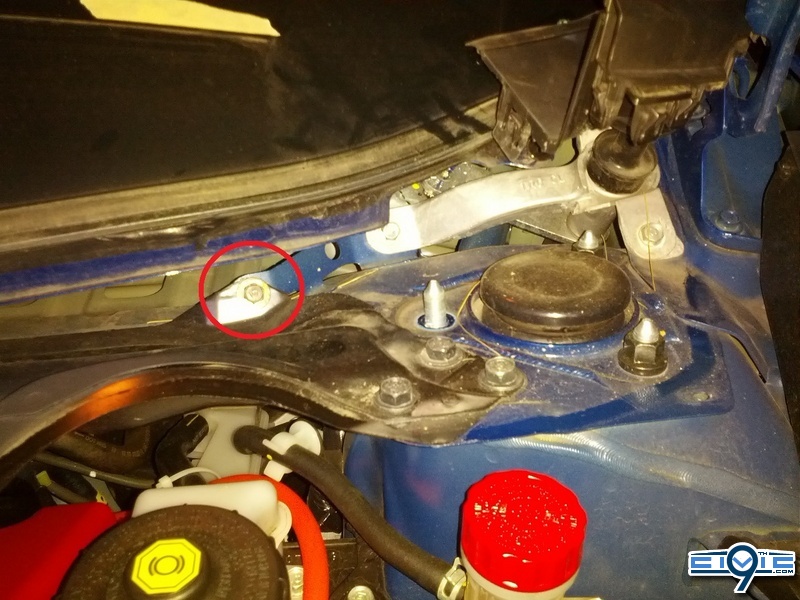
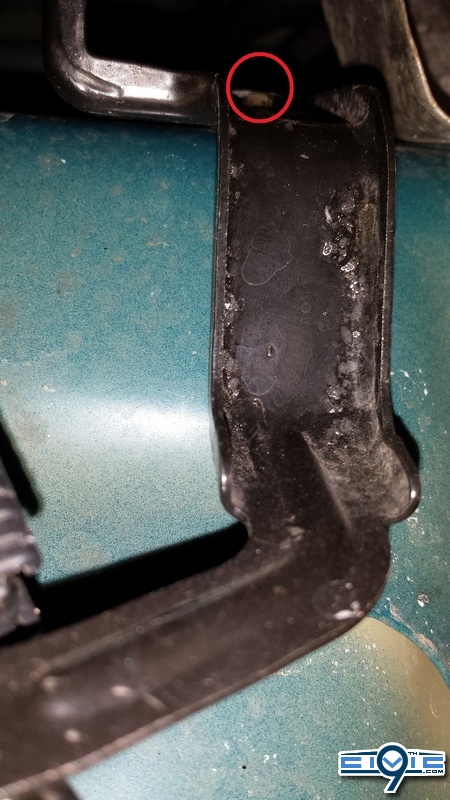
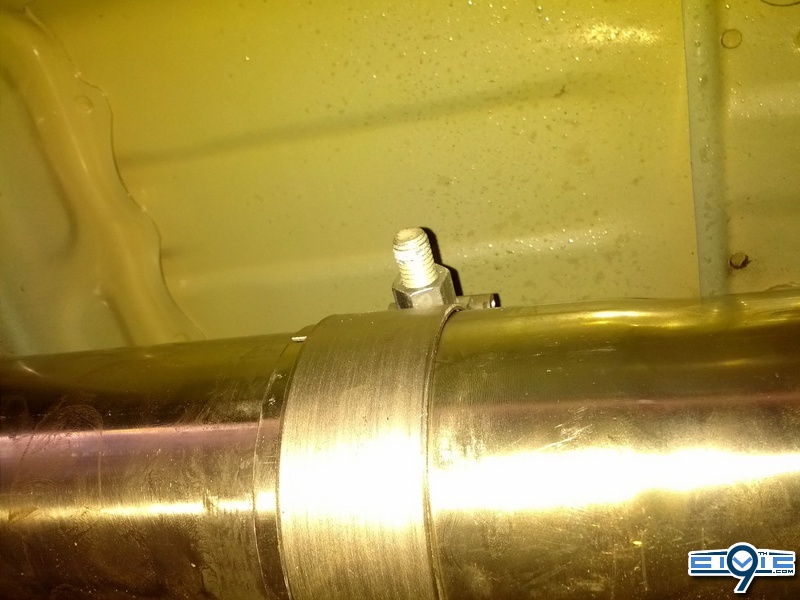
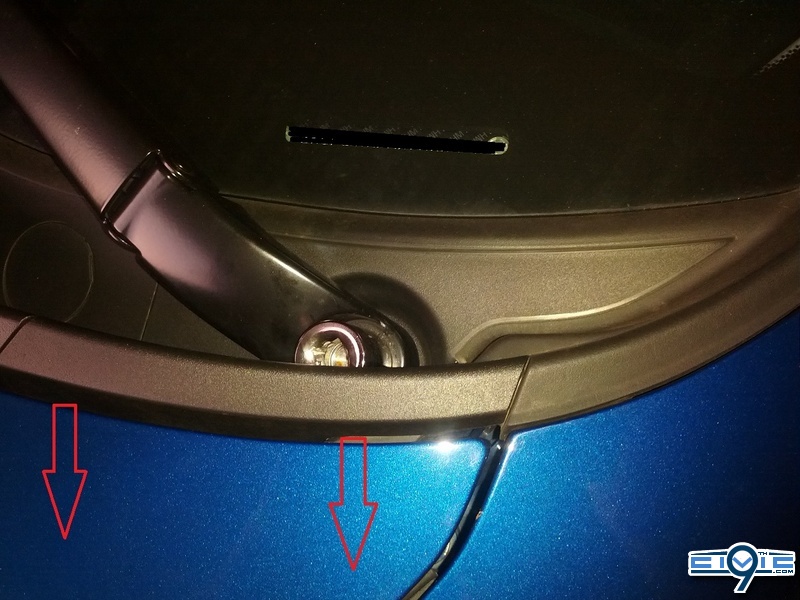
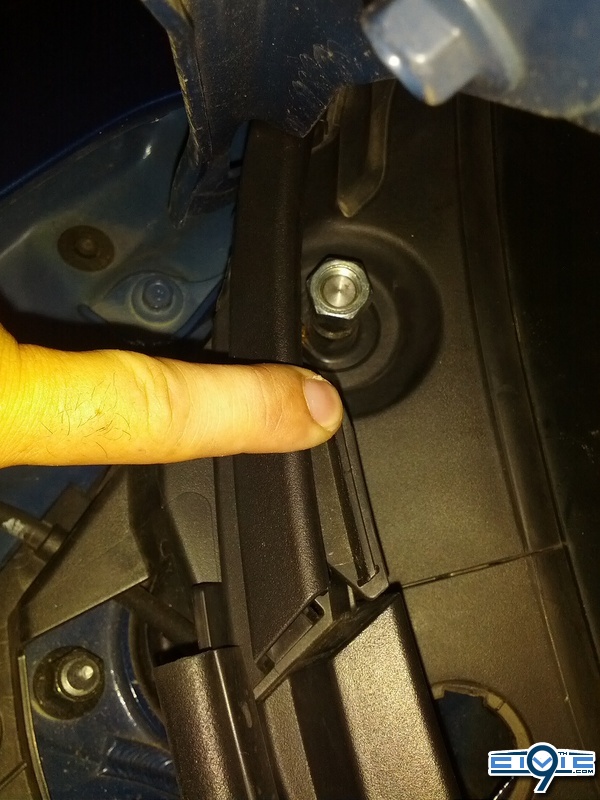
The plastic piece that covers part of the nut can be unclipped as shown by the arrows below. It doesn't come off completely, but will move out of the way. You may want to do this with the hood up, but is possible with the hood down as it gives just enough room. The nut is 17mm.
I am missing pictures for removing the upper pieces of the cowl on the left and right, but they do pop out. Although not as easily as you would expect.
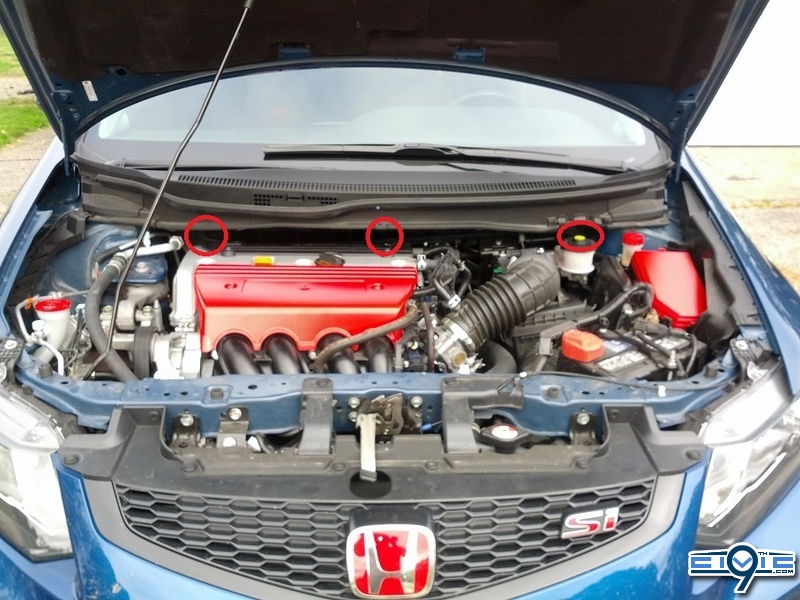
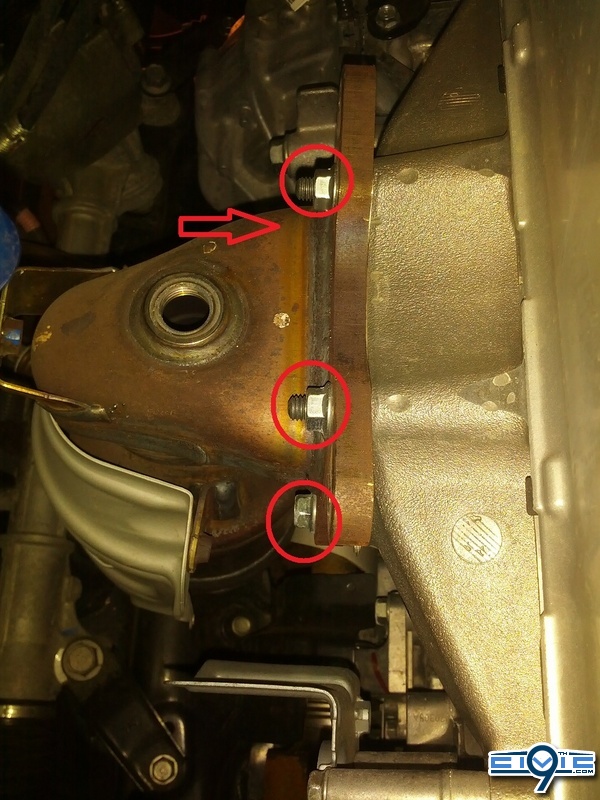
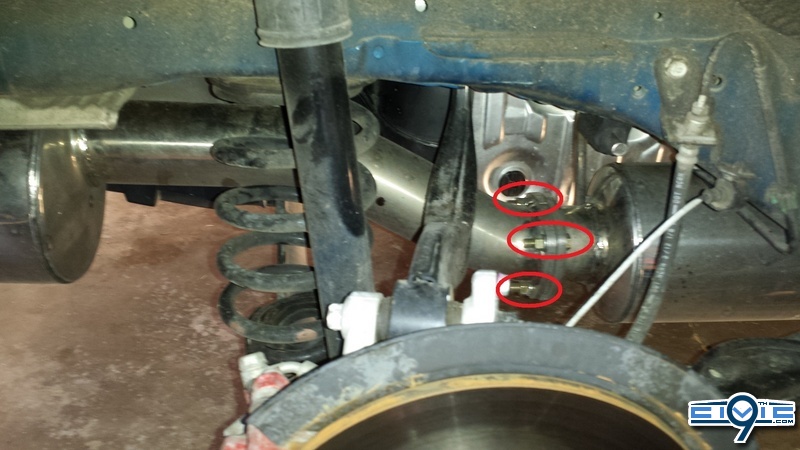
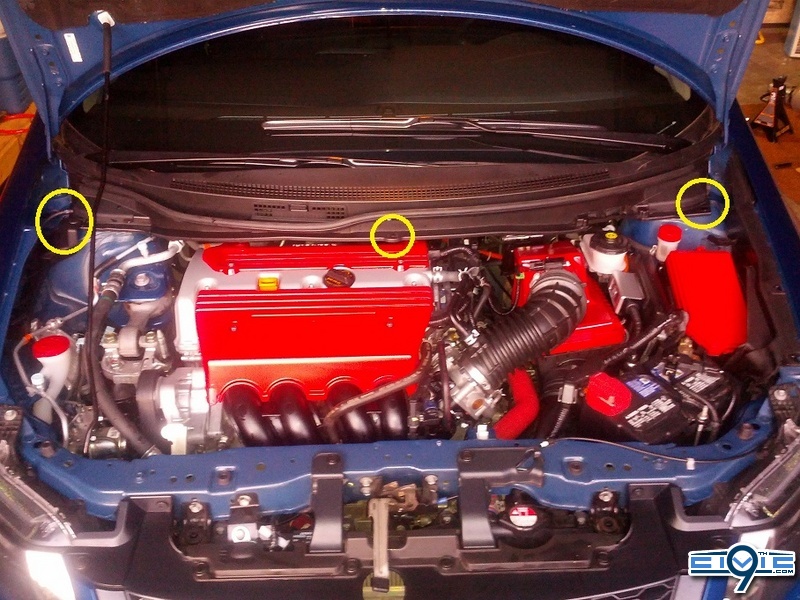
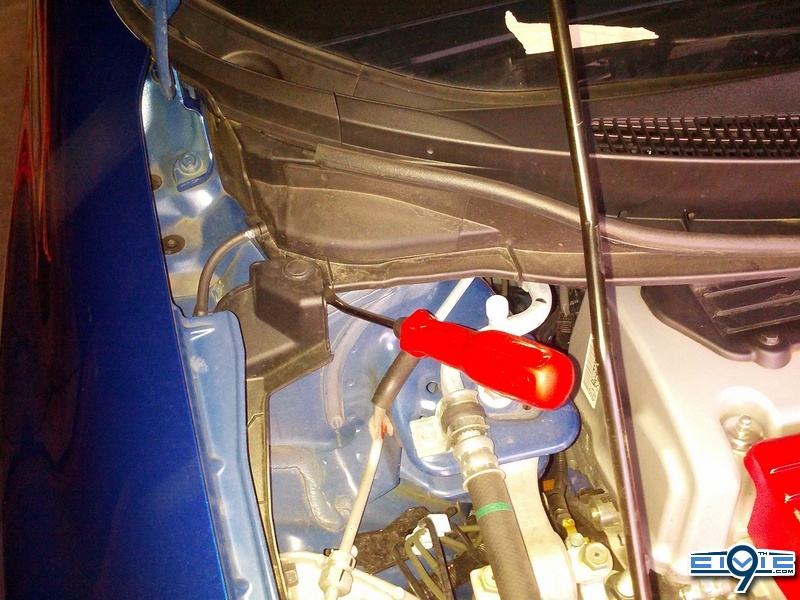
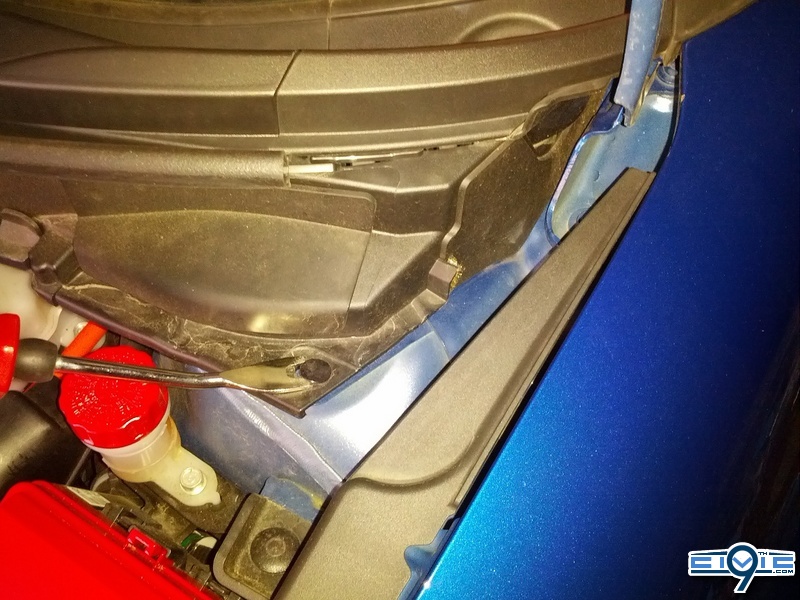
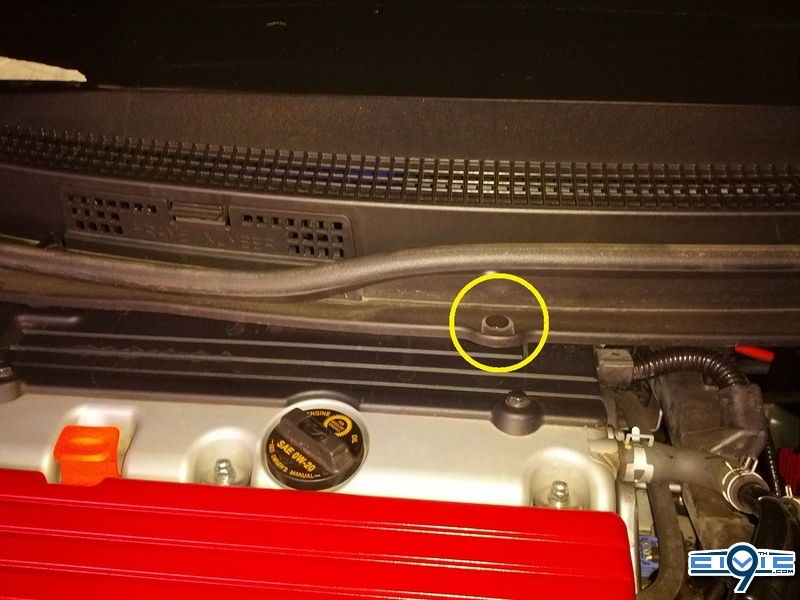
There are three plastic clips that need to be removed as shown below. The clip removal tool or a plastic trim piece removal tool works best, but you could manage with a flat head screwdriver if necessary.
The cowl has a small hose for the windshield washer fluid attached it on the passenger so car must be taken when removing it. I simply laid the entire cowl piece off to the side on the passenger side of the engine bay.
To be continued in the next post...
Full-Race Downpipe (catted or catless)
Full-Race Exhaust
2 gaskets (supplied)
6 bolts (supplied)
6 lock washers (supplied)
6 nuts (supplied)
Clamp with adjusting bolts (supplied)
Optional Parts
Rear Motor Mount - highly recommended, but not absolutely necessary
Tools Needed:
Jack
Jack Stands
3/8" Ratchet
1/2" Ratchet
1/4" Ratchet
Torque Wrench
Various Extensions
10-19 mm Sockets
9/16" Socket
O2 Sensor Socket
WD-40, Liquid Wrench, or Grease of choice.
Masking Tape
Trim/Clip Removal Tools
Rags
High Temp Anti-seize
Disclaimer: I do not have torque specs. Use your best judgement.
Step 1:
You can do this a few ways.
1. Use a lift.
2. Put your car on jack stands.
3. Lift the front and rear of the car as necessary. Not recommended as this would be a hassle, but doable if it is your only option. Make sure to use some wheel chocks if you chooses this method.
Step 2:
Cowl Removal - You will need to mark your windshield wiper placement with masking tape in order to make sure you get them back on in the correct position. I also marked the left one with a piece of tape since the wipers are different sizes.
Next, you will need to do is remove the caps to the nuts on the windshield wipers. You can use a screwdriver or one of the trim piece removal tools. They are pretty simple to wedge off.
The plastic piece that covers part of the nut can be unclipped as shown by the arrows below. It doesn't come off completely, but will move out of the way. You may want to do this with the hood up, but is possible with the hood down as it gives just enough room. The nut is 17mm.
I am missing pictures for removing the upper pieces of the cowl on the left and right, but they do pop out. Although not as easily as you would expect.
There are three plastic clips that need to be removed as shown below. The clip removal tool or a plastic trim piece removal tool works best, but you could manage with a flat head screwdriver if necessary.
The cowl has a small hose for the windshield washer fluid attached it on the passenger so car must be taken when removing it. I simply laid the entire cowl piece off to the side on the passenger side of the engine bay.
To be continued in the next post...
Last edited: