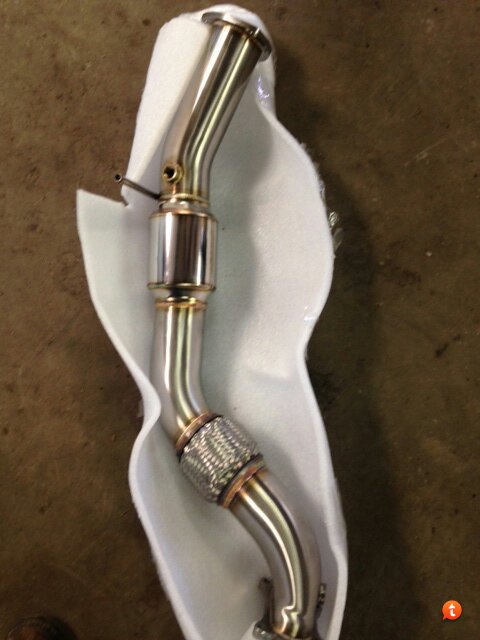
Step 17 continued:
Connect the rubber mount at the rear axle. This one is also a royal pain. Make sure it is greased up well as you may need to slide it to ensure clearance from the spring and part of the frame. When you first put the rubber mount on the Full-Race hanger, slide it on with about 3/4" of the metal showing on the outside end.
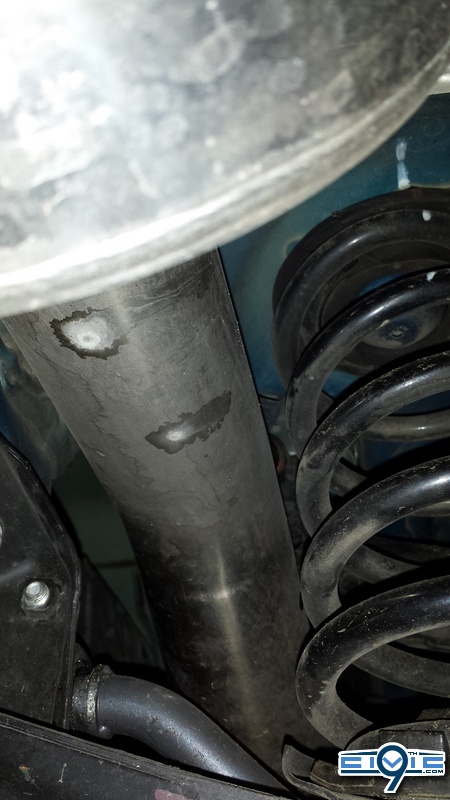
Clearance. Sorry about the angle, but that was the best I could do. It does clear the spring fine.
Step 18:
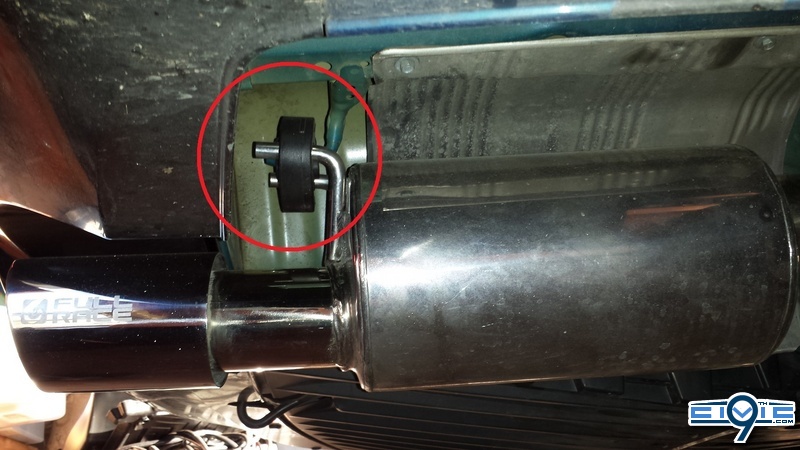
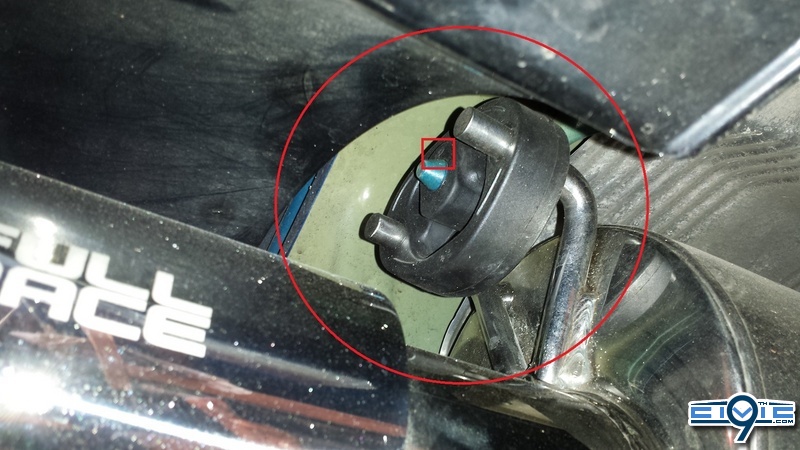
Mount the muffler. Make sure the rubber hanger is positioned with the word up (in the red box) correctly. When you slide the hanger onto the muffler, push them back about an inch. Grease these up well too as you will need to play around with positioning a bit.
Step 19:
Bolt the muffler to the resonator using the supplied bolts, lock washers, and gasket. You will need a ratchet and wrench. Due to space being tight, it is recommended that you put the head of the bolt towards the front of the car as shown in the picture below. Space is really tight for the bolt in the top circle. You will need to play around with socket depth and extensions to figure out what works best for you.
Step 20:
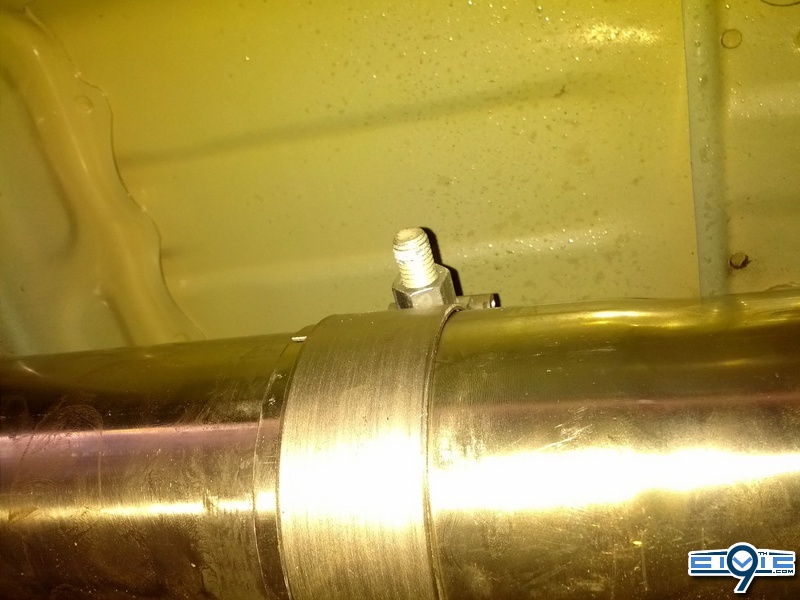
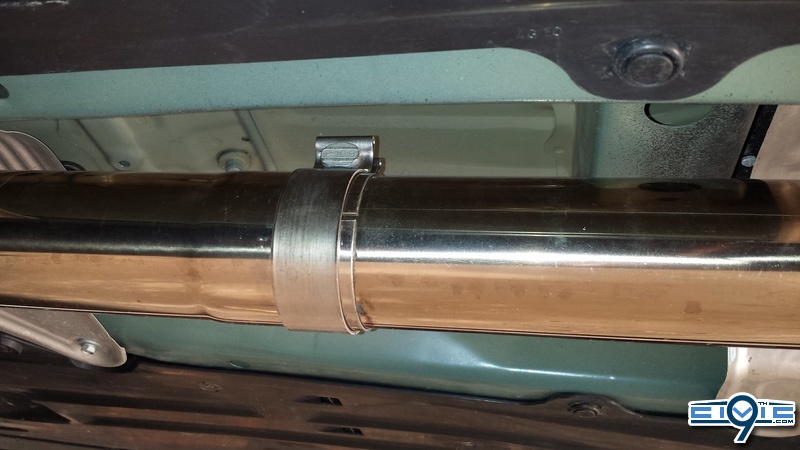
Tighten the clamp at the mid-pipe using a 15mm socket. You can position this in any way you want, but I choose to put the bolt at the top. This one needs to be
tight. Use a breaker bar.
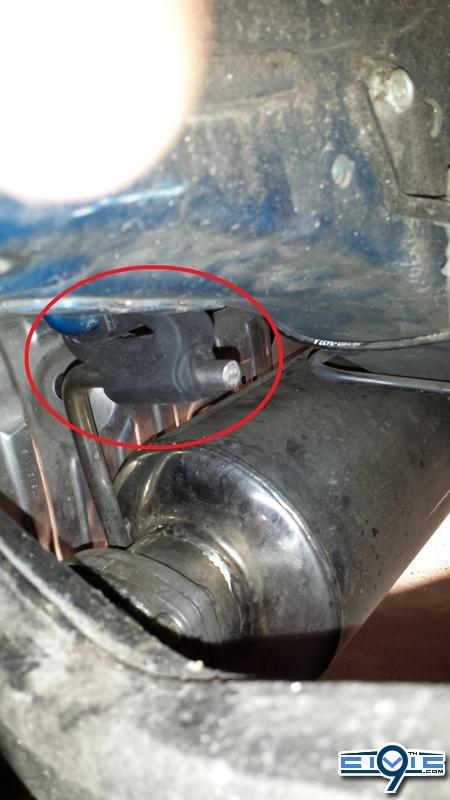
Step 21:
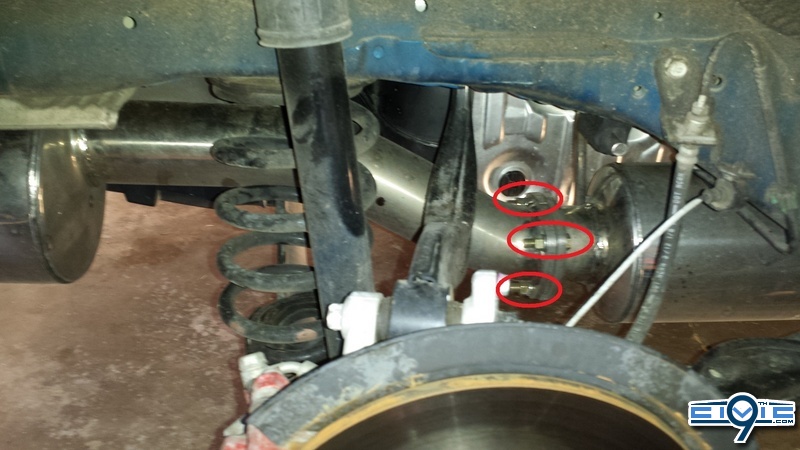
Tighten the 2 bolts and 2 nuts securing the downpipe onto the engine block. Three of them are circled. As with taking the stock downpipe off, you will need to feel around for the fourth one.
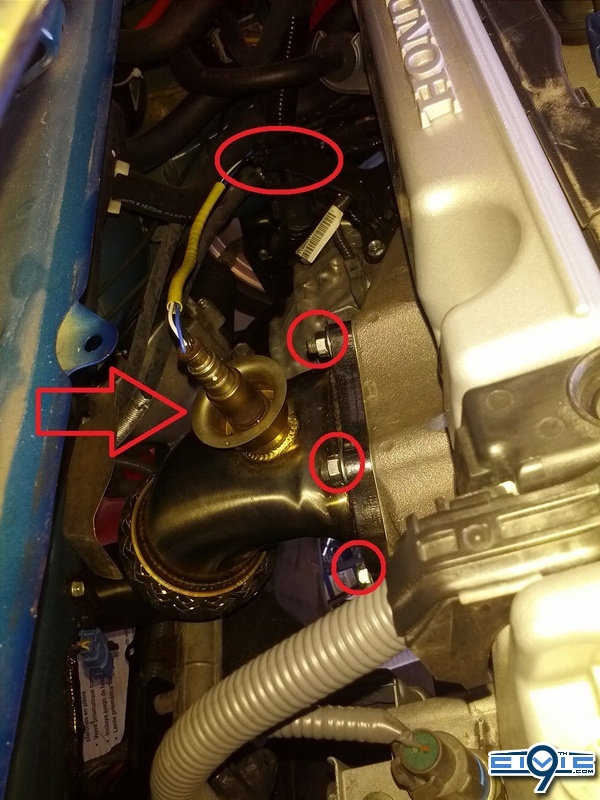
Step 22:
See picture above. Reconnect the O2 sensor. Again be careful with the wires and possibly anti-seize. After you have tightened it, don't forget to reconnect the clip.
Step 23:
Reattach the heat shield and cowl in reverse order of taking them off. When reattaching the small upper pieces of the cowl, be aware of the little blue clips (as seen below). Make sure they line up right with the slot (not shown).
View attachment 26831
Step 24:
Fire it up!
Take it for a drive. It will be really loud at first.
If anybody has any questions or something needs clarified, don't hesitate to ask. If anybody would like to provide correct sizes for the nuts and bolts, I would greatly appreciate it so I can update this DIY with the correct sizes.
Edit:
Some thoughts on having installed a Full-Race Downpipe and Exhaust
When I first installed both of these (at the same time), the only other modification I had was a resonator delete and K&N drop-in. I threw a CEL within 25 miles. I thought I was going to need an O2 defouler. I also had horrible rasp at moderate to heavy acceleration. Keep in mind this was on the stock tune. After I got FlashPro, I uploaded the ReFlash map and the CEL went away. The rasp was still there, though. Fast forward a few months and I installed an RBC, ZDX, and 3.5" SRI. I also loaded a basemap calibration (tune) geared towards my mods. No CEL was thrown AND the rasp went away...COMPLETELY. I believe the car was just not getting enough air. Even with the ReFlash, which also runs rich. This was not an ideal tune at all.
Lesson learned: To run this downpipe and exhaust, you
need FlashPro and a proper tune! If you do not get a proper tune, you may throw a CEL and/or have horrible rasp depending on what mods you have installed.
Thoughts on sound
This was ear-splitting loud when I first fired it up in my garage. It breaks in fairly quick, though. Probably 500 miles or so and its tone will become stable. It has a nice deep tone and the drone is nearly non-existent when just cruising. Nice aggressive sound during acceleration. After using a proper tune, it got even deeper and sounds better!
") Do you have a DIY for the PRL intake?
Do you have a DIY for the PRL intake?