DIY 2012-2015 Automatic Day/Night Mirror

jasonandre

mlem
Super Mod
VIP Member
2,730
2,383
Alexandria, VA
Vehicle Model
Civic Touring
Body Style
Sedan
DIY 2012-2015 Automatic Day/Night Mirror

08v03-tr0_350x229.jpg

This article covers the mirror installation for model years 2012 through 2015.
Note: Photos shown here depict installation on a 2014 Si.

Application: Coupe and Sedan
Installation Time: ~45 minutes

What You Need:
  • Auto Day/Night Mirror Kit (08V03-TR0-100A)
  • Attachment Kit (08V03-TR0-100)
  • Sub-harness kit (08V03-TR0-1A0) - 2013 through 2015 Models with ECON switch only
  • Phillips screwdriver
  • Flat-tip screwdriver
  • Isopropyl alcohol
  • Shop towel
  • T20 TORX wrench
  • Flashlight
  • Masking tape
Let's Begin:
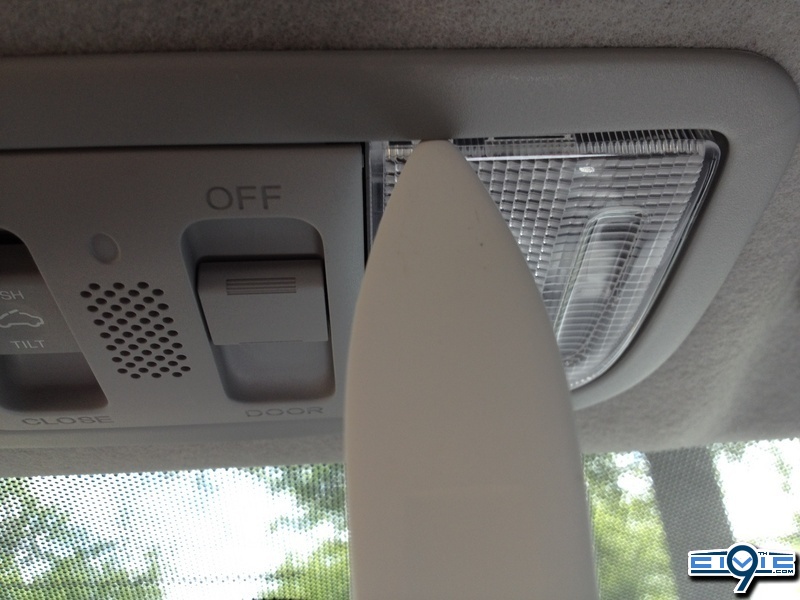
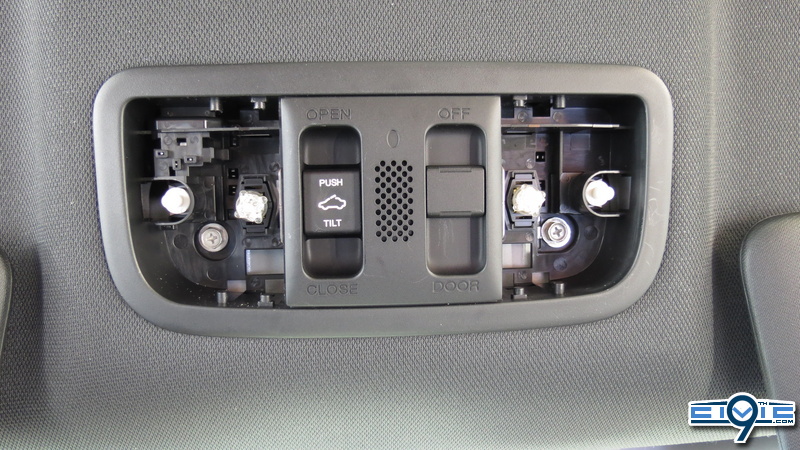
  1. Remove the left and right lenses from the map light console (four retaining tabs for each lens) using a plastic trim tool.
    Remove the two bolts.
    Remove the map light console. Then unplug the vehicle connectors, and remove the switch (four retaining tabs).
    mirror-step01.png
    070_G.sized.jpg

    046_G_001.sized.jpg


  2. Remove the driver's and passenger's sunvisor holders by turning then in a counter-clockwise direction.

    mirror-step02.png

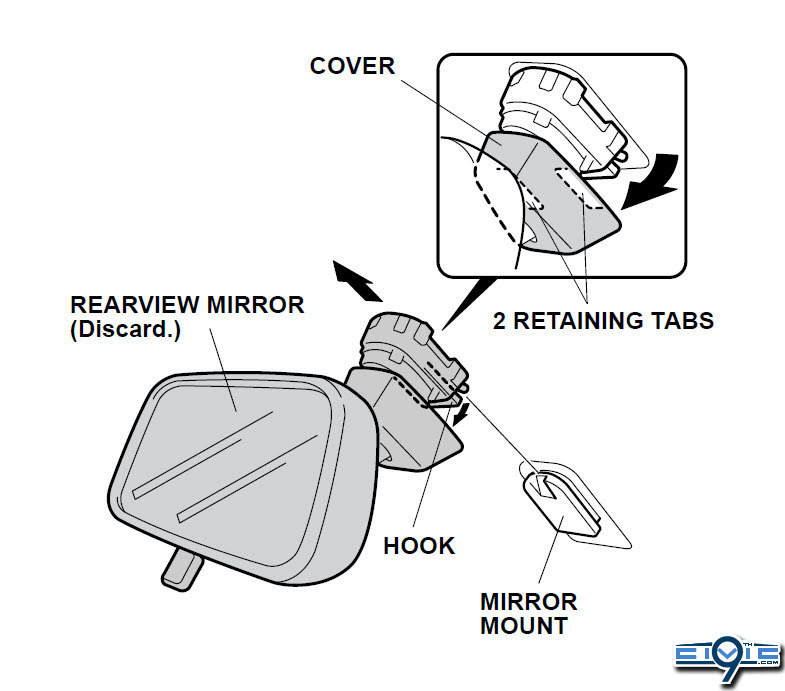
  3. Remove the cover from the rear-view mirror by prying the two tabs on the left and right sides of the cover. Then, while holding down the hook, slide the mirror off of the mount.
    4_26_2012_11_36_07_PM.jpg


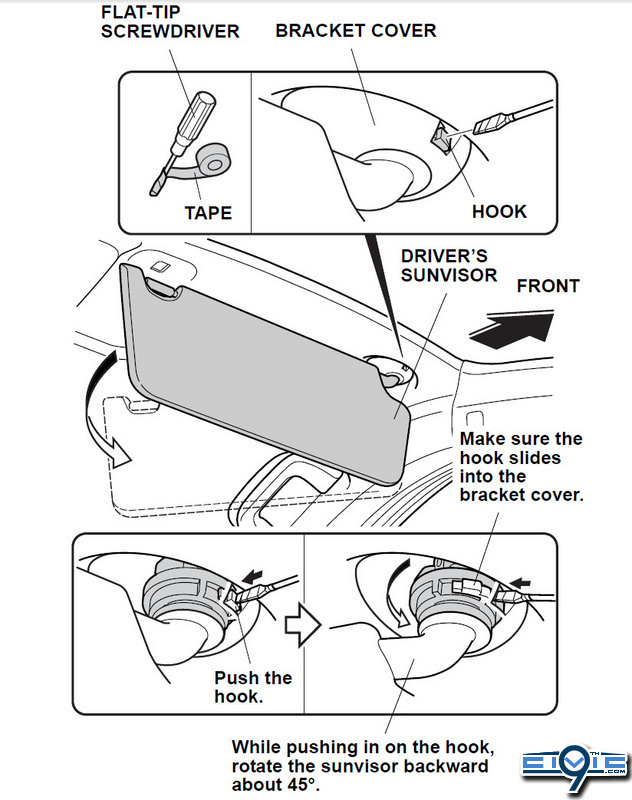
  4. Wrap the end of a flat-tip screwdriver with tape. Locate the slot in the bracket cover, and insert a flattip
    screwdriver into the slot. Push the hook with the flat-tip screwdriver.

    Note: This part can be extremely difficult to remove. It may take 3-5 rotations for the visor to finally pop off. Just keep trying!
    4_26_2012_11_37_44_PM.sized.jpg

    mirror-step04.png
  5. Pull the driver's door seal opening away from the A-pillar, then pull out the drivers' A-pillar trim to release the clips.

    Note: Put a shop towel in the opening between the driver's A-pillar and the dashboard to prevent scratches.

    mirror-step05a.png mirror-step05.png

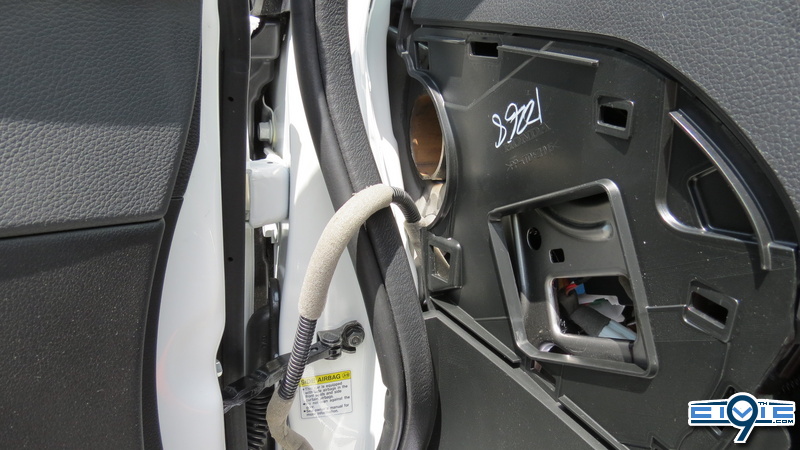
  6. Remove the driver's A-pillar trim from the upper clip by using a long trim tool or screwdriver, pushing the clip downward. Unplug the speaker connector, if equipped.

    Note: The upper clip will stay in the body.

    mirror-step06.png

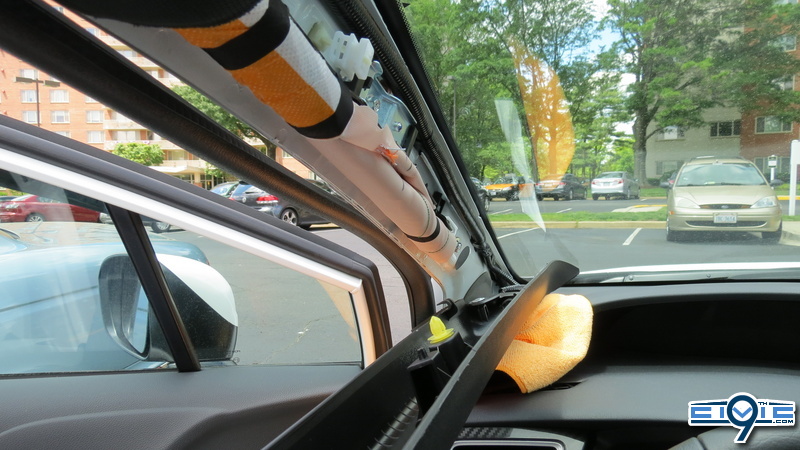
  7. Remove the remaining upper clip from the driver's A-pillar and install the new clip directly to the driver's A-pillar trim.
    052_G.sized.jpg
    mirror-step07.png

  8. Pull away the door opening seal from around the dashboard.
    Remove the driver’s dashboard side cover (three clips, two retaining tabs, and two hooks).

    mirror-step08.png

  9. Remove the driver's dashboard lower cover.

    mirror-step09.png

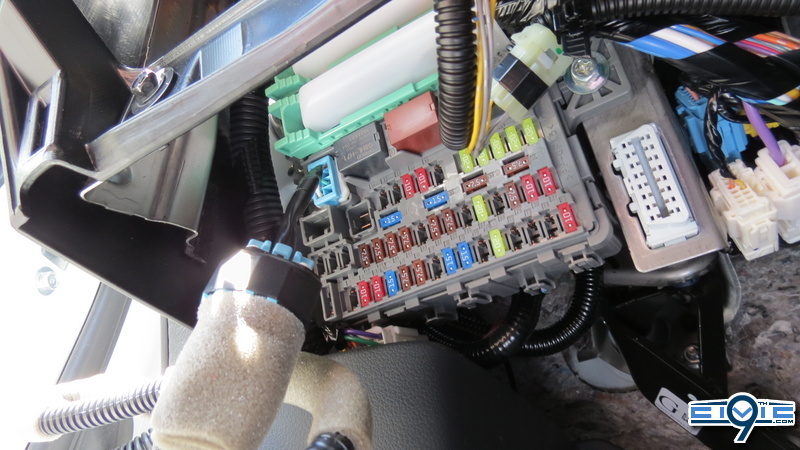
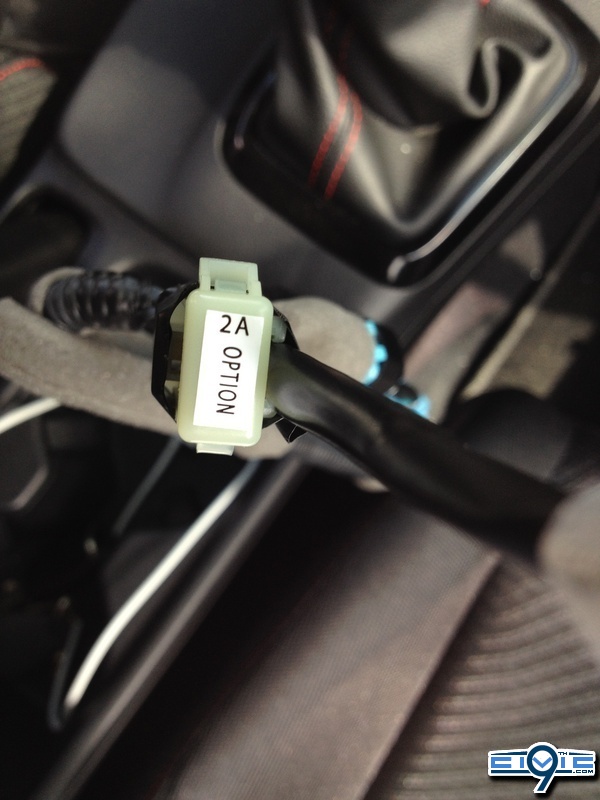
  10. Using isopropyl alcohol on a shop towel, thoroughly clean the fuse case where the fuse label with attach, then attach the 2A fuse label to the case on the harness.
    087_G.sized.jpg

...continued in next post
 
Last edited:
  • Thread starter
  • Staff
  • #2
  1. Install the automatic day/night mirror using a T20 torx wrench/screwdriver.

    mirror-step11.png

  2. Plug the automatic day/night mirror harness 6-pin connector into the fuse box 6-pin connector.
    If another accessory harness is already plugged into the fuse box, unplug it and plug in the automatic day/night mirror harness.

    057_G.sized.jpg

  3. Route the automatic day/night mirror harness to the driver’s dashboard lower cover opening as shown.
    Using one wire tie A, secure the automatic day/night mirror harness to the vehicle harness.

    mirror-step003.png
    058_G.sized.jpg


  4. Unplug the vehicle 5-pin connector from the VSA switch, and plug it into the automatic day/night mirror harness 5-pin connector.

    mirror-step004.png

  5. Using one wire tie A, secure the automatic day/night mirror harness to the vehicle harness as shown.

    mirror-step005.png

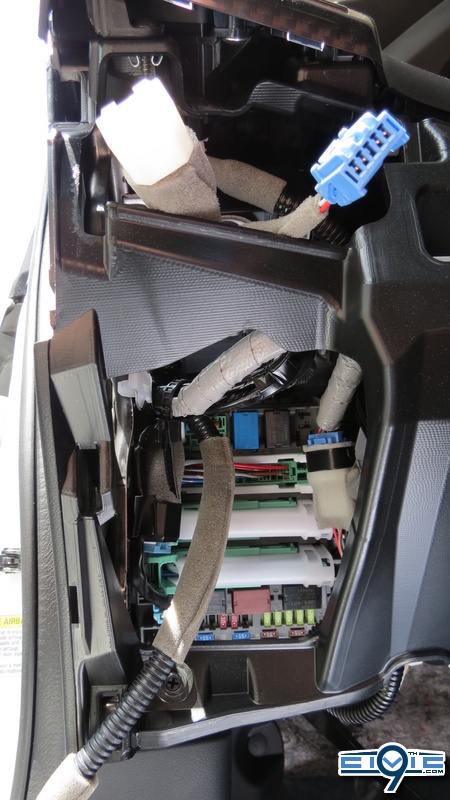
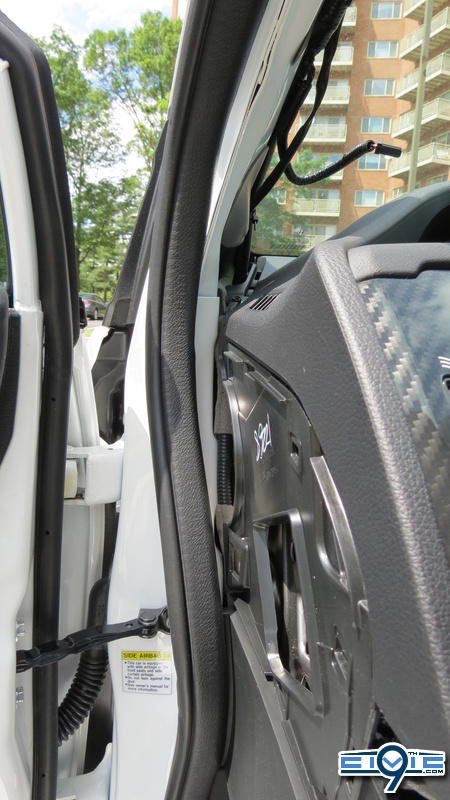
  6. Route the harness between the dashboard and the A-pillar.
    Insert the automatic day/night mirror harness between the dashboard and the driver’s A-pillar.

    mirror-step006.png
    060_G.sized.jpg

    mirror-step006a.png
    067_G.sized.jpg


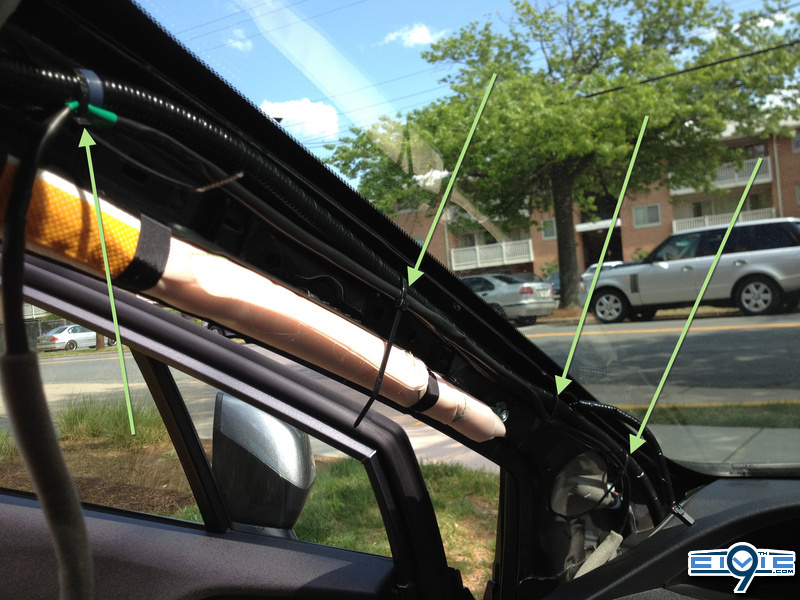
  7. Align the green tape on the harness with the vehicle clip and secure the harness with a wire tie, then secure the rest of the harness to the vehicle's harness with additional wire ties.

    093a.sized.jpg


  8. Route the harness behind the headliner. Be very careful not to crease or bend the headliner.

    mirror-step008.png

  9. Plug the harness 7-pin connector to the rear of the mirror.

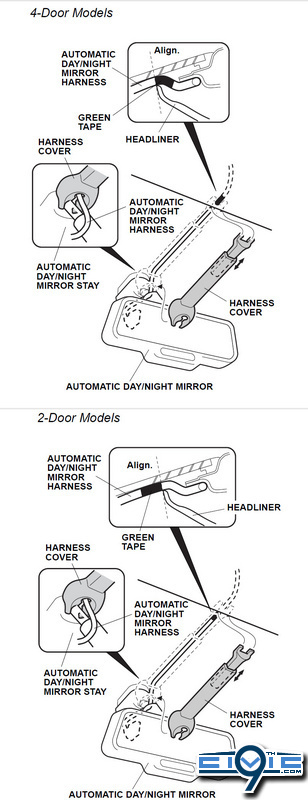
  10. Align the green tape on the harness at the headliner as shown below. Secure the harness cover to the mirror stay and put the top of the harness cover behind the headliner.

    4_26_2012_11_39_52_PM.sized.jpg

    096_G.sized.jpg


  11. Using isopropyl alcohol on a shop towel, thoroughly clean the area where the urethane tape will attach.
    Secure the harness to the vehicle panel with one urethane tape as shown in Honda's instructions. Be very careful not to crease or bend the headliner.
    Note:
    This part can be pretty tricky to do on your own. I found it marginally successful to hold the harness wire in place with one hand, pulling the tape backing away from the urethane tape, and resting that tape in the headliner until I got it just right into position, then letting the harness wire fall on it. This sounds ridiculous, but it was the best idea I had at the time of this install.

    mirror-step011.png

  12. Reinstall all removed parts.
 
Last edited:
  • Thread starter
  • Staff
  • #3
068_G.sized.jpg


Function Check:
  1. Turn the ignition switch to ON, but do not start the engine.

  2. Turn on the switch and check that the LED light comes on. It's hard to tell, but it should turn green.

    mirror-function01.png

  3. Cover the front sensor in the mirror with your hand and use a flashlight on the rear sensor (the one facing you). Make sure the mirror surface becomes dim.

    mirror-function02.png

  4. Make sure the parking brake is locked securely.
    Step on the brake pedal and move the select lever to Reverse.
    Repeat step 3 and make sure the mirror surface does not become dim.

  5. If the automatic mirror does not function properly, check the fuse and all connectors.
 
Last edited:
Nice write up. However, I'm convinced that I don't have the necessary skills. Any idea how much it'd cost to have installed (how many hours)?

Obviously, I wouldn't want to go to a dealer :)
 
  • Thread starter
  • Staff
  • #6
Nice write up. However, I'm convinced that I don't have the necessary skills. Any idea how much it'd cost to have installed (how many hours)?

Obviously, I wouldn't want to go to a dealer :)
You don't give yourself enough credit. It's quite easy to do, especially with a write-up that trumps what Honda offers.
The standard installation time is 0.6 hours, so it just depends on how much that dealership charges per hour. They also tend to charge you full retail price on the accessories, so you end up bending over quite a bit.
That all said, having the dealership install it will magically grant you a full 3-year warranty, whereas installing yourself only gives you one.

Decisions, decisions.
 
Back
Top