- Staff
- #1
DIY 2013-2015 Ambient Light Kit


This article covers the ambient light kit installation for model years 2013 through 2015.
Note: Photos shown here depict installation on a 2014 Si.
Application: Coupe and Sedan
Installation time: ~60 minutes
What you need:

This article covers the ambient light kit installation for model years 2013 through 2015.
Note: Photos shown here depict installation on a 2014 Si.
Application: Coupe and Sedan
Installation time: ~60 minutes
What you need:
- Red Ambient Light Kit (08E10-TR0-100C) or Blue Ambient Light Kit (08E10-TR0-100D)
- Philips screwdriver
- Ratchet or open end wrench
- Trim tool
- Shop towel
- 8mm socket
- Masking tape
- Remove the glove box.


- Remove the driver's dashboard lower cover.

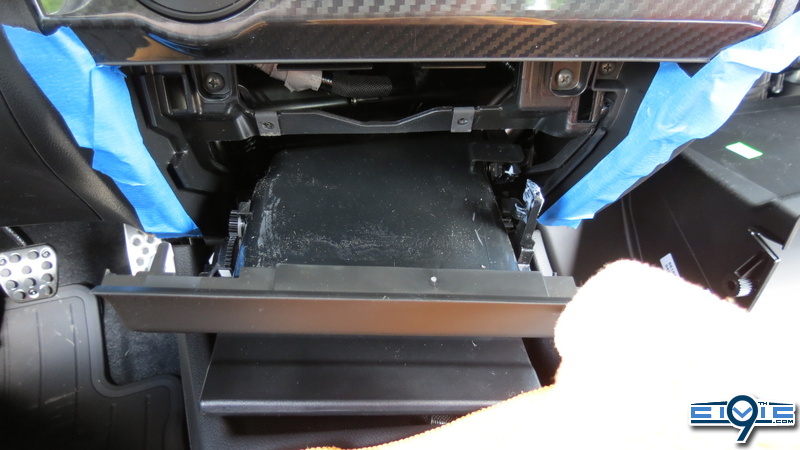
- Attach masking tape to the dashboard in the areas shown.
Move the shift lever to the N (neutral) position, and wrap a shop towel around the shift lever. This is to prevent scuffing when removing the panel.

- Remove the center lower panel (two self-tapping screws, four clips, and unplug the vehicle connectors, if equipped).

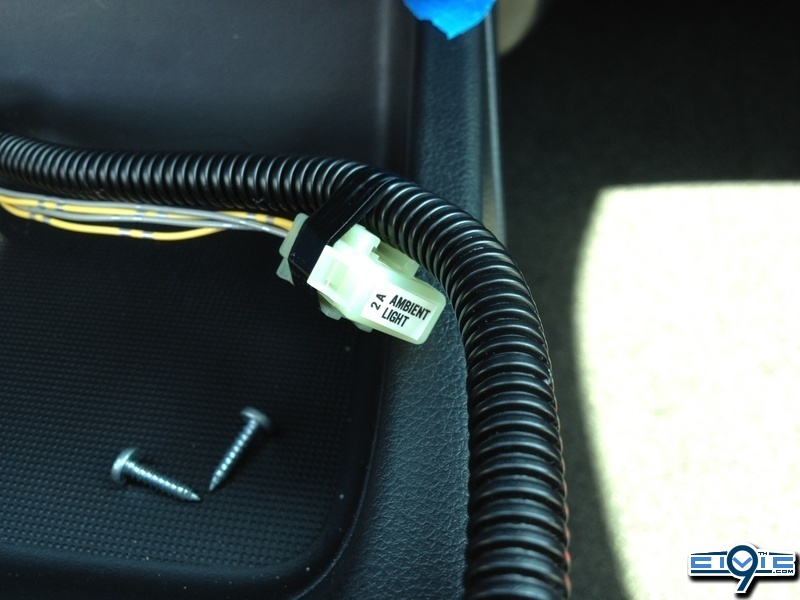
- Attach the fuse label (2A AMBIENT LIGHT) to the ambient light harness fuse case.
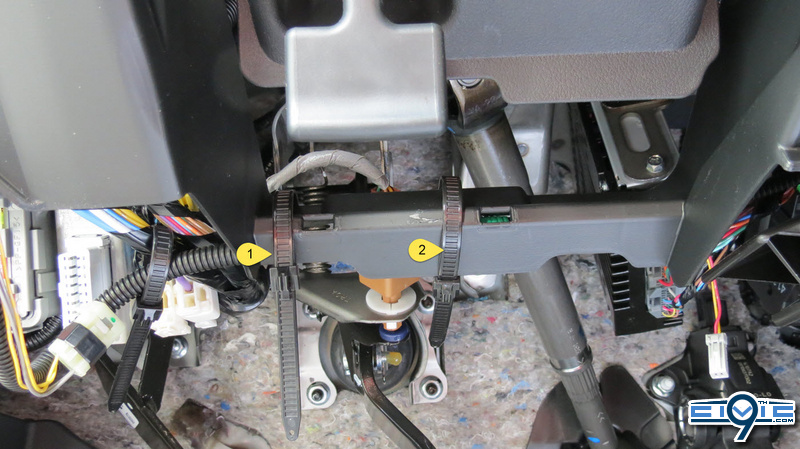
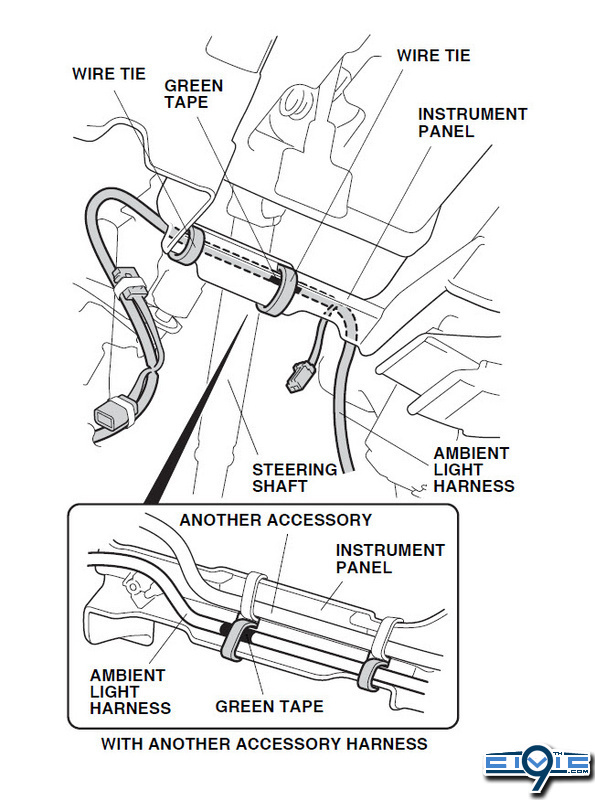
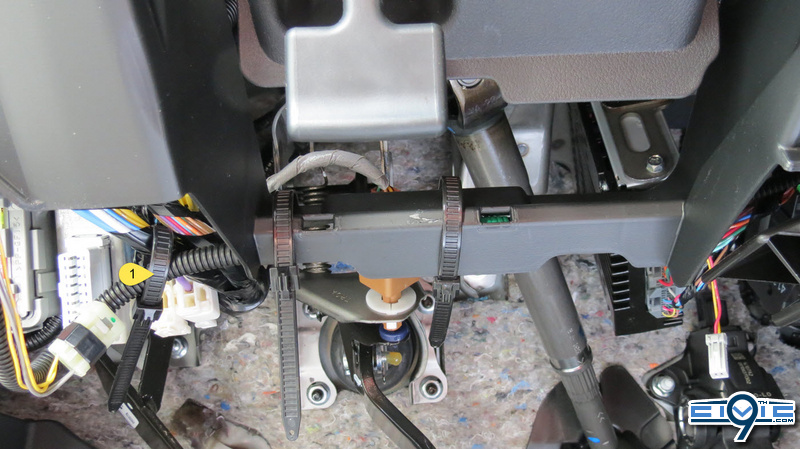
- Under the driver’s dashboard, align the green tape on the ambient light harness with the hole in the dashboard panel. Secure the ambient light harness to the dashboard panel with one wire tie at the green tape. If another accessory harness is already attached to the dashboard panel, route and attach the ambient light harness below the other harness.
Secure the ambient light harness with one additional wire tie in the other hole in the dashboard panel.
Note: Keep the wire ties a tad loose so that you can easily adjust the slack later.
- Route the ambient light harness up to the switch lid opening, and secure it to the vehicle harness with one wire tie.

- Unplug the vehicle 6-pin (5-pin on Si model) connector from the switch, and plug it into the ambient light harness 6-pin (5-pin on Si model) connector. Then, plug the ambient light harness 6-pin (5-pin on Si model) connector into the switch.
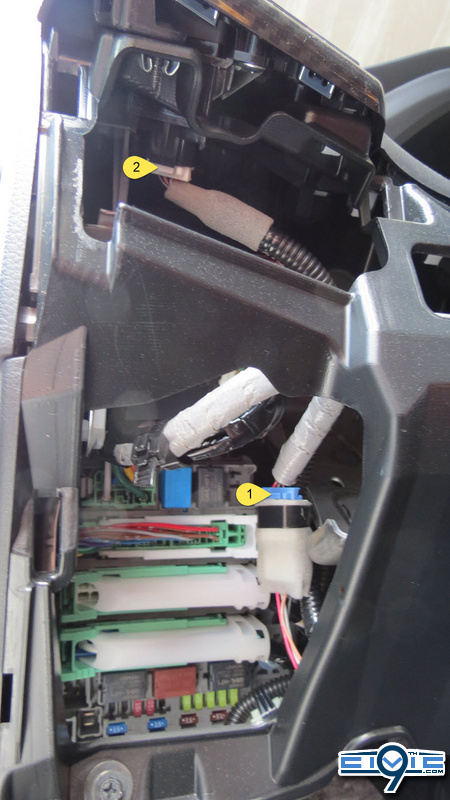
- Route the ambient light harness 2-pin connector towards the center lower panel opening.
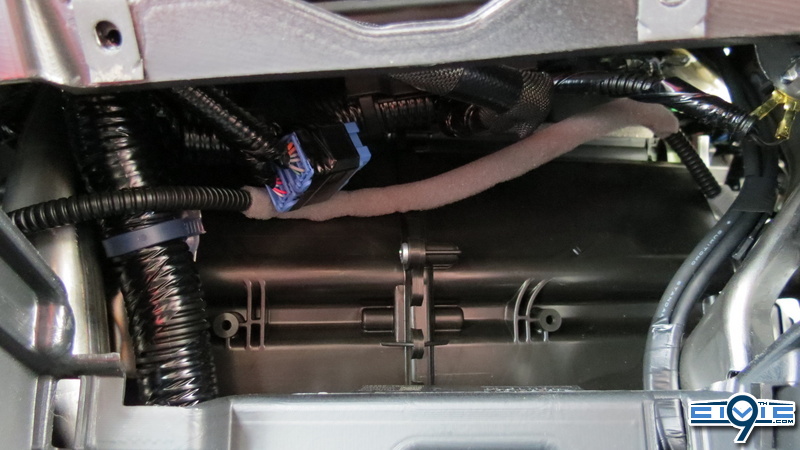
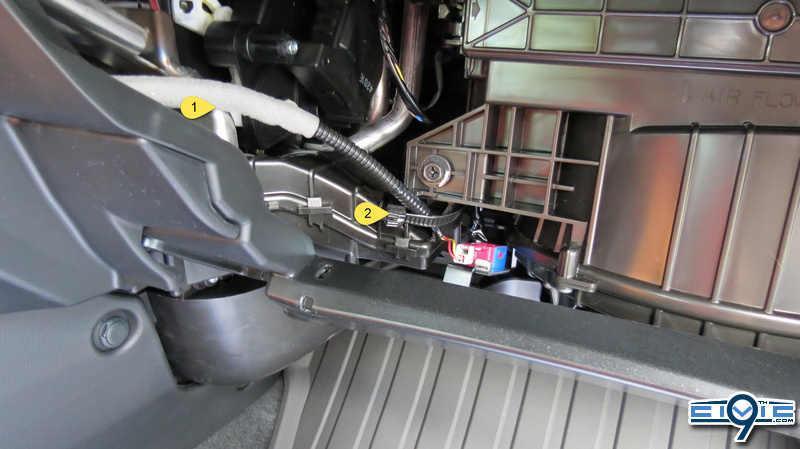
- Continue routing the ambient light harness to the passenger’s side of the vehicle. Inside the glove box opening, secure the ambient light harness with one wire tie at the location shown.
Note: You want the wire to sit above the metal frame as shown in the photo. This keeps it out of the way of the air vent actuator.
- Install the ambient lights to the left and right brackets by rotating them into position.

- Install the right bracket through the hole in the dashboard panel and secure it with the 8mm flange nut, then plug the ambient light harness 2-pin connector into the ambient light.

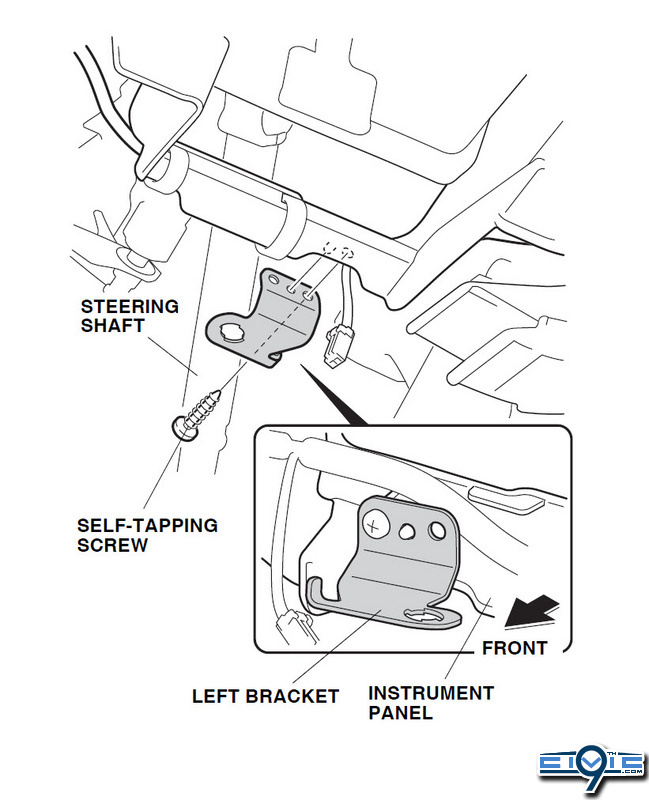
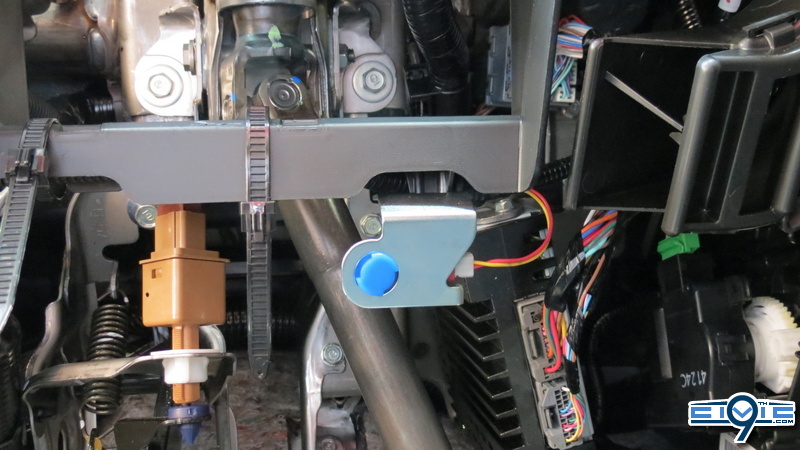
- Install the left bracket to the instrument panel and secure it with one self-tapping screw, then plug the light connector into the light.
- Test functionality by turning the light switch to the ON position.
- Tighten any loose wire straps.
Reinstall all removed parts.
- If the ambient lights do not come on, check the fuse and all the connectors.
Last edited:


