2014 Coupe Si Grill versus Non Si Grill

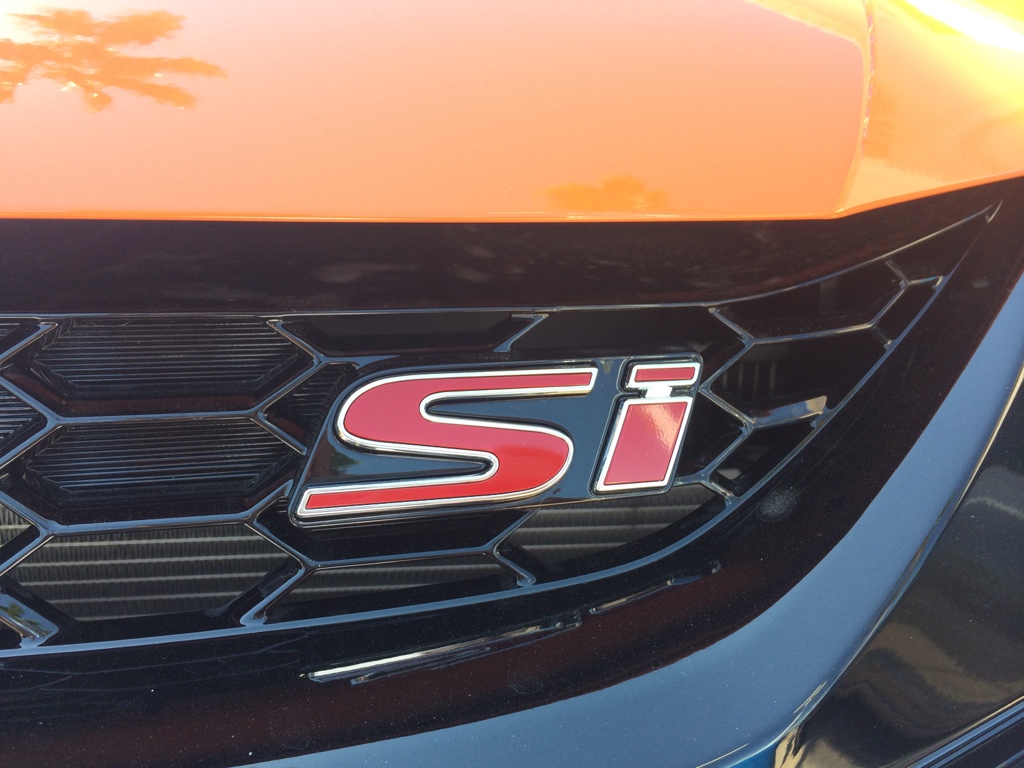
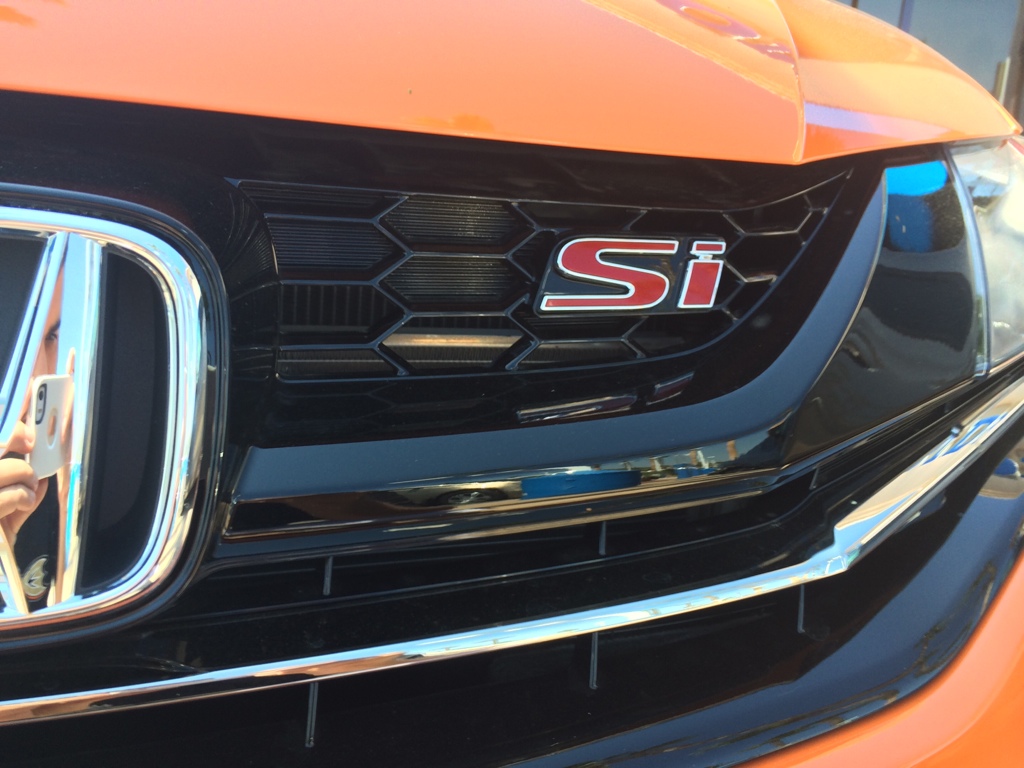
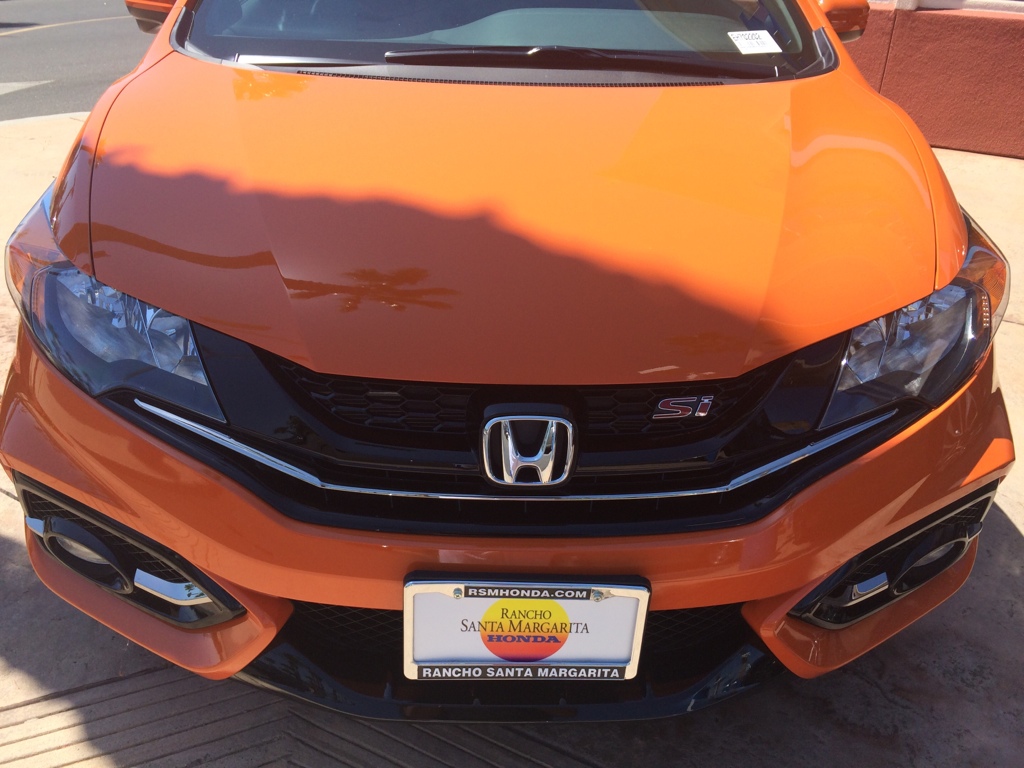
Yeah i know... I guess i am trying to find a solution to covering up the black box where the Si badge would go... Any suggestions would be apprechiated =P.... I really really hate the front grill on the 14 EX-L =P
 
da5yqyqu.jpg


8y7u6ase.jpg
uqe2yjaq.jpg


Up close photos of the Si badge if any non Si users wanted a peek
 
I have not. Still waiting on college hills honda to add the discount to my account. It's slown down my process. :(
 
Update: Just placed my Order... Hopefully should see it soon =) Although I honestly do not know the turn around time on a purchase like this =)
 
I kind of did something similar to you with my 2013 touring edition(Ex-L) sedan. I hate the non si lower grille all though with fogs it helps it just didn't look aggressive enough for me. That big chrome bar that makes the car look like it's smiling and feminine bothered the hell out of me. I even vinyled it to see if it would help and I could still see that bumper smiling at me. Lol. Anyways my point is everything is interchangeable with these assembly line cars. They make it so everything is interchangeable. Helps cut costs. I personally love the way my civic looks now and I was the first like your self to be the guinea pig! Since I've don't it I've help a few guys out with what parts to order and what not. Good luck looking forward to the end result. Take pics throughout the mod. So when people ask how to do it or what's needed you'll have pics to paint a better picture. Lol
11bb7e871d4059c948b9ebec71eb95e6.jpg
1a8f80e90768488303ecde877e624784.jpg
 
Update: Easier Said than done....

I just received the parts I ordered & was excited to get home & get started on what seemed to be an easy project... Well that word easy has been changed now to "hard". I am looking for any suggestions on how to get this part sorted out. So I popped the hood after watching a video on how to take off the grille on a 14 Si Sedan and was advised the same set of steps should apply for the coupe and coupe si. Although the steps appear to be similar there are differences never the less...

1. I popped off the 8 Marked whatchamacallits (Picture attached) & then removed the plastic cover shown in the 2nd picture.

Popped Off 1.jpg
Plastic thing 2.jpg

2. I did my best to look inside the uncovered area to see if I could find the remaining push tabs to remove so I can remove the grill. I looked for a while, but really was not able to find anything resembling the push tabs I was advised to look for. I tried to then wiggle the grill around to see if it would just "come loose".... well I was not able to get the grill loose, but I was able to cause a new problem... I now have a small section of the grill that sticks out & when I try to put it back in place it just pops back out. My guess is that there was a push tab there & me wiggling it around caused it to go free... Unfortunately the section is basically impossible to get to by hand so i have put the push tabs back on in hopes to do some better research regarding this task. Here is what it looks like now =/...

Popped out 3.jpg

Popped out 4.jpg

Popped out 5.jpg

This is what it is supposed to look like...

Should look like 6.jpg
 
When I look at the replacement part I can see it looks like there are a total of 6 spots where push tabs of some sort should go...

Replacement Part 1.jpg Replacement Part 2.jpgReplacement Part 3.jpg
 

Attachments

  • Replacement Part 2.jpg
    Replacement Part 2.jpg
    65.6 KB · Views: 7
Based on my point of view I am afraid I will have to remove the entire bumper to gain access to these tabs (Especially 1,2,5,& 6). Any suggestions or advise will be appreciated.
 
Word of advise don't force it. Take the bumper off and just clip it in. Easier too. If it was a sedan it's doable I did it.
ea8f1a7cc724b26cb4bcc609cf7cee49.jpg
6 clips and it comes off. Sorry to hear it's not going smoothly.
 
Thanks @PMMcivicFB2

Yeah I am going to have to grow a pair and do it... I just do not want to damage the bumper or the parts in any way. Any tips or advise on the bumper removal? I am a complete novice when it comes to this kind of stuff. Also When the bumper comes off how easy will it be to disconnect the fog lights? I imagine the bumper cant hit the ground with the amount of slack the fog lights wire length is. Any tips tricks or suggestions are welcome. Thanks for your help ^^
 
I do have another question regarding the back side of the factory emblem... On the parts I ordered I did not receive any clips to clip the emblem onto the grill as shown in your picture. Any suggestions on how to mount the factory emblem on besides pushing it through the two holes? My thoughts were to use a little bit of super glue on the 2 Pegs showing in my picture. Let me know what your thoughts are regarding this... Thanks again ^^

IMG_1563.JPG
 
Make sure you have all screws and clips under the hood and bumper. Take the two Philips screw near the wheel well and start from on corner and start pulling the bumper off the tabs. Don't force it u may of missed a clip or something. Lay a blanket on the ground below the bumper. Unclip fog harness if h have it. It's actually really easy but yeah scary I've done it a few times and I'm a nervous wreck. Lol. Good luck.
 
I do have another question regarding the back side of the factory emblem... On the parts I ordered I did not receive any clips to clip the emblem onto the grill as shown in your picture. Any suggestions on how to mount the factory emblem on besides pushing it through the two holes? My thoughts were to use a little bit of super glue on the 2 Pegs showing in my picture. Let me know what your thoughts are regarding this... Thanks again ^^

View attachment 40075
Yeah super glue should do the trick. Or see if honda has the pieces to lock the emblem in. Or use your existing ones.
 
Yeah super glue should do the trick. Or see if honda has the pieces to lock the emblem in. Or use your existing ones.

I went back to the parts list and found what I was looking for to lock down the Honda emblem to the main part of the grill. Here is a picture of the part. I purchased 2 one for each peg.

IMG_1570.JPG
 
Back
Top