jasonandre
Deal with it
DIY 2012 Honda Civic Navigation System Software Update Guide
This article covers the installation of the 2013 Yellow USB Map Update v9.C0 for model year 2012. 2013 models already have this update.
Shown here is it installed on a 2012 Civic Si.
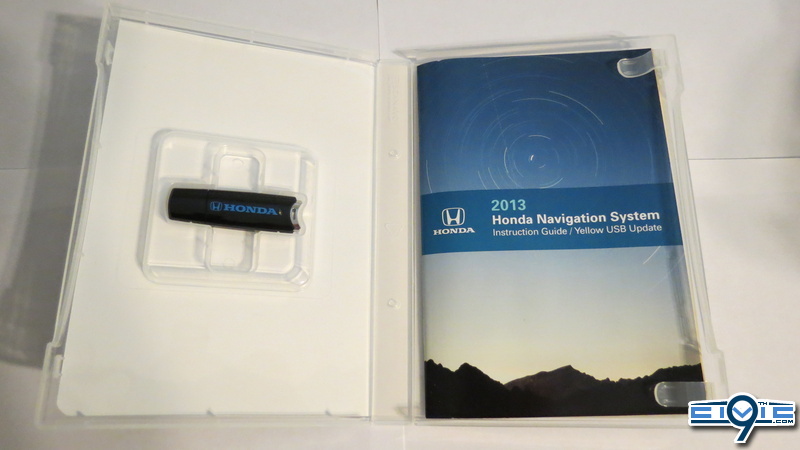
What you need:
Important Notes:
This article covers the installation of the 2013 Yellow USB Map Update v9.C0 for model year 2012. 2013 models already have this update.
Shown here is it installed on a 2012 Civic Si.
What you need:
Important Notes:
- Park your vehicle in a safe, well-ventilated area.
- The engine must be running to prevent the battery from discharging during the update.
Loss of power during the update can cause navigation system damage! - Do not drive your vehicle at any time during the update.
- The navigation function is not useable during the map update.
- The navigation system can not go back to the previous version after the map update.
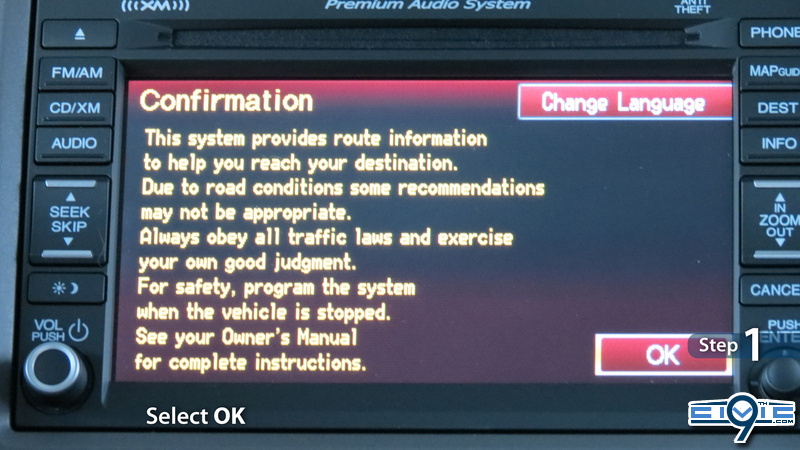
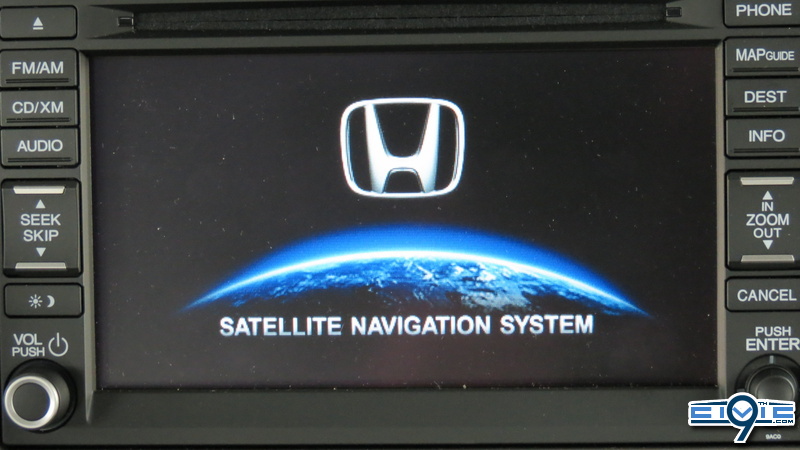
- Navigation system boot up.
Start the engine and let the navigation system boot up.
When the following Confirmation screen appears, select OK.
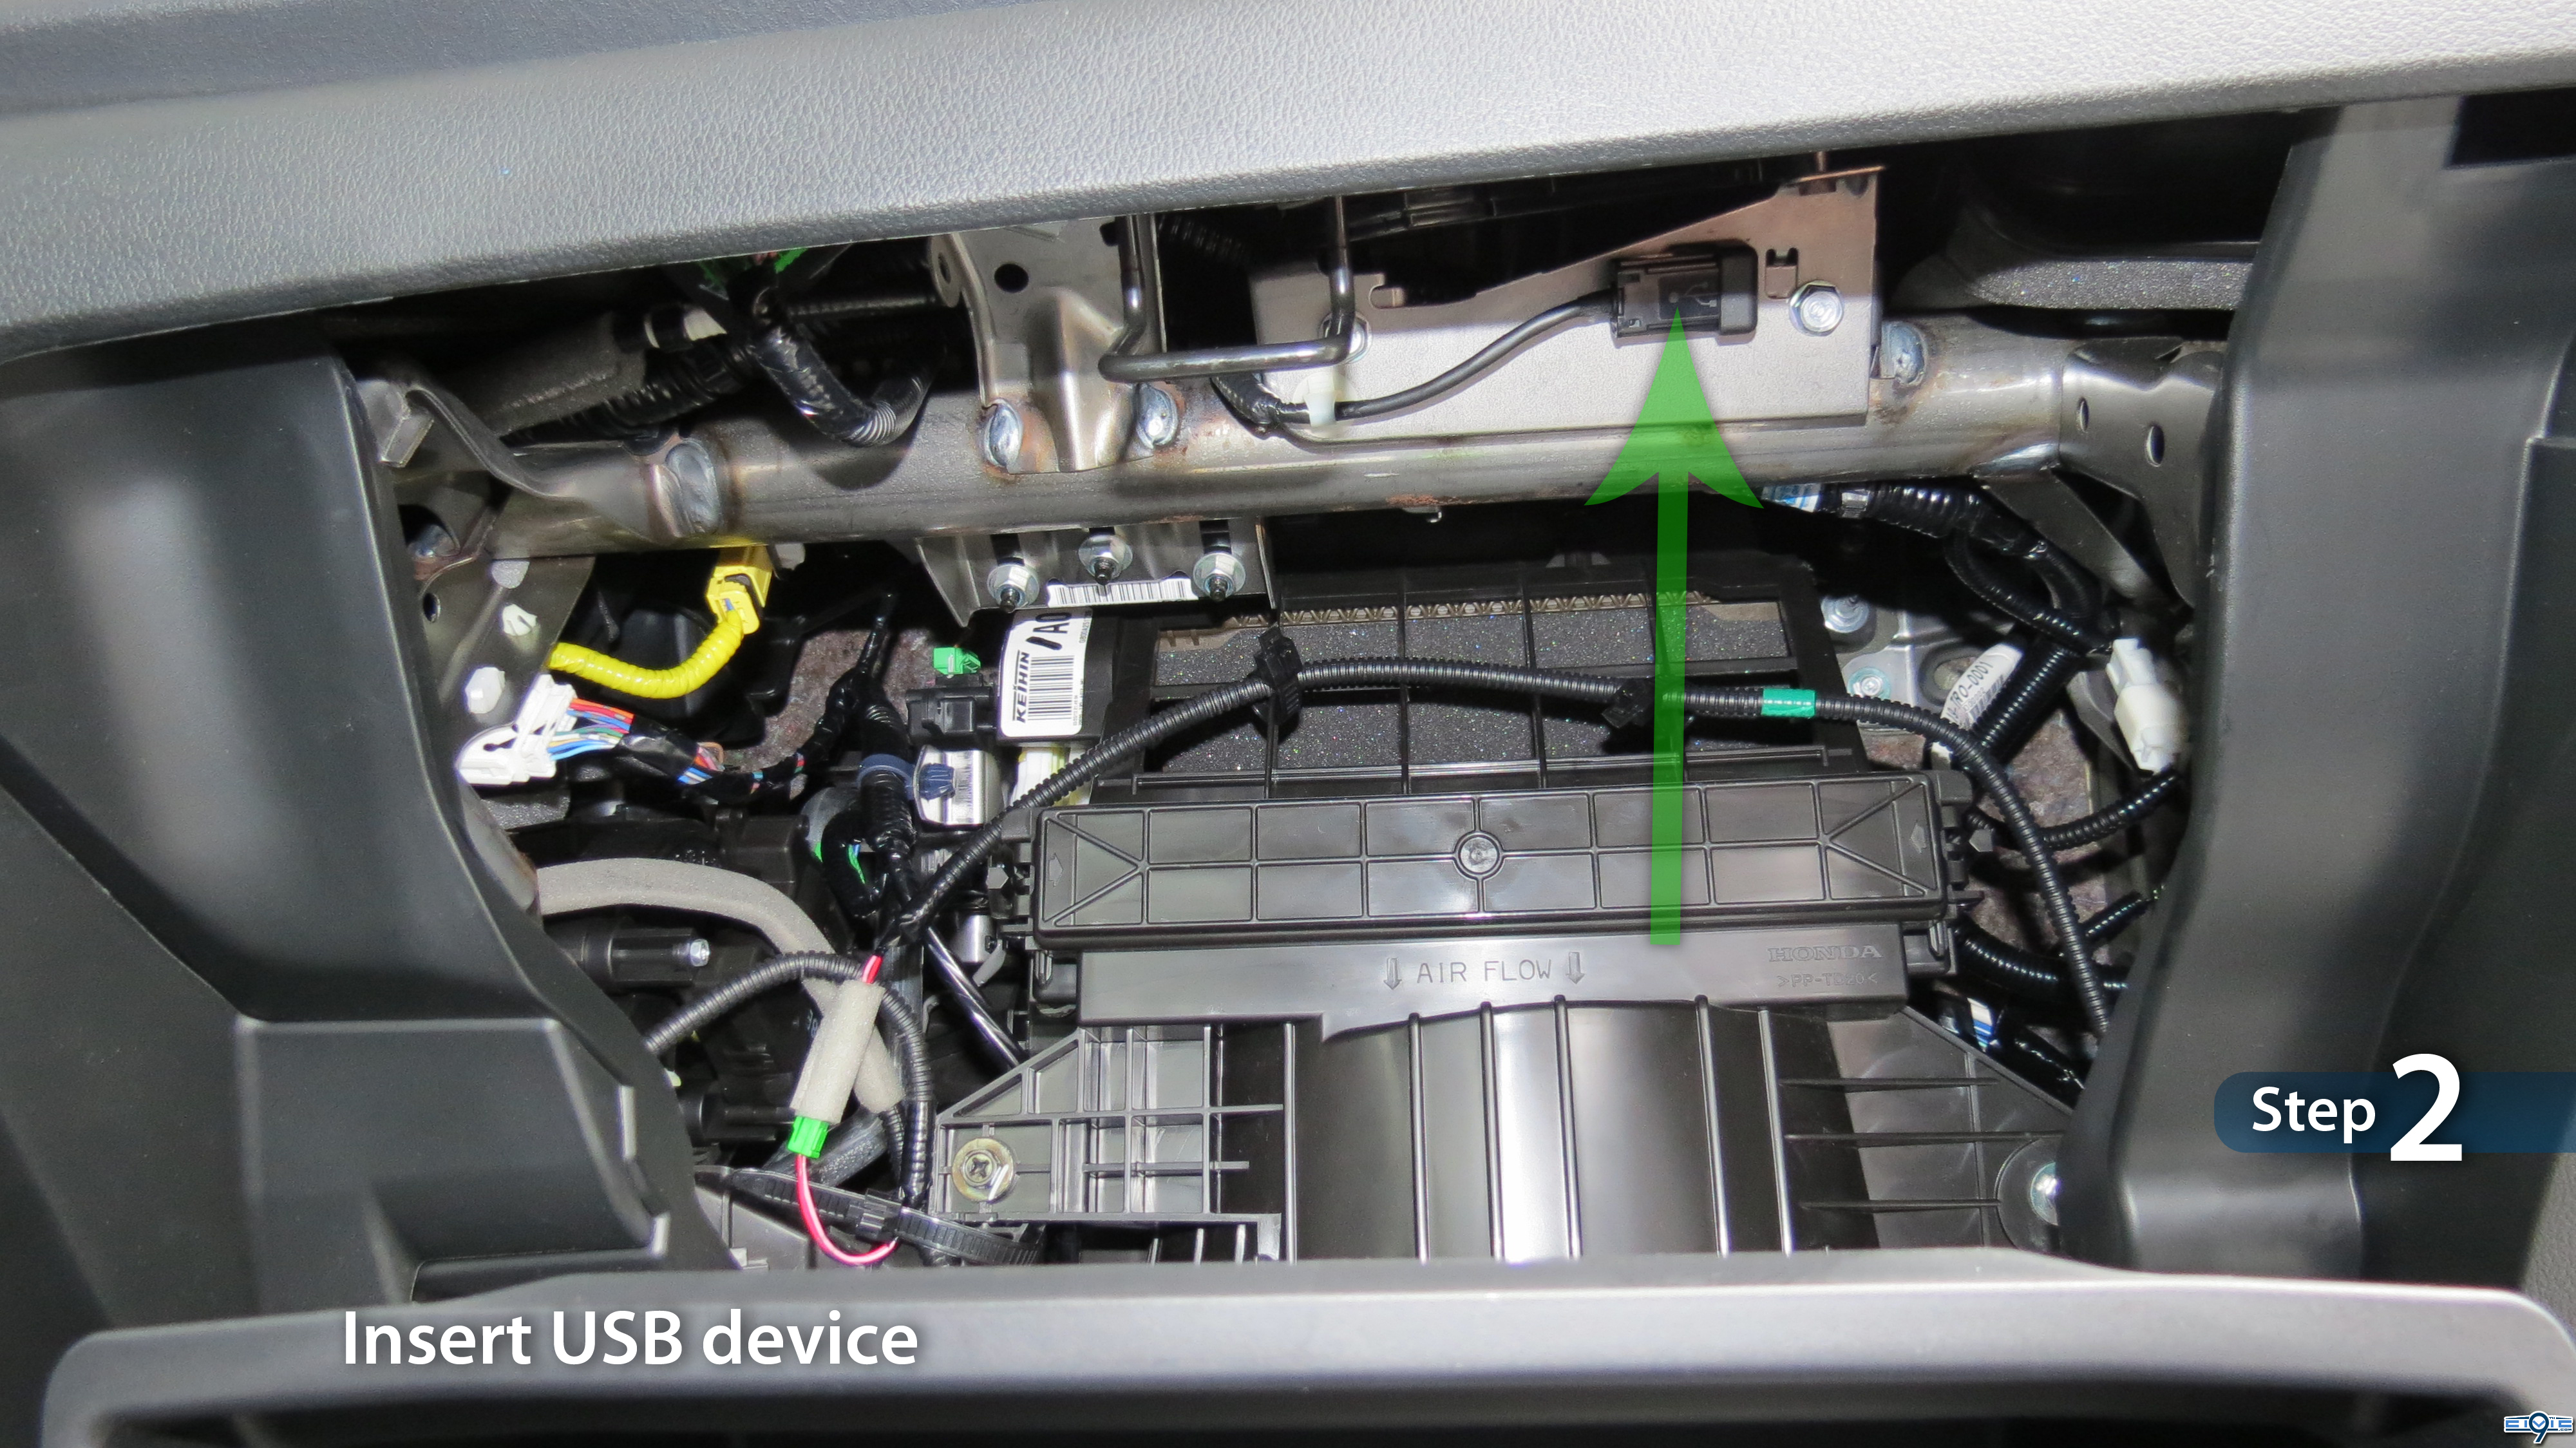
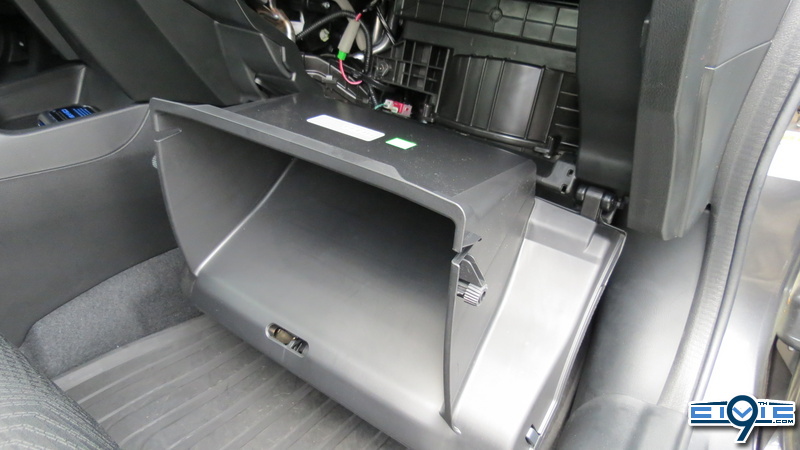
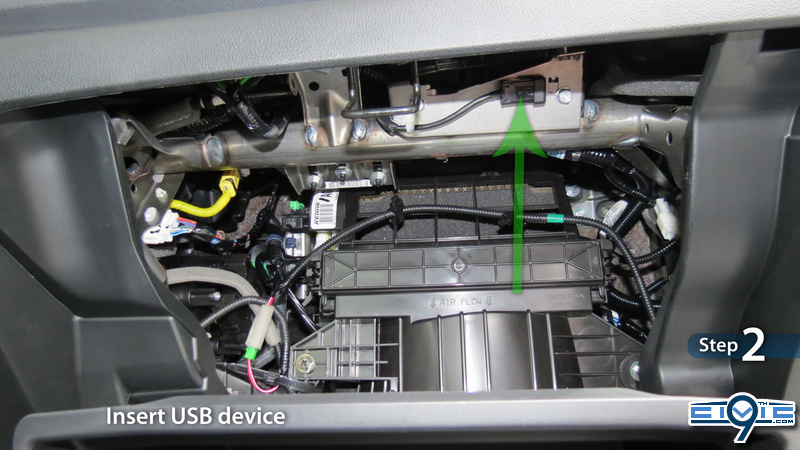
- Install the USB device.
Open and fully extend the glove box.
Locate the USB interface and install the USB device. The USB interface is located in a holder in the upper portion of the glove box. Pull down the USB cable from above.
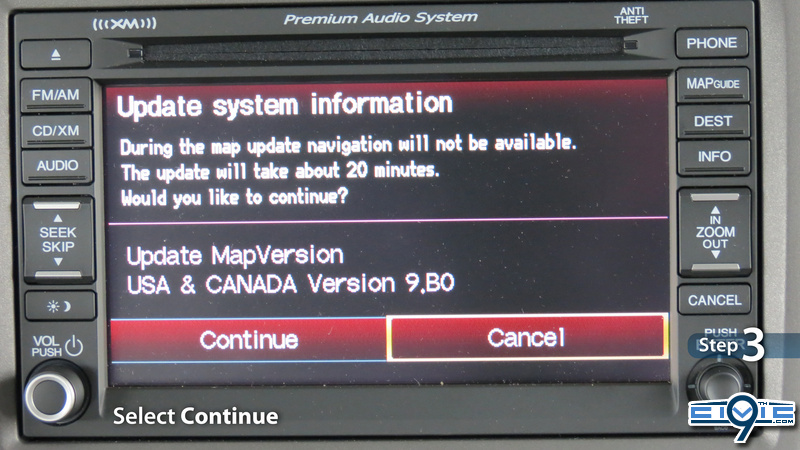
- Start the update.
When the following screen appears, select Continue on the touch screen.
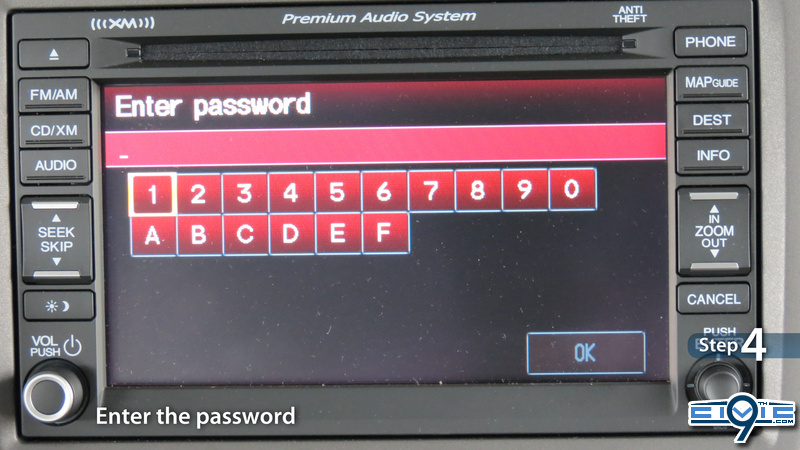
- Enter the password.
When the following screen appears, enter your 12-digit alpha-numeric password that came with your email confirmation when your ordered the update.
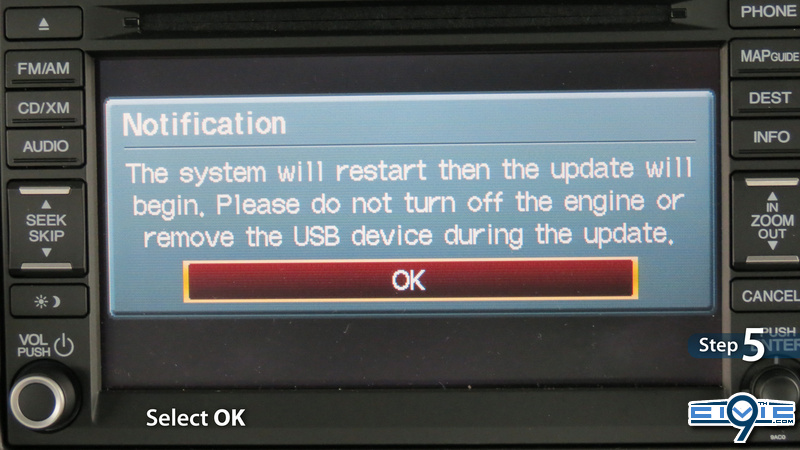
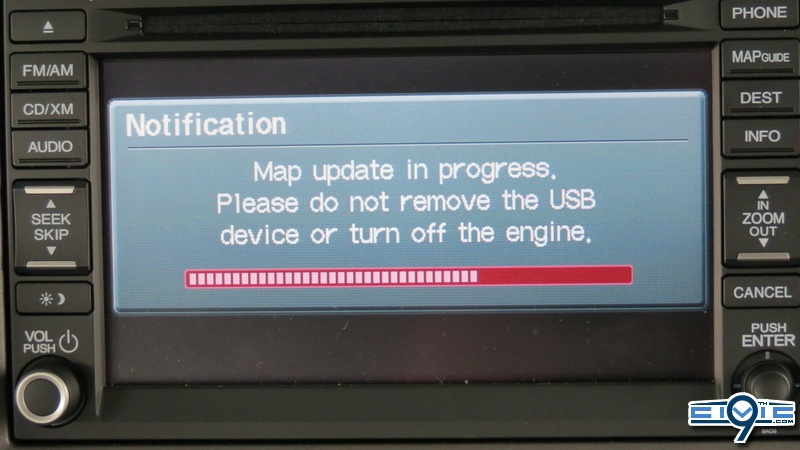
- Update will commence.
When the Notification screen appears, select OK on the touch screen.
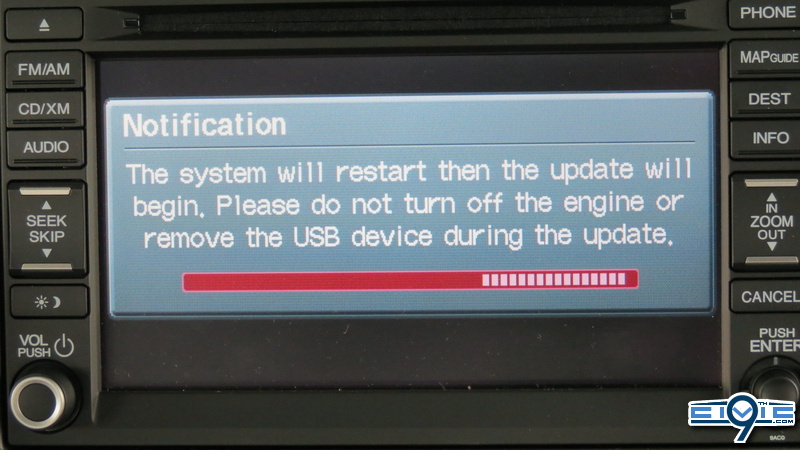
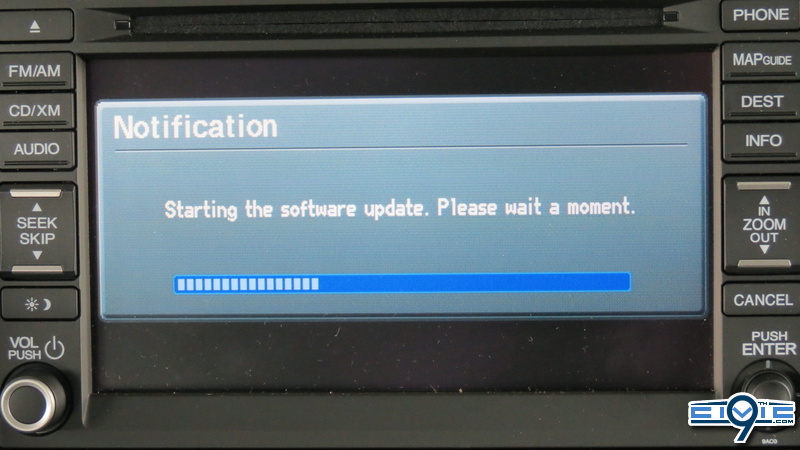
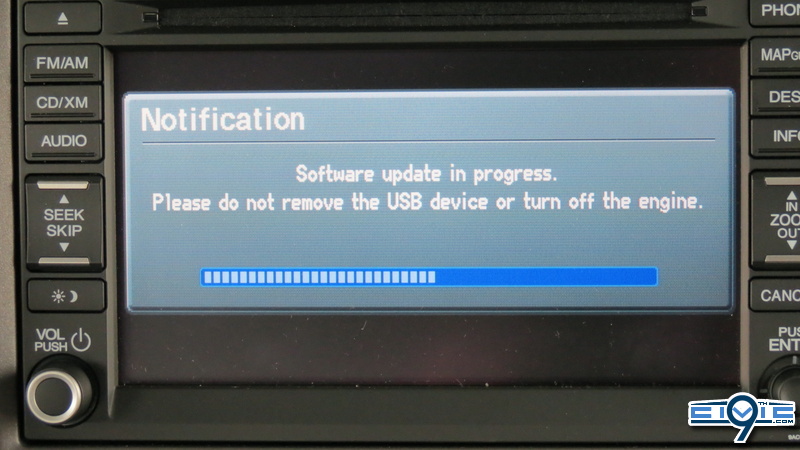
Various screens will then be presented as the software update cycles the process, during which the navigation system will automatically reboot. This will take between 15-20 minutes.
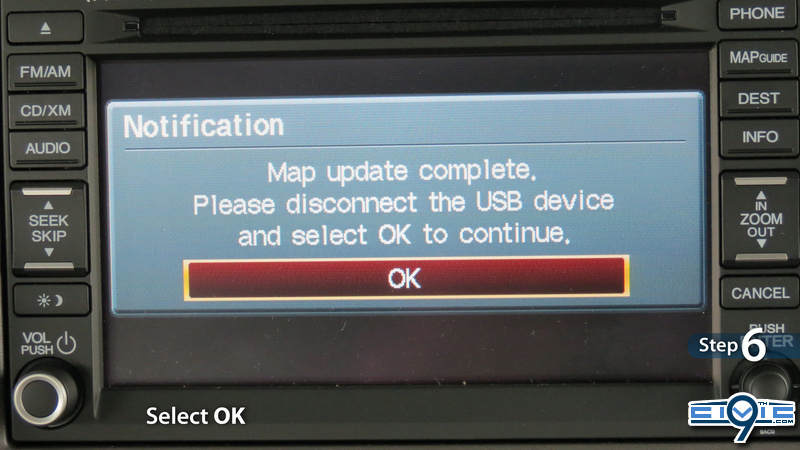
- Map update complete.
The map update is complete when the following Notification screen appears.
You may now remove the USB device and reinstall the USB adapter interface in it's holder.
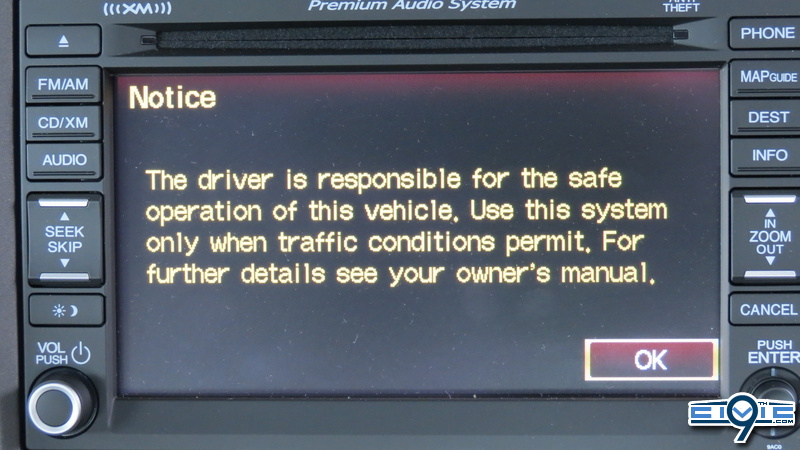
The following Notice screen appears. Select OK on the touch screen.
With this update, the Notice screen shown below replaces the prior Confirmation screen. This screen will only appear for 5 seconds, then change to the map screen regardless if OK is selected.