I just wanted to add a little fullness to the sound of the base system, so I set out to get this installed and do it myself.
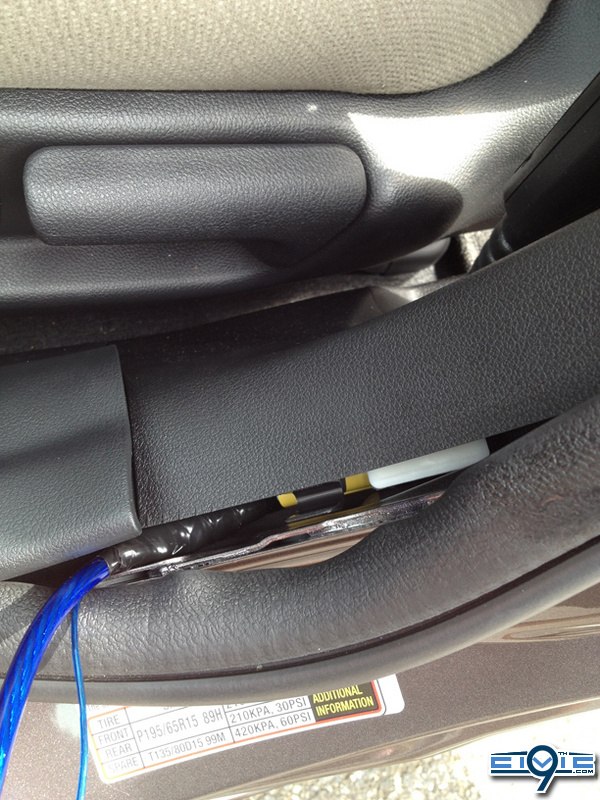
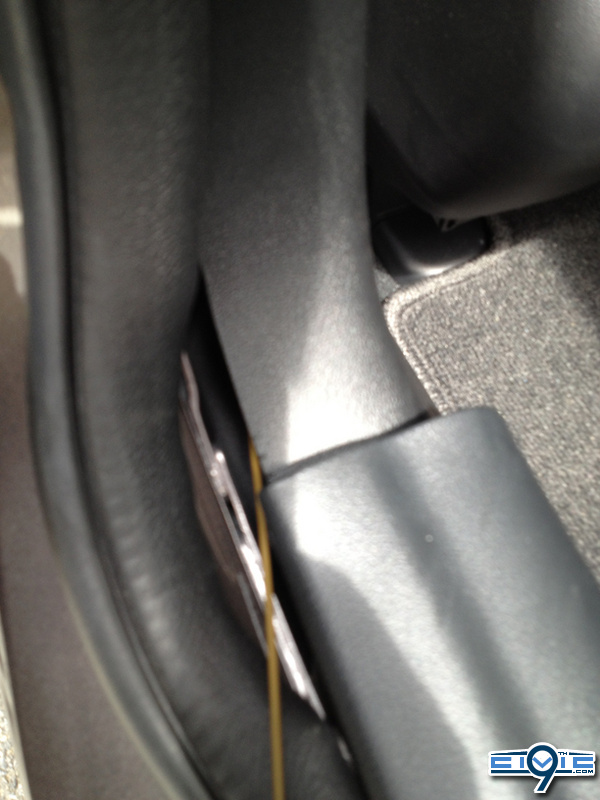
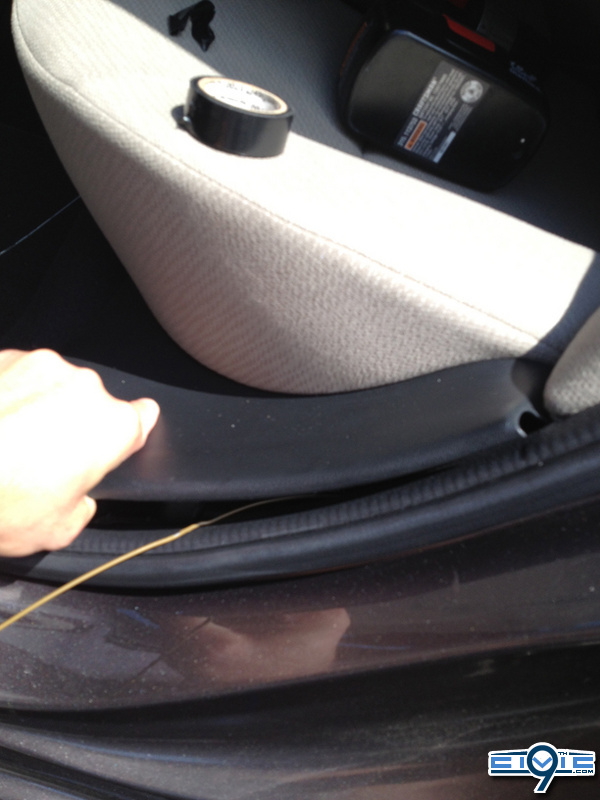
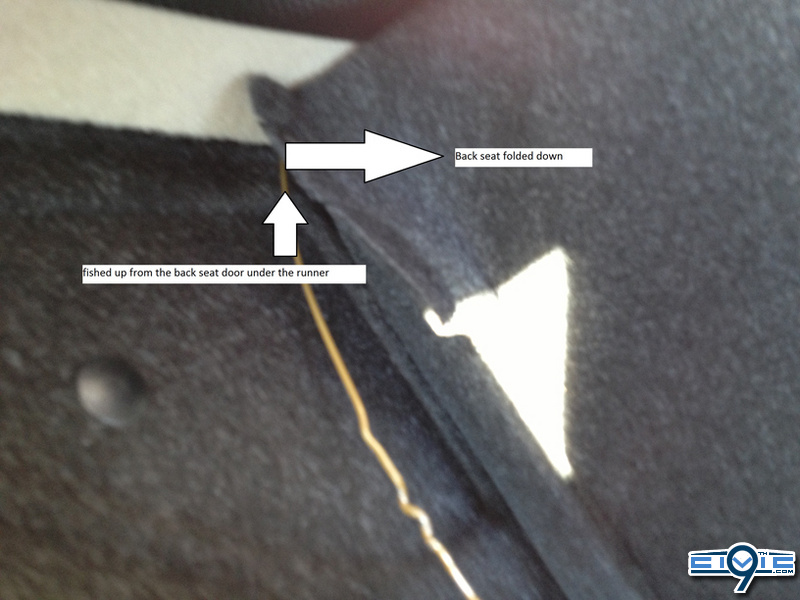
I found a bunch of different posts about running the cabling, but didn't find anything on the whole that covered how to tap into the wires for the speakers, and get the cables ran, so I took pics of my install, and thought others could benefit from it if they haven't tapped into speakers before for signals.
I broke the post into two parts to include all of the pics that I took.
What I purchased:
Amp with high level inputs -- I'm using an Alpine MRV-M250 250W x 1 Subwoofer Amplifier
Sub/enclosure combo -- I ordered Rockford Fosgate Prime R1L-1X1 Single R1S410, 150 watts RMS
Amp wiring kit -- I used EFX Amplifier Wiring Kit 8-gauge w/Patch Cord
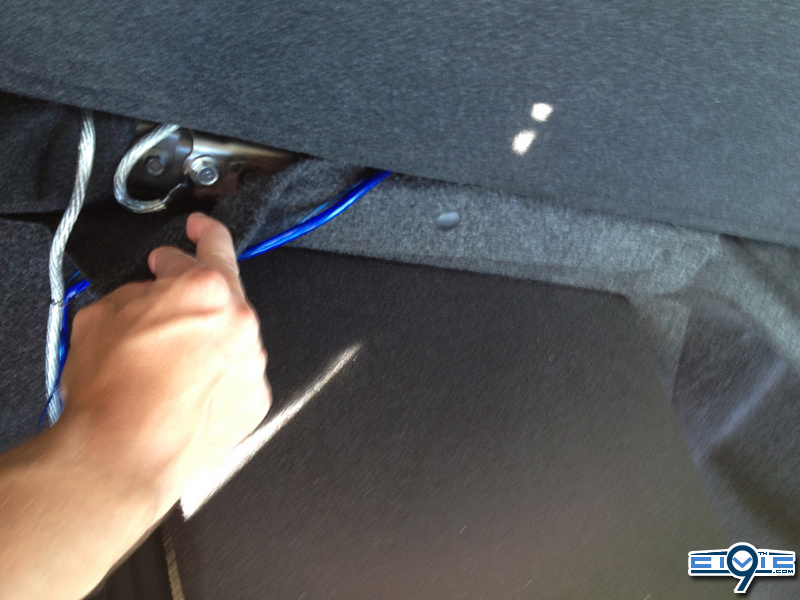
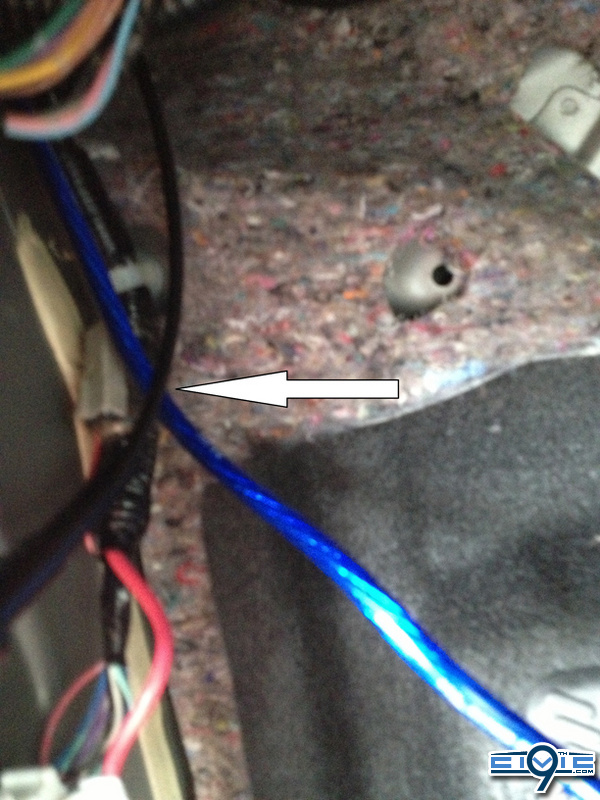
6 feet of speaker wire, 16 gauge
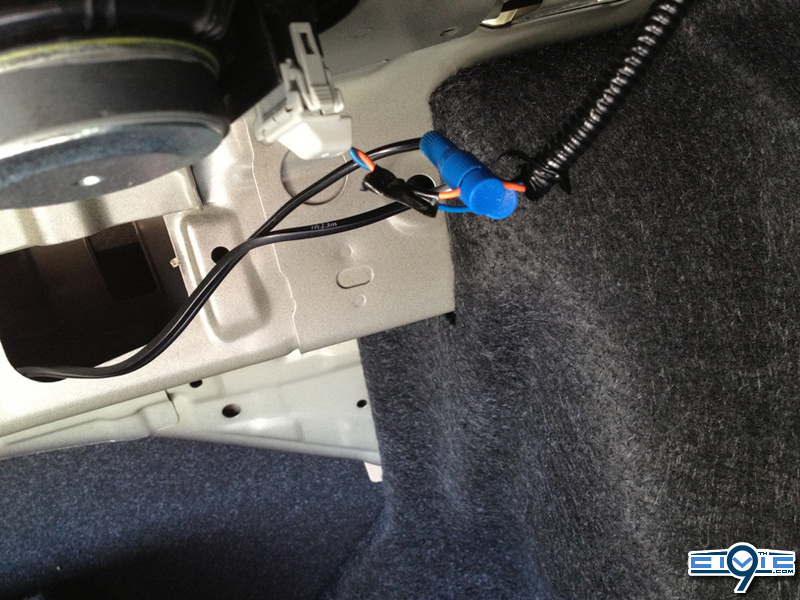
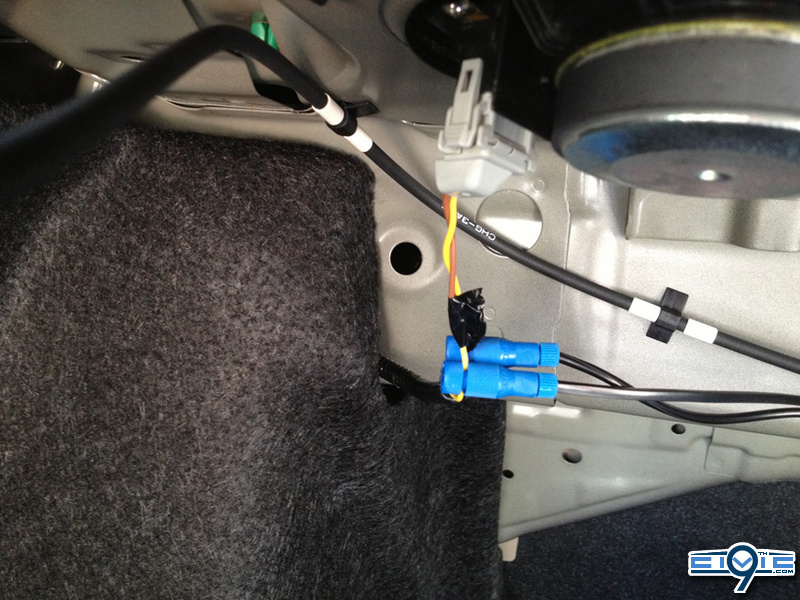
Wire taps -- Posi-Products Connector Kit 6 pieces Posi-Tap 16-18 Gauge (only need 4 of them, pos/neg for both back speakers)
Sub grill to protect the sub, not necessary but I got it anyway
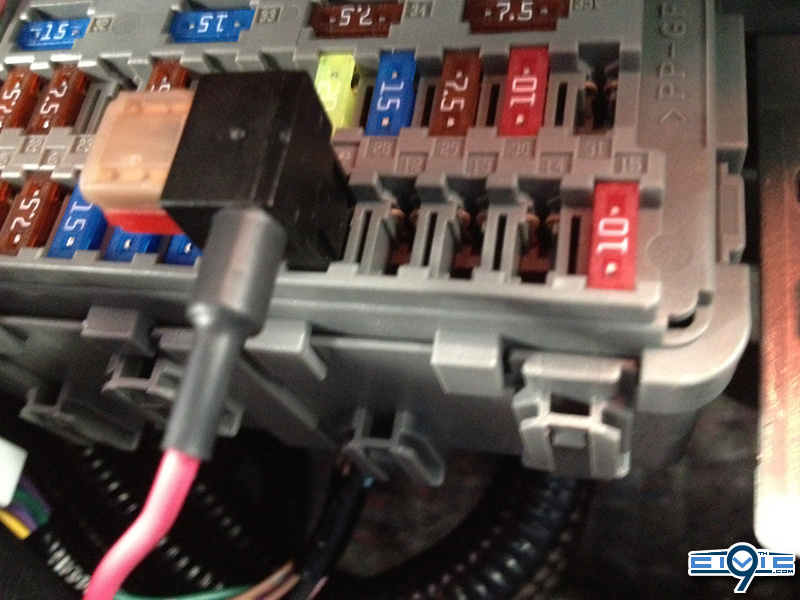
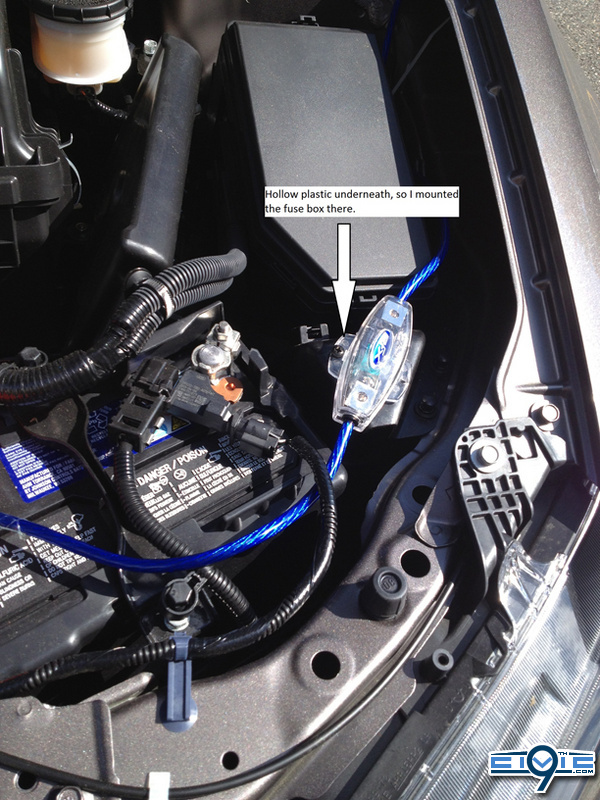
Mini "add a fuse" adapter to tap into the fuse box for the remote wire
Additional items to have:
Electrical tape
Wire stripper (8ga for power and ground cables, 16 ga for speaker wire, 18 ga for the remote wire I had)
Wire caps or soldering gun to join speaker cable from the posi-taps to the wiring harness on the amp)
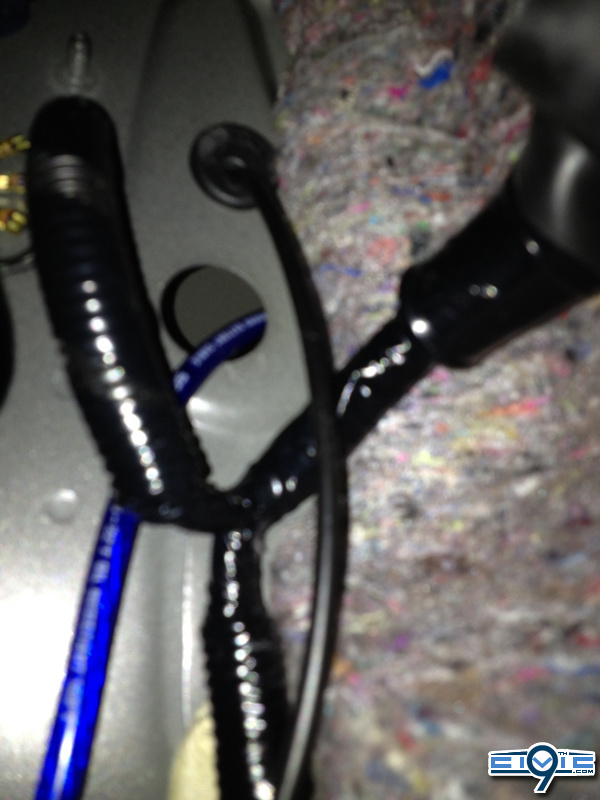
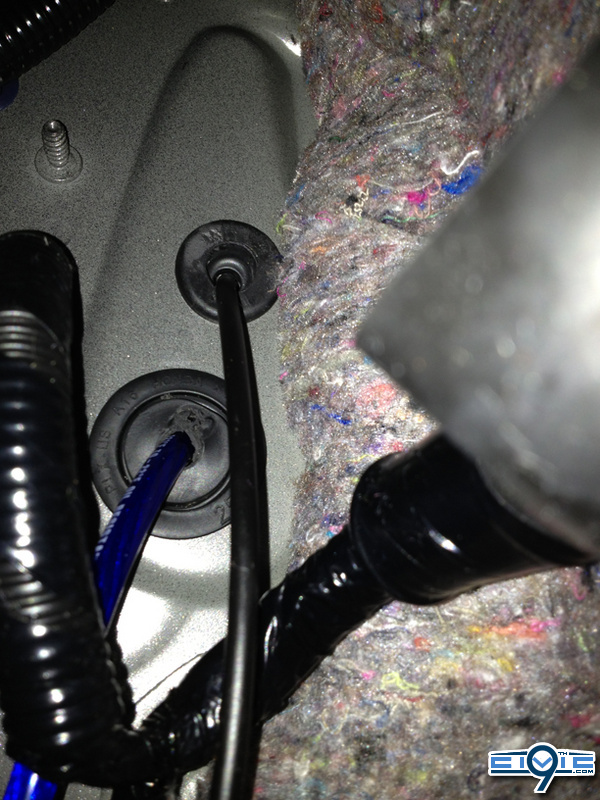
I ran the power cable through the side quarter panel like many others have, and through the rubber plug near the hood release cable. To me, this was the part of the install I wanted to be 100% sure of before I started.
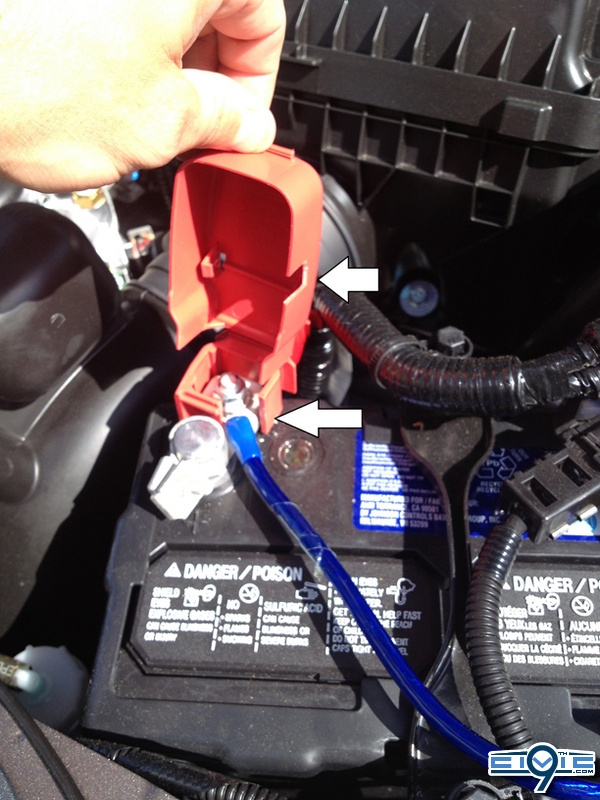
Step 1 - Disconnect the negative terminal on the battery. Make sure that stays away from the post -- Zip-tie it or tape it away.
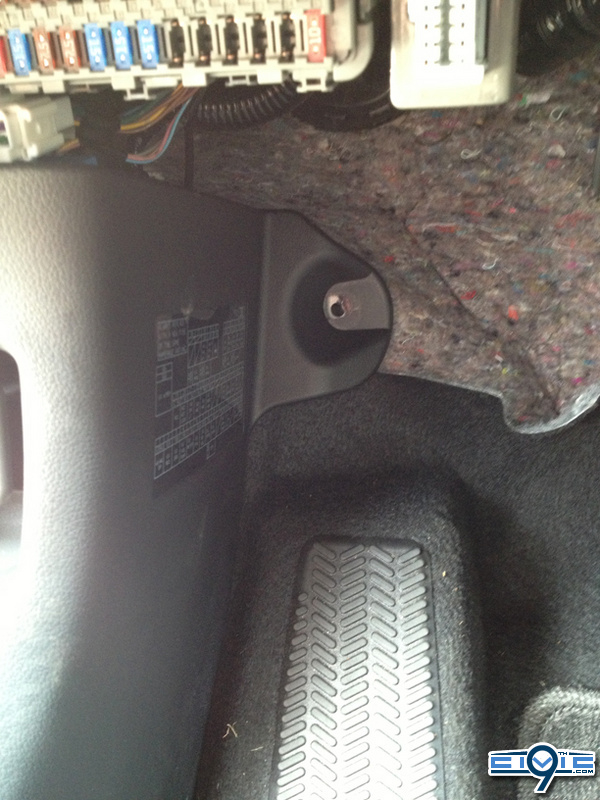
Step 2 - Locate where to fish the wire, and pull off the plastic cover by the side view mirror on the driver side to see the wire pull
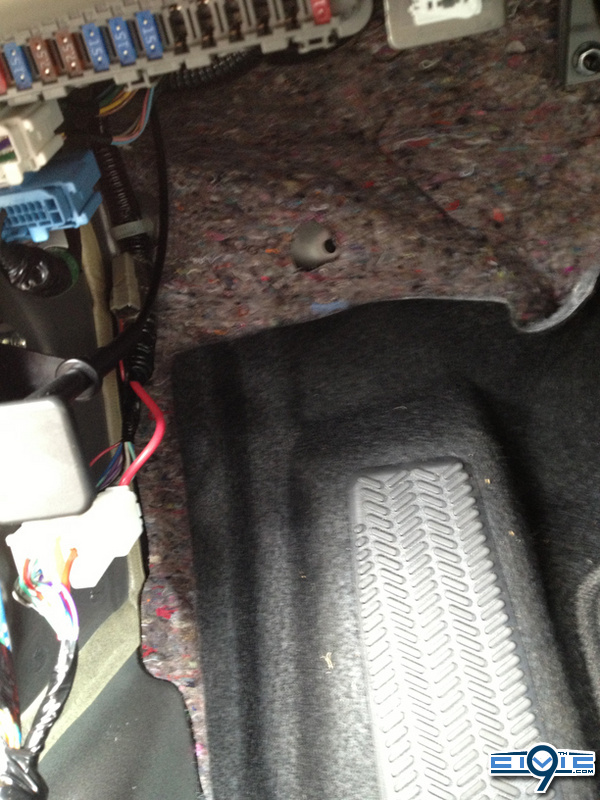
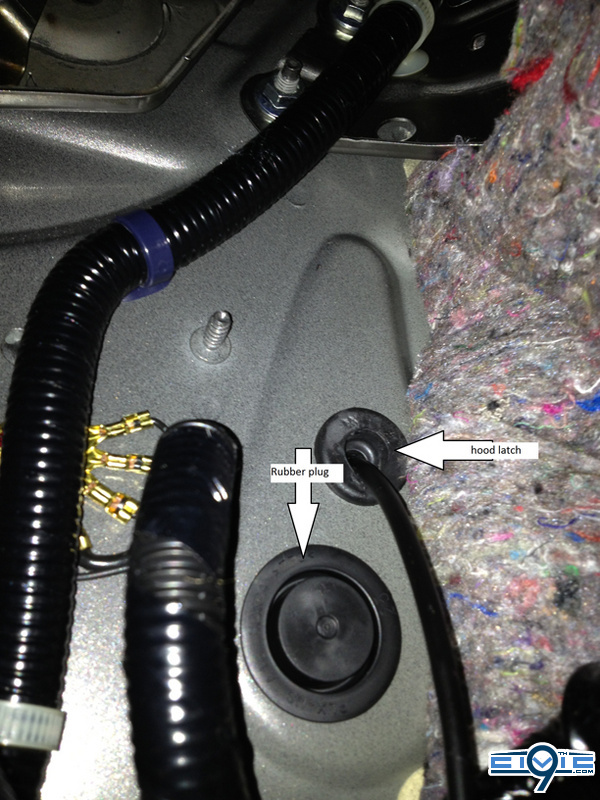

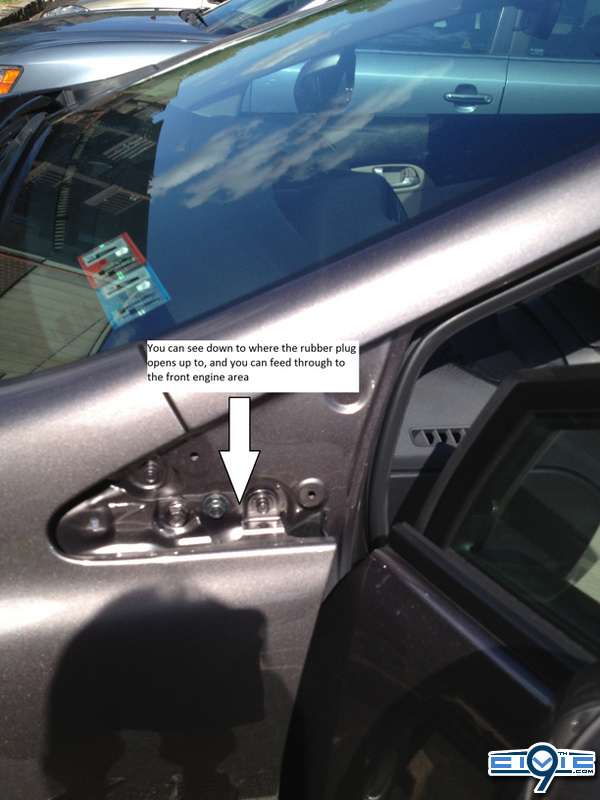
Feed the coat hanger up through the opening where the rubber plug was removed, and you'll see it from the opening where the plastic cover is off. Once you see it, you can then feed it on through to under the hood. Be careful not to pull it too far, you still need some of the hanger to stay in the car to be able to feed it through.
Step 3 - Feed the cable through and lay things out so you have enough cable to reach the battery.
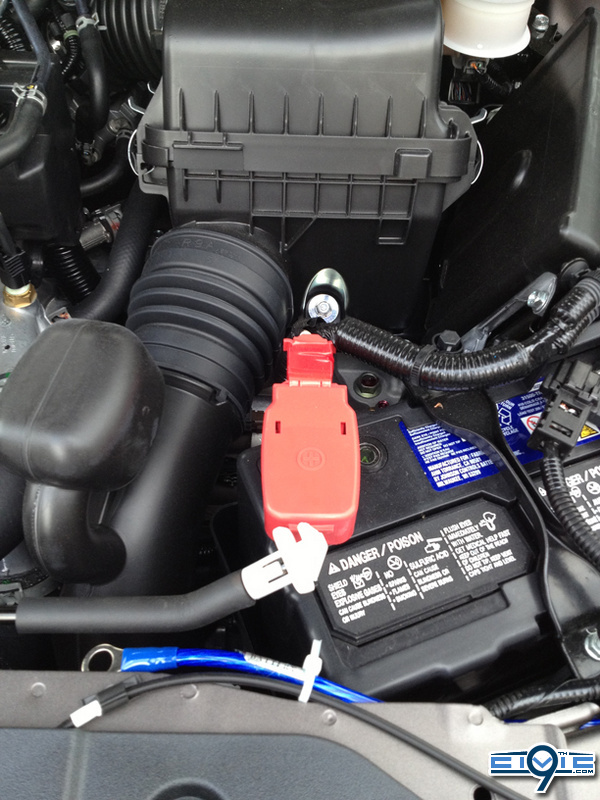

Slowly feed the cable through the opening, and lay the cable underneath the trunk release cable so it's not twisted up when you go to feed it under the side panels. Tape the power cable away from the positive post til the end.
...Continued in the comments since I couldn't get the rest of the pics posted.
I found a bunch of different posts about running the cabling, but didn't find anything on the whole that covered how to tap into the wires for the speakers, and get the cables ran, so I took pics of my install, and thought others could benefit from it if they haven't tapped into speakers before for signals.
I broke the post into two parts to include all of the pics that I took.
What I purchased:
Amp with high level inputs -- I'm using an Alpine MRV-M250 250W x 1 Subwoofer Amplifier
Sub/enclosure combo -- I ordered Rockford Fosgate Prime R1L-1X1 Single R1S410, 150 watts RMS
Amp wiring kit -- I used EFX Amplifier Wiring Kit 8-gauge w/Patch Cord
6 feet of speaker wire, 16 gauge
Wire taps -- Posi-Products Connector Kit 6 pieces Posi-Tap 16-18 Gauge (only need 4 of them, pos/neg for both back speakers)
Sub grill to protect the sub, not necessary but I got it anyway
Mini "add a fuse" adapter to tap into the fuse box for the remote wire
Additional items to have:
Electrical tape
Wire stripper (8ga for power and ground cables, 16 ga for speaker wire, 18 ga for the remote wire I had)
Wire caps or soldering gun to join speaker cable from the posi-taps to the wiring harness on the amp)
I ran the power cable through the side quarter panel like many others have, and through the rubber plug near the hood release cable. To me, this was the part of the install I wanted to be 100% sure of before I started.
Step 1 - Disconnect the negative terminal on the battery. Make sure that stays away from the post -- Zip-tie it or tape it away.
Step 2 - Locate where to fish the wire, and pull off the plastic cover by the side view mirror on the driver side to see the wire pull
Feed the coat hanger up through the opening where the rubber plug was removed, and you'll see it from the opening where the plastic cover is off. Once you see it, you can then feed it on through to under the hood. Be careful not to pull it too far, you still need some of the hanger to stay in the car to be able to feed it through.
Step 3 - Feed the cable through and lay things out so you have enough cable to reach the battery.
Slowly feed the cable through the opening, and lay the cable underneath the trunk release cable so it's not twisted up when you go to feed it under the side panels. Tape the power cable away from the positive post til the end.
...Continued in the comments since I couldn't get the rest of the pics posted.
Last edited: