magneto198
Well-Known Member
- 24
- 25
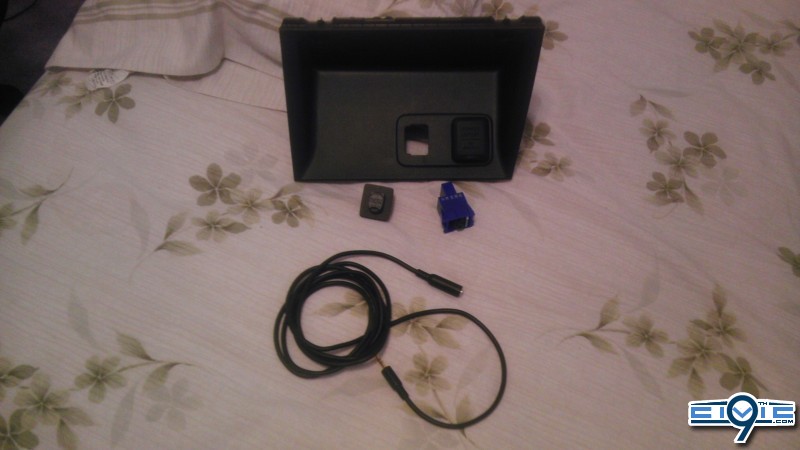
I wanted to make this DIY since there were none for a full install with speaker replacements and sub running to an amp. I replaced the factory radio in my Si with a double din unit. The front speakers were replaced with new components. The rears were replaced with coaxial speakers.
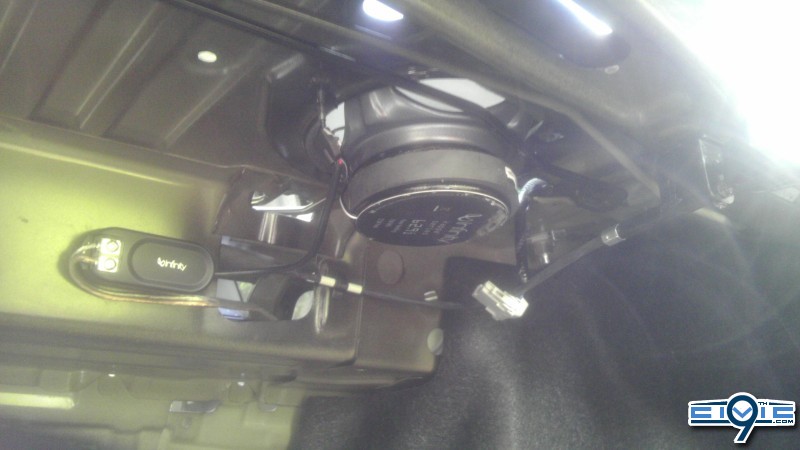
First off is the removal of the rear deck. The rear can only be accessed once the sides with the curtain airbags are removed. After that, there are 4 plastic pins that hold the rear deck on. 2 green and 2 beige. I installed Infinity KAPPA 62.9i in the rears. I like these speakers because they come with a little box that allows for easy speaker wire hookup. I mounted them to the metal in the trunk with double sided tape. Ran the wires down behind the carpet and to the amp.
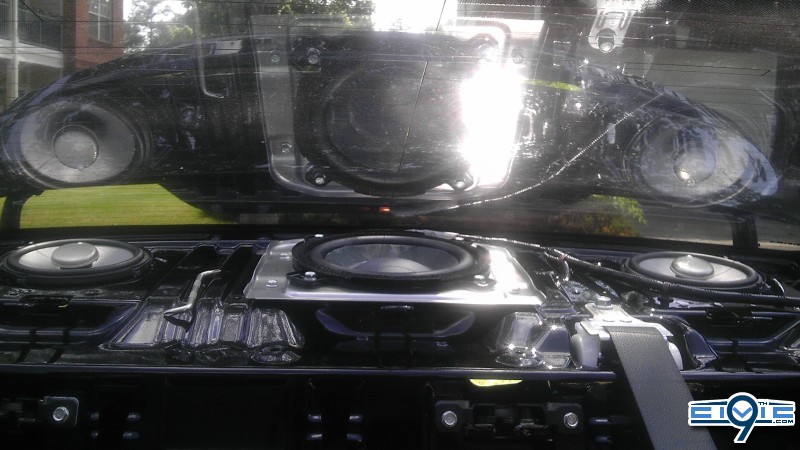
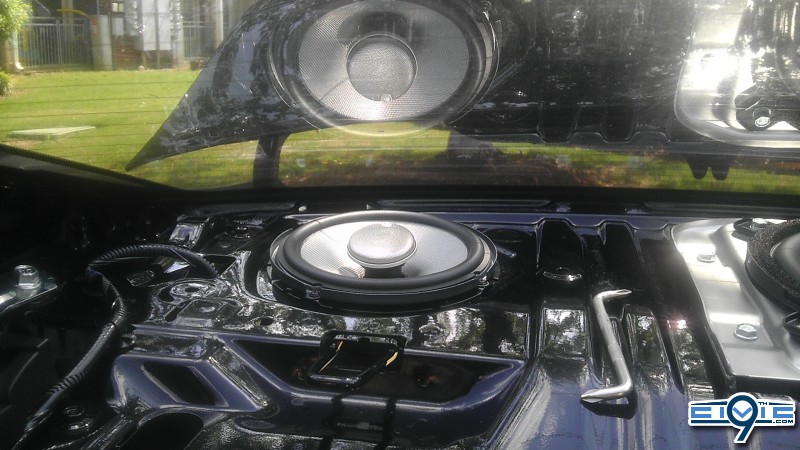
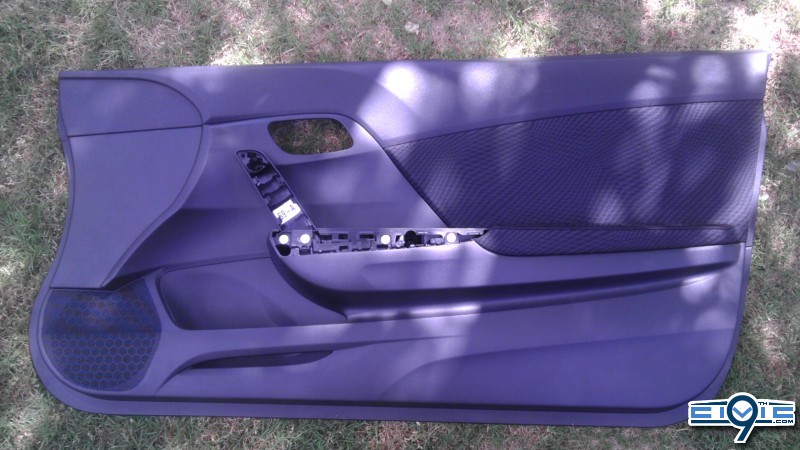
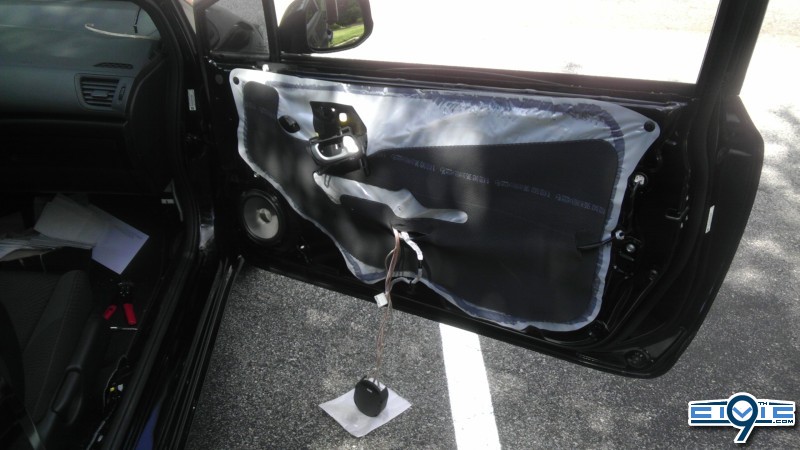
The Front speakers are accessed by removing the doors. I had the hardest time because it couldn't find any screws but i knew they were there somewhere. You must remove the silver hand piece by gently pulling until the clips pop off. Once that is removed, you can access the 3 screws holding the door on. After that, just pop a bunch of clips off going around the door and off lifts the door. I replaced the front speakers with Infinity KAPPA 60.9CS components. Both the fronts and rears are considered 6-3/4" speakers but can also fit a 6-1/2" opening. I didn't need to cut anything extra for my speakers. The clearance is fine, just drop them in.

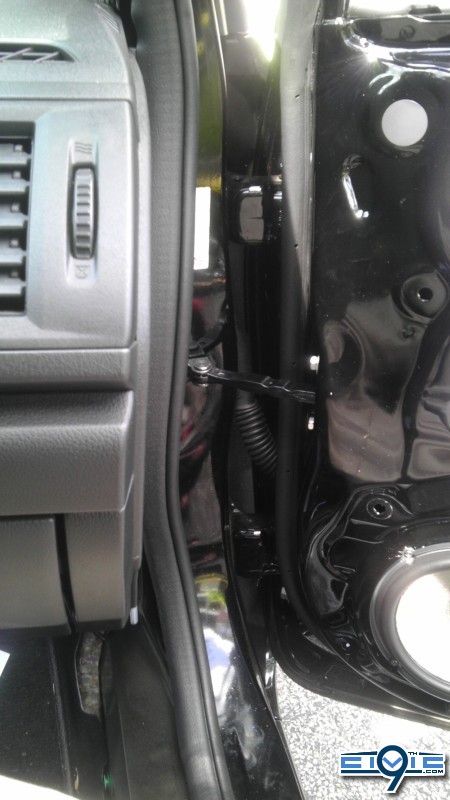
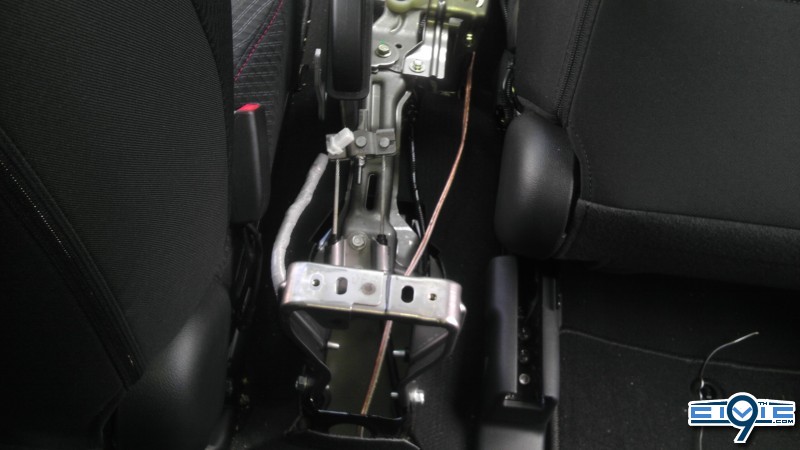
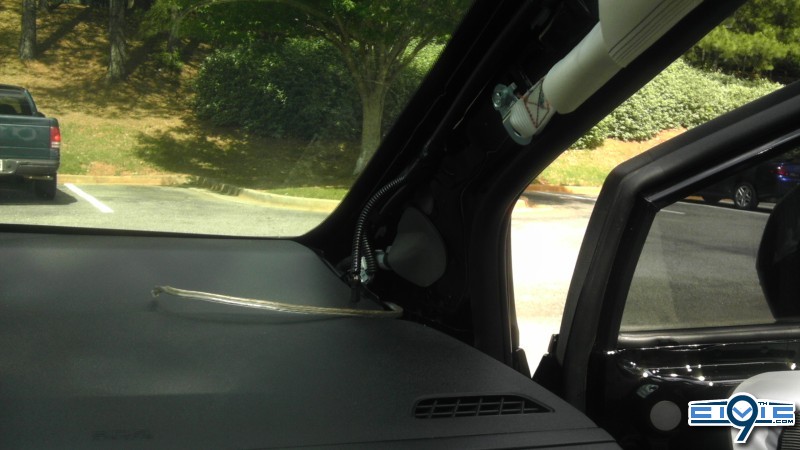
I removed the center console and ran the front speaker wires from the doors, through the rubber tubing to the inside of the car, and down the middle, under the carpet, under the seat, and out to the trunk. Here is a picture of one wire ran. I used about 50ft of 16 gauge wire and barely had enough. Its best to use one continuous wire when hooking up the speakers to the amp. That way you don't have any breaks in the circuit which can cause distortion.
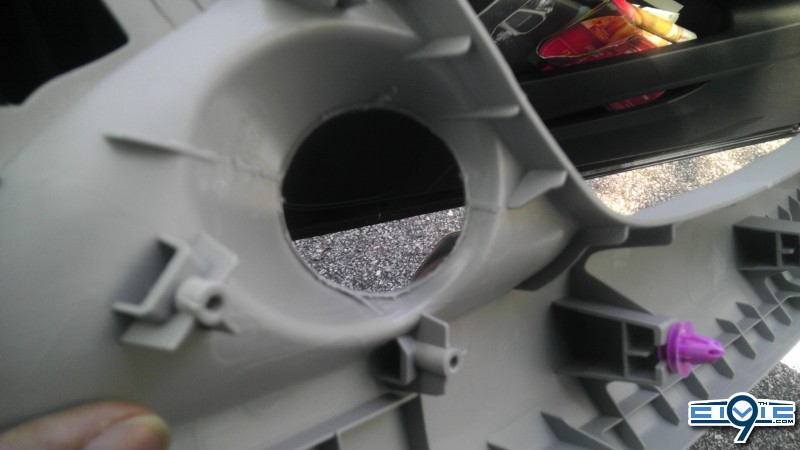
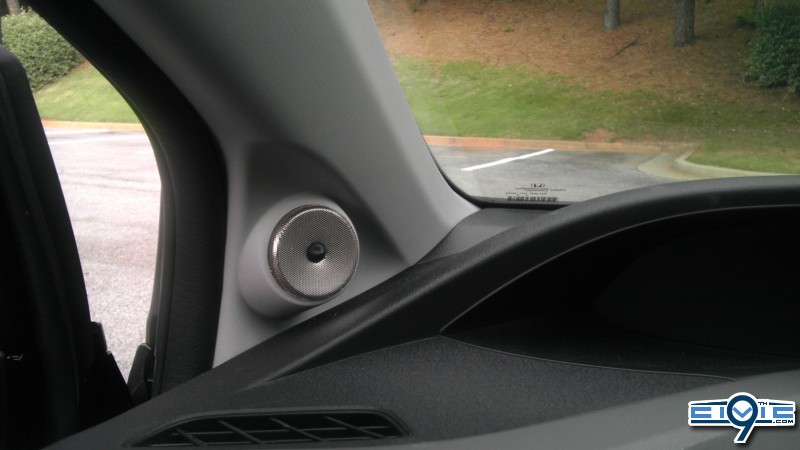
For the tweeters, i ran the wire from the inside of the door and up to the stock tweeter location. Unscrewed the stock tweeters from the pillar plastic and used a Dremel to make the hole larger. The hole is just big enough so that the tweeter can squeeze in and be snug without the use of glue holding it in. The crossover boxes were wired up and stuffed inside between the metal doors and the plastic door coverings.
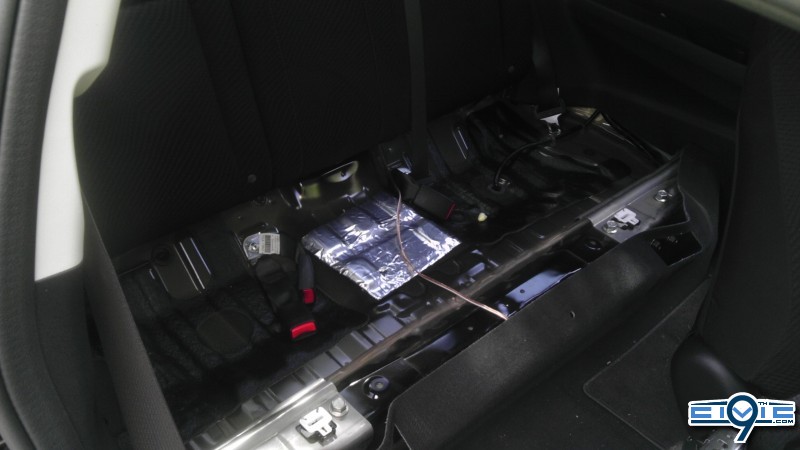
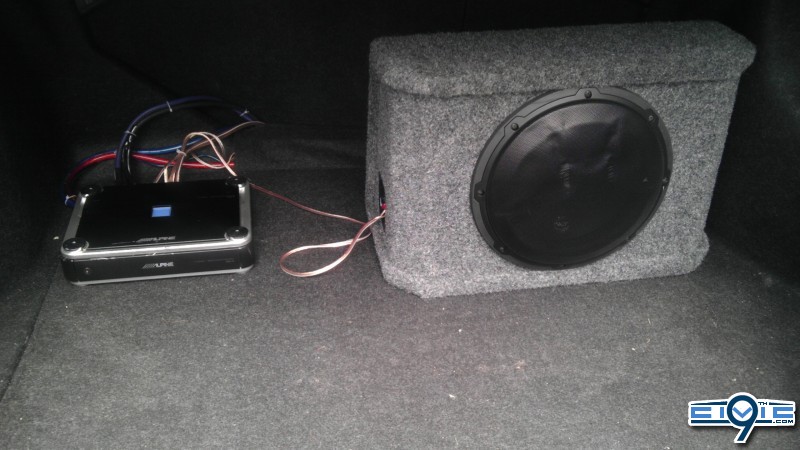
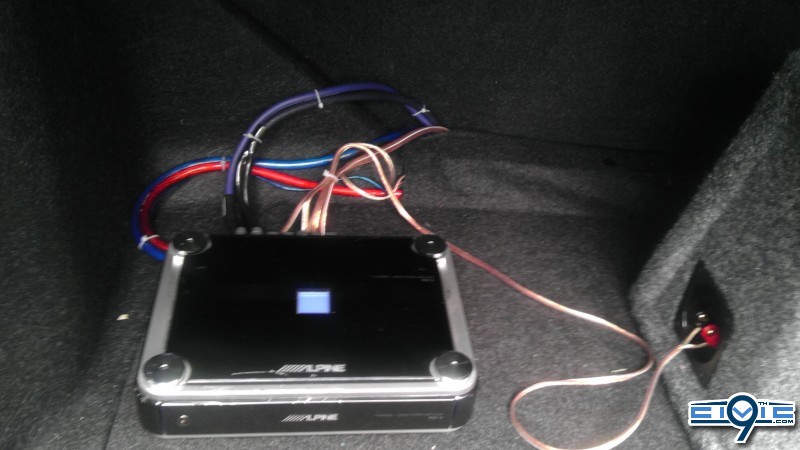
The amp i used was an Alpine PDX-5 5-channel amplifier it delivers ample power for pretty much any aftermarket speakers and delivers power for a sub woofer as well. This makes installation of a new system easy because you only need to have one of everything instead of having a separate amp for sub and one for speakers. The power wire was run from the engine bay and down through the car on the left side under the trim. The right trim pieces hid my 2 channel rca wire for my subs. The 4 channel rca wire for the speakers ran up the middle. The sub is a single JL 10w3.
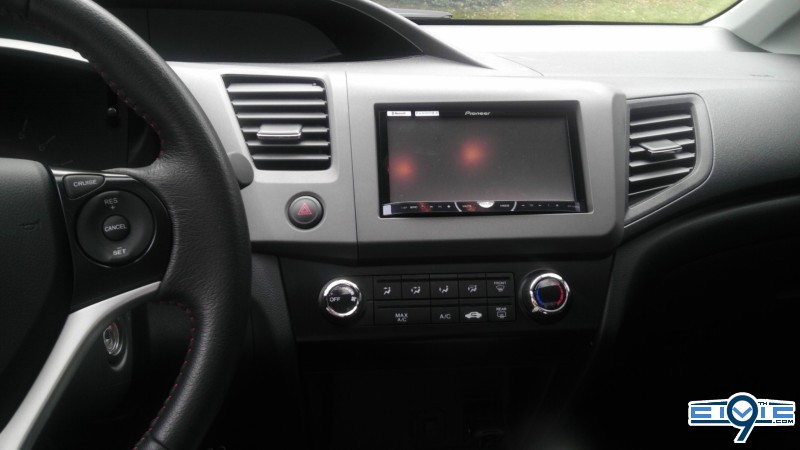
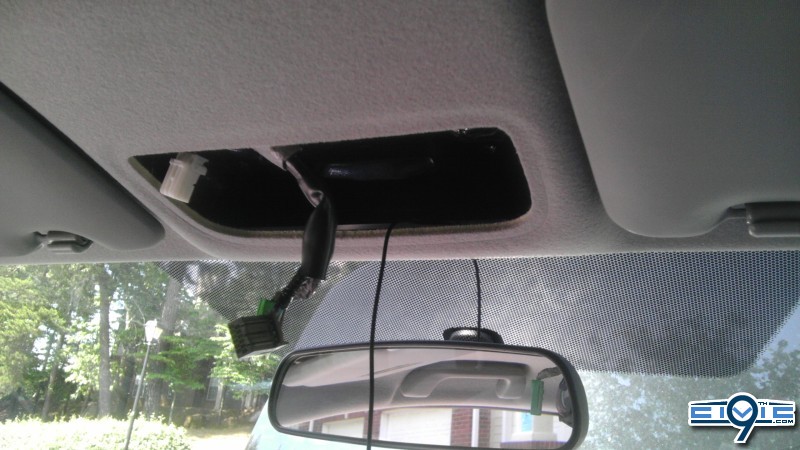
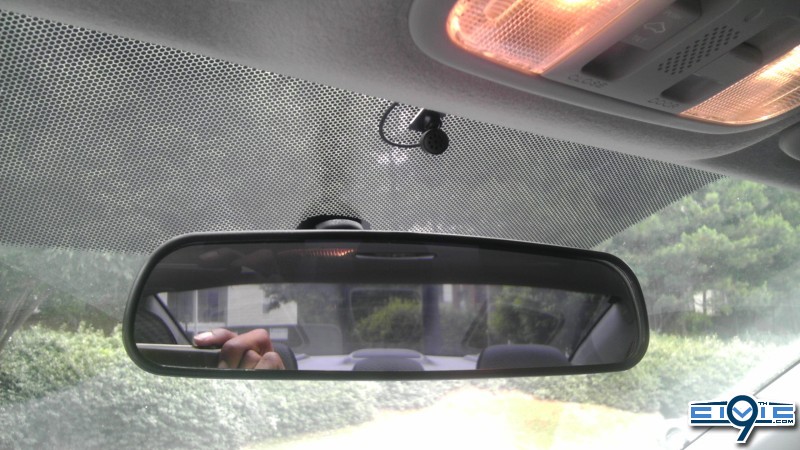
My head unit is a pioneer AVH-P4400BH. Make sure That when doing the install of the head unit that you tape up the climate control or you will scratch the heck out of it. The stereo has Bluetooth capability and works much like the stock unit. I took the dome light off when trying to route my mic and dissected the stock mic location. found that it was one single unit that housed the mic and moon roof controls so i didn't want to mess with it. Instead i just mounted the aftermarket mic to the front windscreen and ran the wire across the inside roof lining and down the right side pillar and into the back of the unit. Looks pretty good.
The Axess ASWC was a pain because the directions it can with were confusing. I spliced into so many unnecessary wires until i finally figured it out. Looking at the WIRE side of the small beige 20-pin sub harness, spice into wire #3 and #13. The pink metra wire goes to pin 13 on the harness and the blue/pink metra wire goes to pin 3 on the harness. Both wires match up color coded. Pink wire to pink wire, Blue to blue. Don't get the 24-pin main harness confused. That's what i did until i realized i was splicing into the wrong harness. As of right now, the only functionality it gave me was of volume up and down and next or back a track. The Bluetooth button don't work because the stock Bluetooth module is located outside of the head unit area. Someone would have to figure out where the Bluetooth module is and hard wire it straight up to the ASWC. Other than that its great. You can use the on screen Bluetooth buttons of the head unit but i miss the convenience of the stock switches.

To keep the functionality of my front AUX port, i removed the stock unit, kept the faceplate, and glued a Belkin 6ft 3.5mm Extension to the back and plugged it directly into the back of my head unit. Works great also. All of these extra steps i took were time consuming but resulted in a professional looking install and i tried to keep as much functionally as possible of of the stock amenities.
Other parts i used:
Honda Antenna Adapter: Metra 40-HD11
Honda Receiver Wire Harness: Metra 70-1729
2012 Honda Civic Double DIN Kit: Scosche HA1713B
First off is the removal of the rear deck. The rear can only be accessed once the sides with the curtain airbags are removed. After that, there are 4 plastic pins that hold the rear deck on. 2 green and 2 beige. I installed Infinity KAPPA 62.9i in the rears. I like these speakers because they come with a little box that allows for easy speaker wire hookup. I mounted them to the metal in the trunk with double sided tape. Ran the wires down behind the carpet and to the amp.
The Front speakers are accessed by removing the doors. I had the hardest time because it couldn't find any screws but i knew they were there somewhere. You must remove the silver hand piece by gently pulling until the clips pop off. Once that is removed, you can access the 3 screws holding the door on. After that, just pop a bunch of clips off going around the door and off lifts the door. I replaced the front speakers with Infinity KAPPA 60.9CS components. Both the fronts and rears are considered 6-3/4" speakers but can also fit a 6-1/2" opening. I didn't need to cut anything extra for my speakers. The clearance is fine, just drop them in.
I removed the center console and ran the front speaker wires from the doors, through the rubber tubing to the inside of the car, and down the middle, under the carpet, under the seat, and out to the trunk. Here is a picture of one wire ran. I used about 50ft of 16 gauge wire and barely had enough. Its best to use one continuous wire when hooking up the speakers to the amp. That way you don't have any breaks in the circuit which can cause distortion.
For the tweeters, i ran the wire from the inside of the door and up to the stock tweeter location. Unscrewed the stock tweeters from the pillar plastic and used a Dremel to make the hole larger. The hole is just big enough so that the tweeter can squeeze in and be snug without the use of glue holding it in. The crossover boxes were wired up and stuffed inside between the metal doors and the plastic door coverings.
The amp i used was an Alpine PDX-5 5-channel amplifier it delivers ample power for pretty much any aftermarket speakers and delivers power for a sub woofer as well. This makes installation of a new system easy because you only need to have one of everything instead of having a separate amp for sub and one for speakers. The power wire was run from the engine bay and down through the car on the left side under the trim. The right trim pieces hid my 2 channel rca wire for my subs. The 4 channel rca wire for the speakers ran up the middle. The sub is a single JL 10w3.
My head unit is a pioneer AVH-P4400BH. Make sure That when doing the install of the head unit that you tape up the climate control or you will scratch the heck out of it. The stereo has Bluetooth capability and works much like the stock unit. I took the dome light off when trying to route my mic and dissected the stock mic location. found that it was one single unit that housed the mic and moon roof controls so i didn't want to mess with it. Instead i just mounted the aftermarket mic to the front windscreen and ran the wire across the inside roof lining and down the right side pillar and into the back of the unit. Looks pretty good.
The Axess ASWC was a pain because the directions it can with were confusing. I spliced into so many unnecessary wires until i finally figured it out. Looking at the WIRE side of the small beige 20-pin sub harness, spice into wire #3 and #13. The pink metra wire goes to pin 13 on the harness and the blue/pink metra wire goes to pin 3 on the harness. Both wires match up color coded. Pink wire to pink wire, Blue to blue. Don't get the 24-pin main harness confused. That's what i did until i realized i was splicing into the wrong harness. As of right now, the only functionality it gave me was of volume up and down and next or back a track. The Bluetooth button don't work because the stock Bluetooth module is located outside of the head unit area. Someone would have to figure out where the Bluetooth module is and hard wire it straight up to the ASWC. Other than that its great. You can use the on screen Bluetooth buttons of the head unit but i miss the convenience of the stock switches.
To keep the functionality of my front AUX port, i removed the stock unit, kept the faceplate, and glued a Belkin 6ft 3.5mm Extension to the back and plugged it directly into the back of my head unit. Works great also. All of these extra steps i took were time consuming but resulted in a professional looking install and i tried to keep as much functionally as possible of of the stock amenities.
Other parts i used:
Honda Antenna Adapter: Metra 40-HD11
Honda Receiver Wire Harness: Metra 70-1729
2012 Honda Civic Double DIN Kit: Scosche HA1713B
 thanks for the writeup