- Staff
- #1
DIY 2012 Civic Sliding Armrest

This article covers the sliding armrest installation for model year 2012. 2013 models already have this feature as standard.
Shown here is it installed on a 2012 Civic Si. Part numbers for all lines are included below.
Caution!: At the time of this writing, I cannot verify that this procedure is the same for lines other than the Si, so proceed at your own risk. Additionally, the colors for the 2013 models have changed and may not match your interior. I can only confirm that the interior color and material for the 2013 Si is the same as the 2012 Si.
Should someone verify to me that the installation process and colors on other lines, I will update this DIY accordingly.
Click on any of the pictures here to see them in a higher resolution.
What you need:
You only need three parts: One (1) Hinge Assembly, one (1) Top Coat Assembly, and one (1) Garnish R.R.
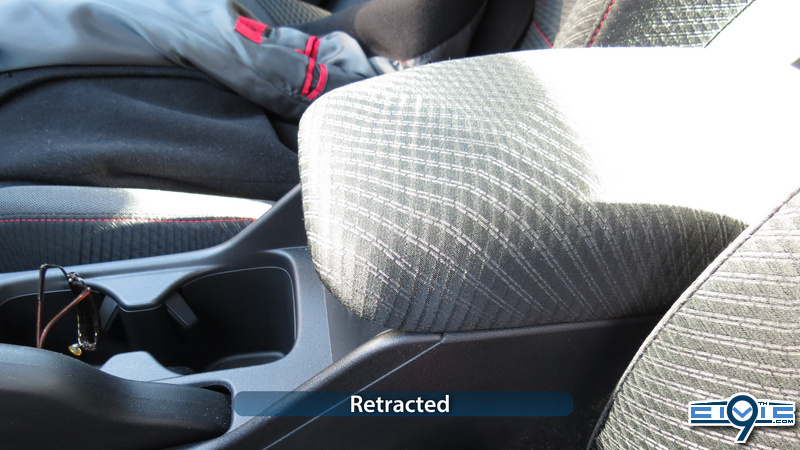
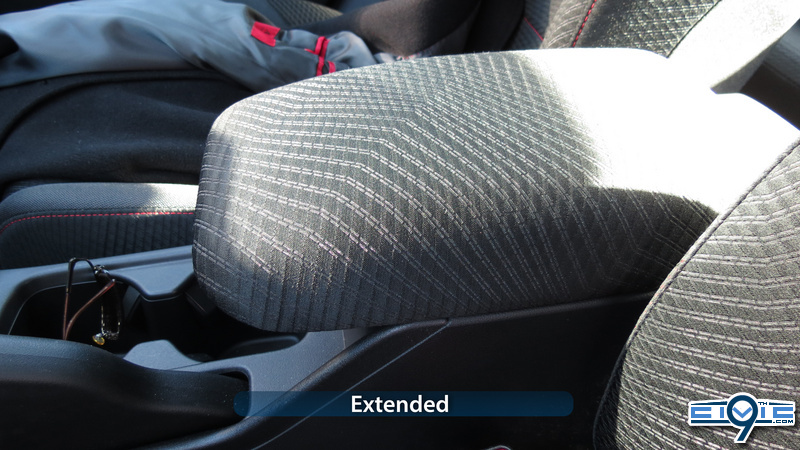
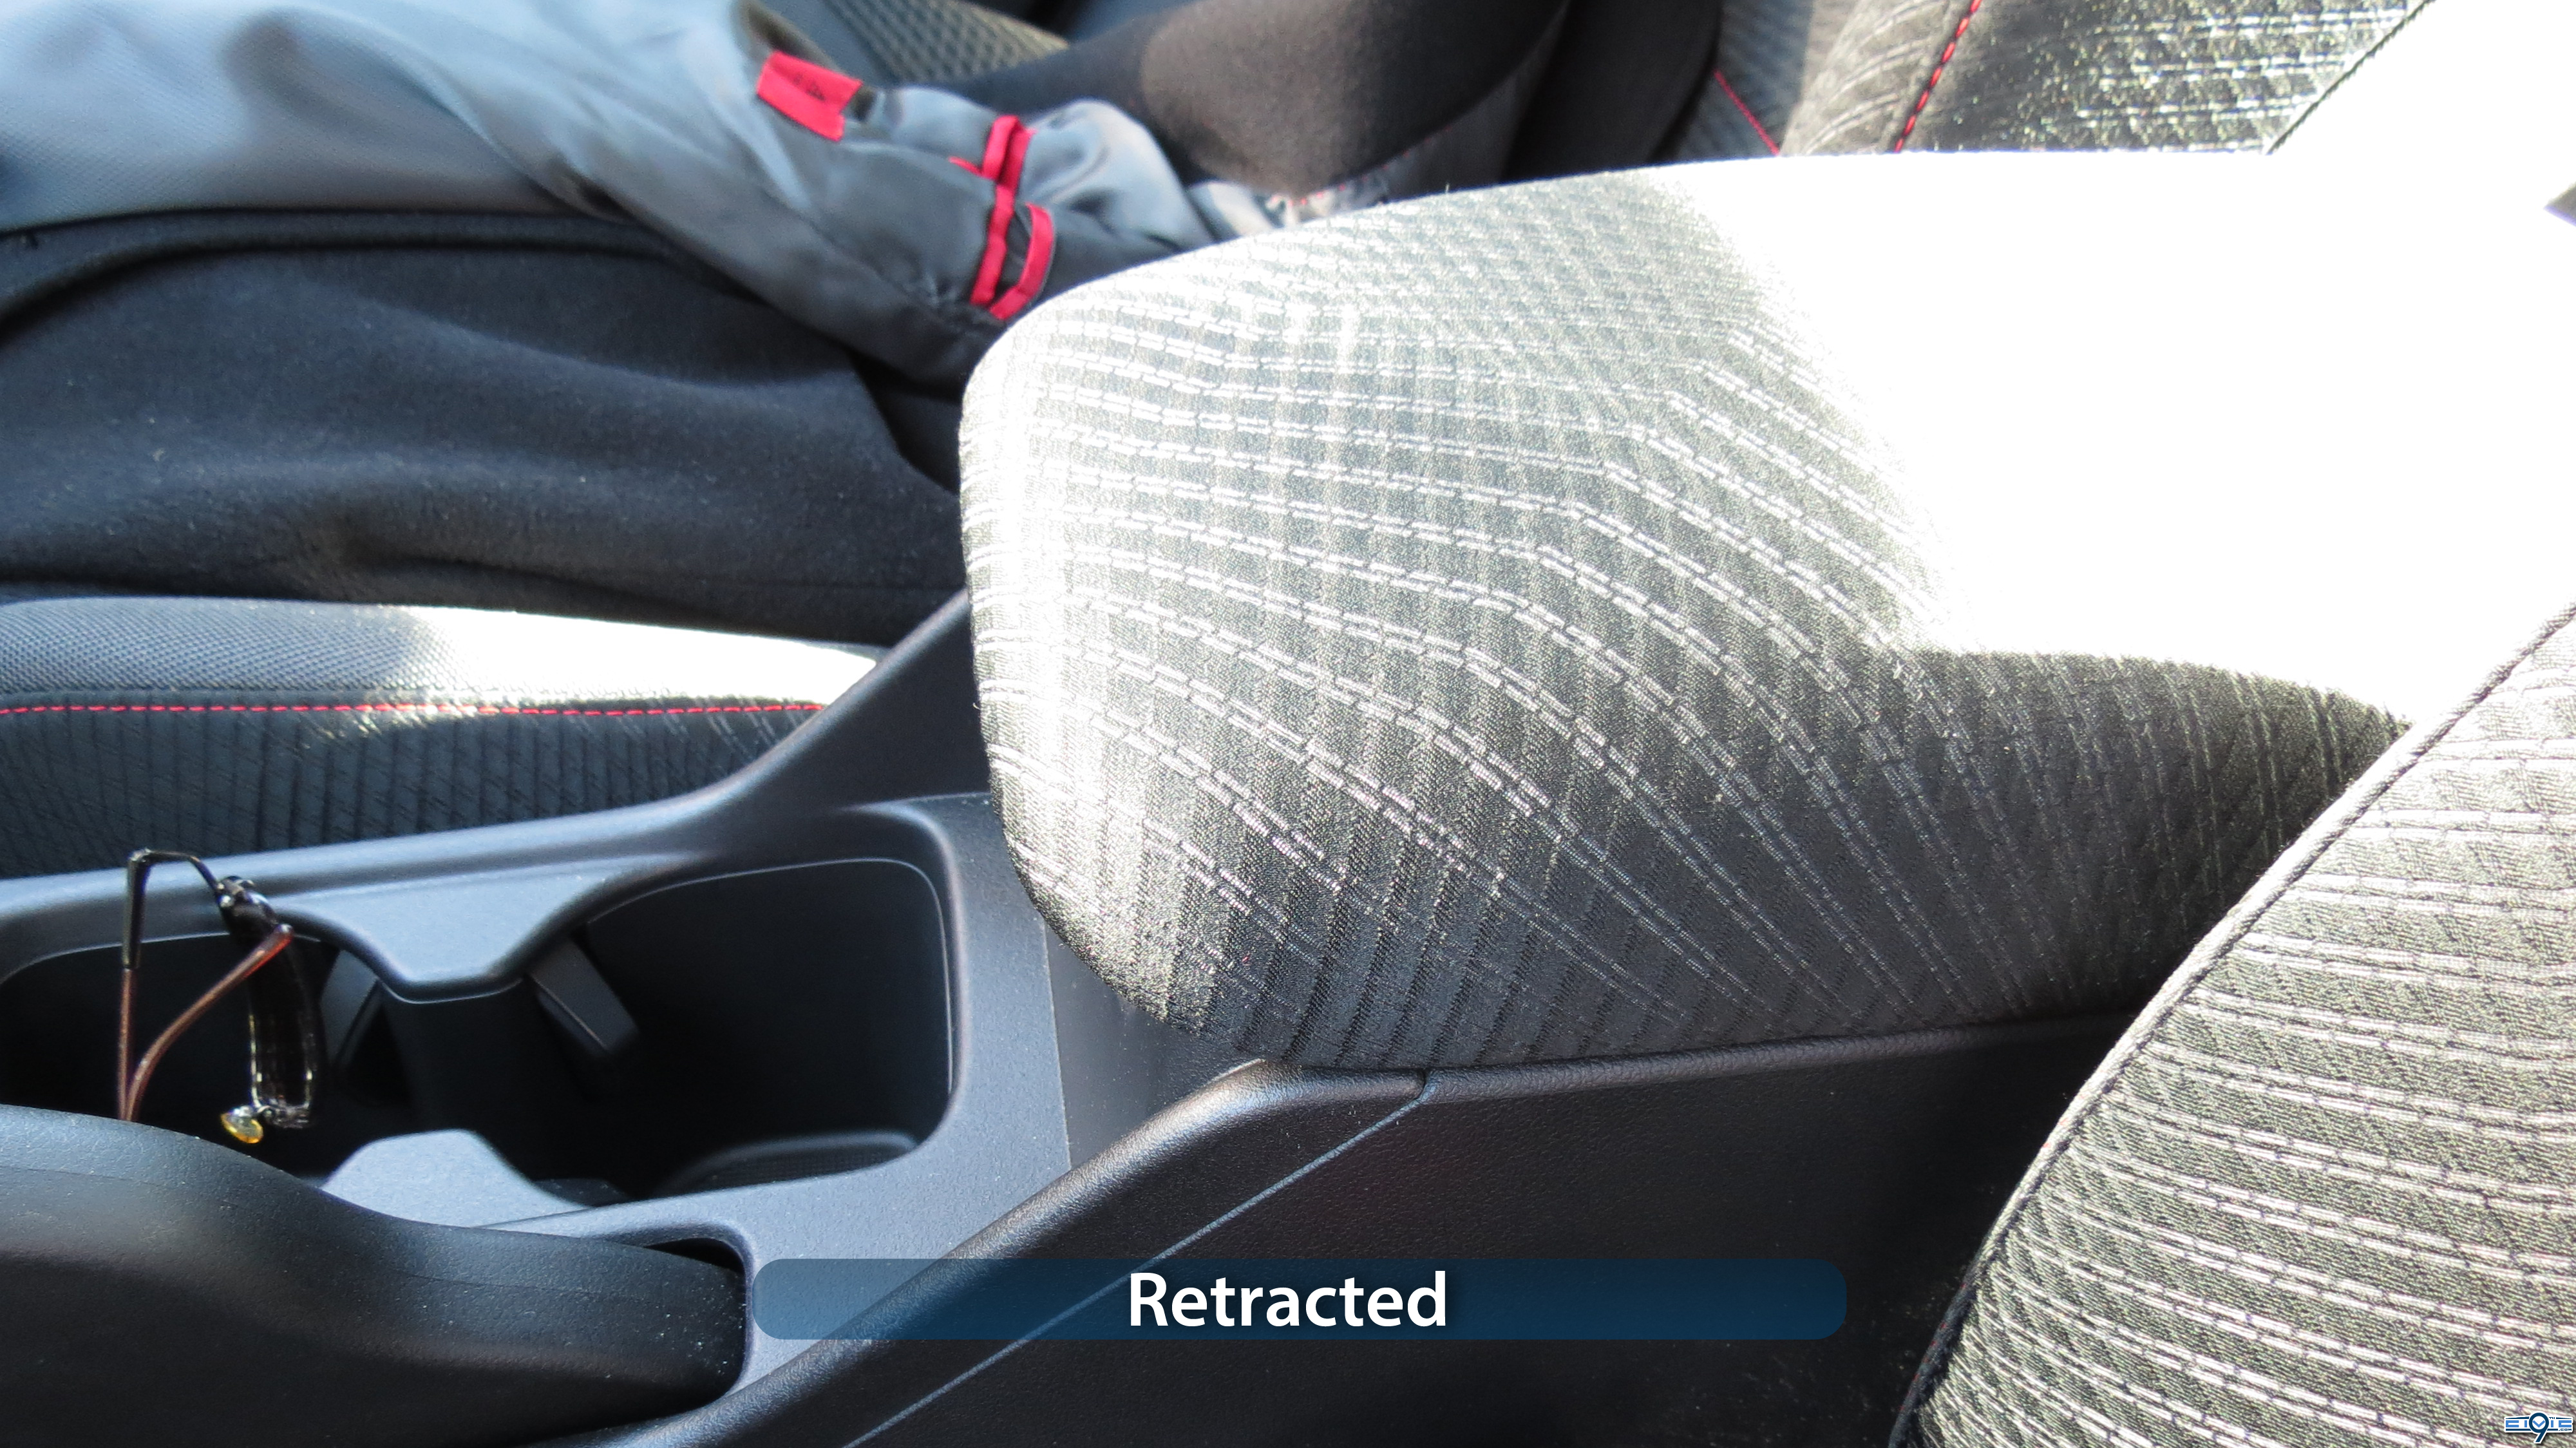
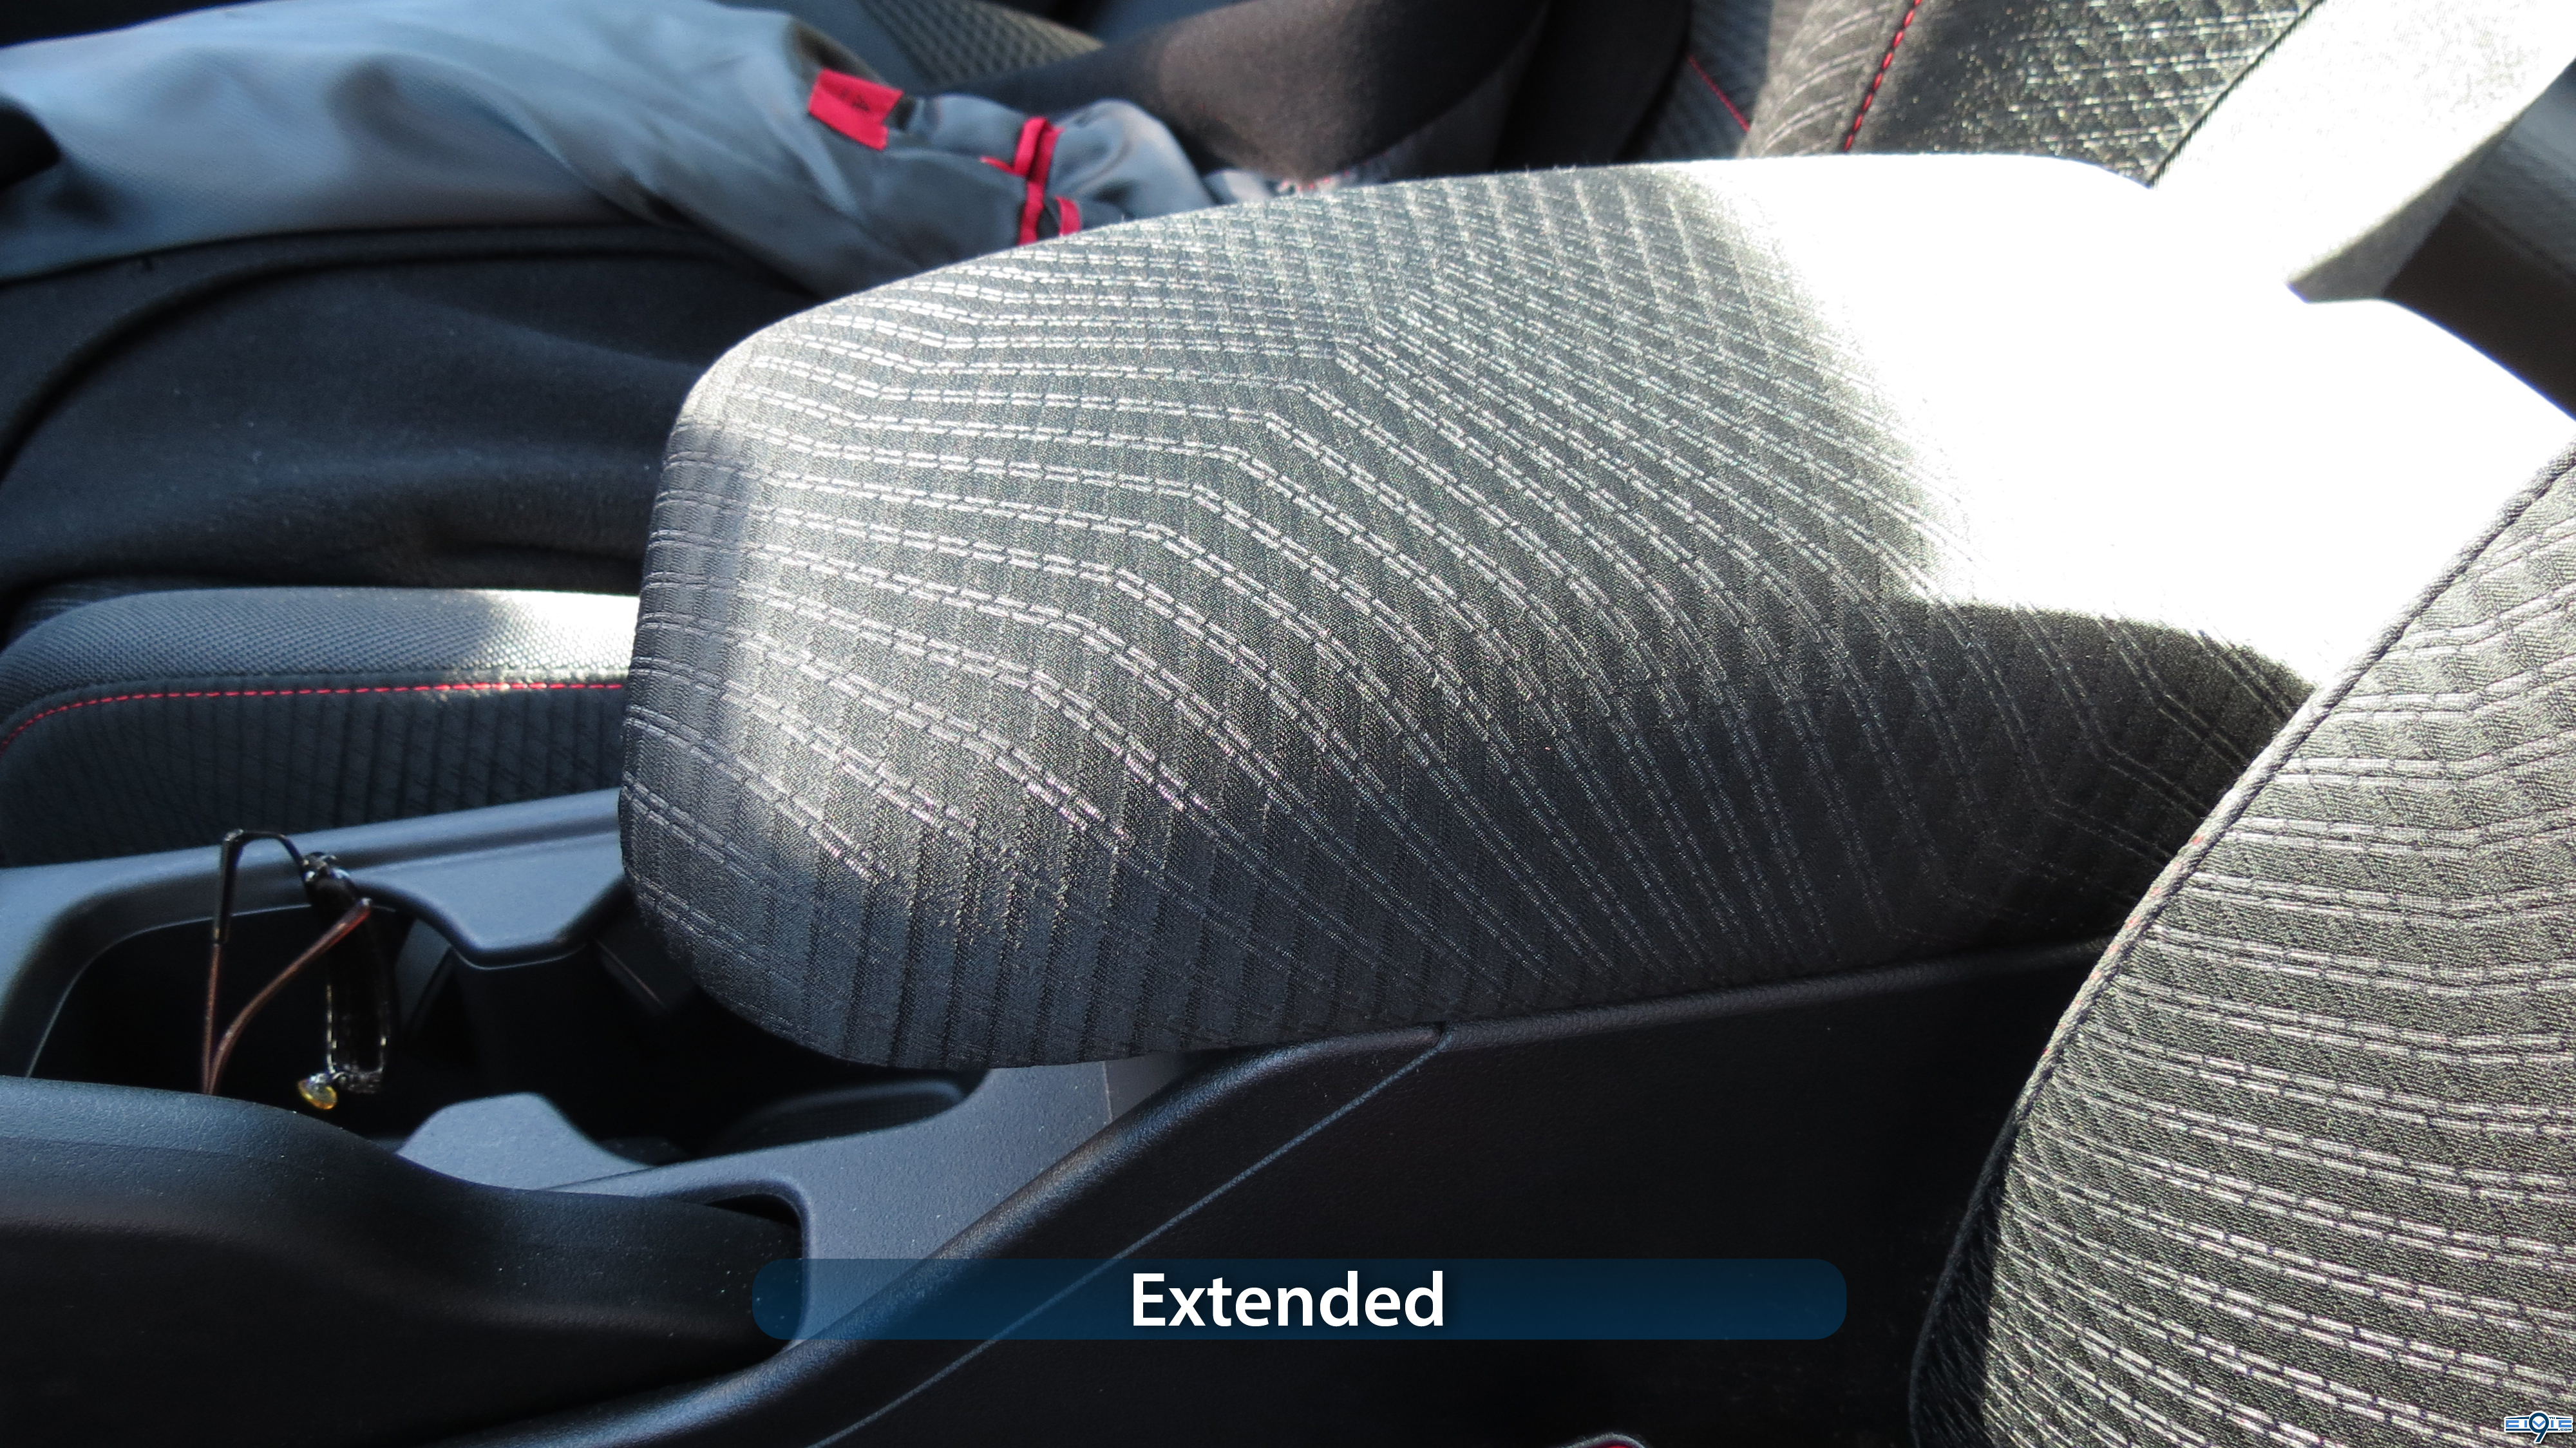
Here are a few photos of it installed in its retracted and extended positions.
And here is a photo showing the size difference between the old and new armrest. The old armrest is at the bottom.
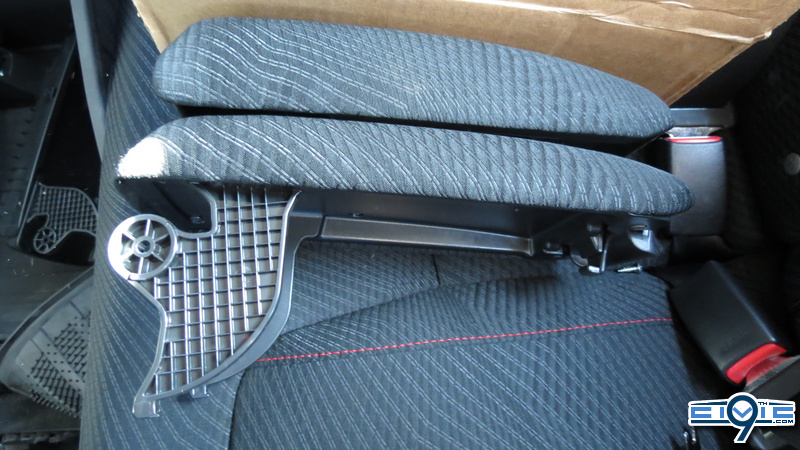
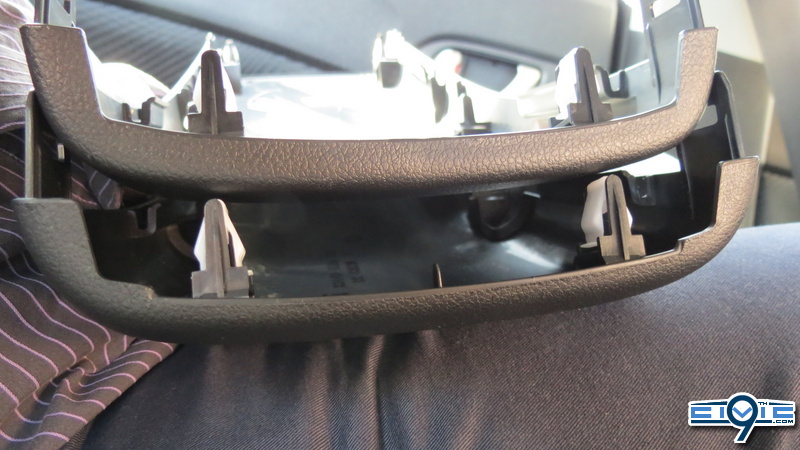
Photo showing the design difference between the old and new rear console panel. The new armrest is at the bottom.
This article covers the sliding armrest installation for model year 2012. 2013 models already have this feature as standard.
Shown here is it installed on a 2012 Civic Si. Part numbers for all lines are included below.
Caution!: At the time of this writing, I cannot verify that this procedure is the same for lines other than the Si, so proceed at your own risk. Additionally, the colors for the 2013 models have changed and may not match your interior. I can only confirm that the interior color and material for the 2013 Si is the same as the 2012 Si.
Should someone verify to me that the installation process and colors on other lines, I will update this DIY accordingly.
Click on any of the pictures here to see them in a higher resolution.
What you need:
- Top Coat Assembly
- Hinge Assembly
- Philips Screwdriver
- Dash removal trim tool (optional)
- Shop towels (two recommended)
You only need three parts: One (1) Hinge Assembly, one (1) Top Coat Assembly, and one (1) Garnish R.R.
- Please choose the Top Coat color that matches your interior.
- For the Si, there is only one choice for each part; the Top Coat Assembly is simply called the Armrest Assembly.
- The Hinge Assembly is the same part number for all lines in both 2 Door and 4 Door.
LX & EX:
EX-L:
Si:
4 Door (Sedan)HX, LX, & EX:
EX-L:
Si:
Important Notes:- Be extremely careful in the handling of the rear console panel and clips particularly. The plastic parts can be forgiving, but the clips holding them in place are not.
- Even being as careful as possible, clips still do break. You can purchase replacements directly from Honda, your local dealership, or from one of our wonderful vendors right here on this site.
- The assembly parts come from the factory already lubricated with grease. Use one or more shop towels for placing the parts on and for wiping your hands. You do not want to stain your upholstery.
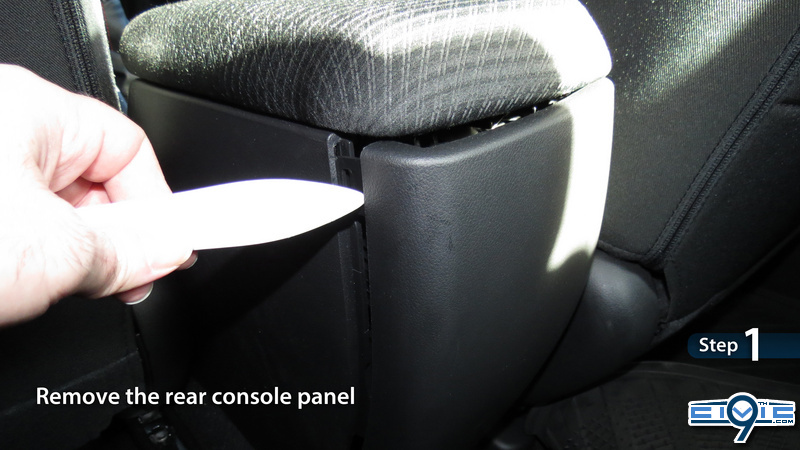
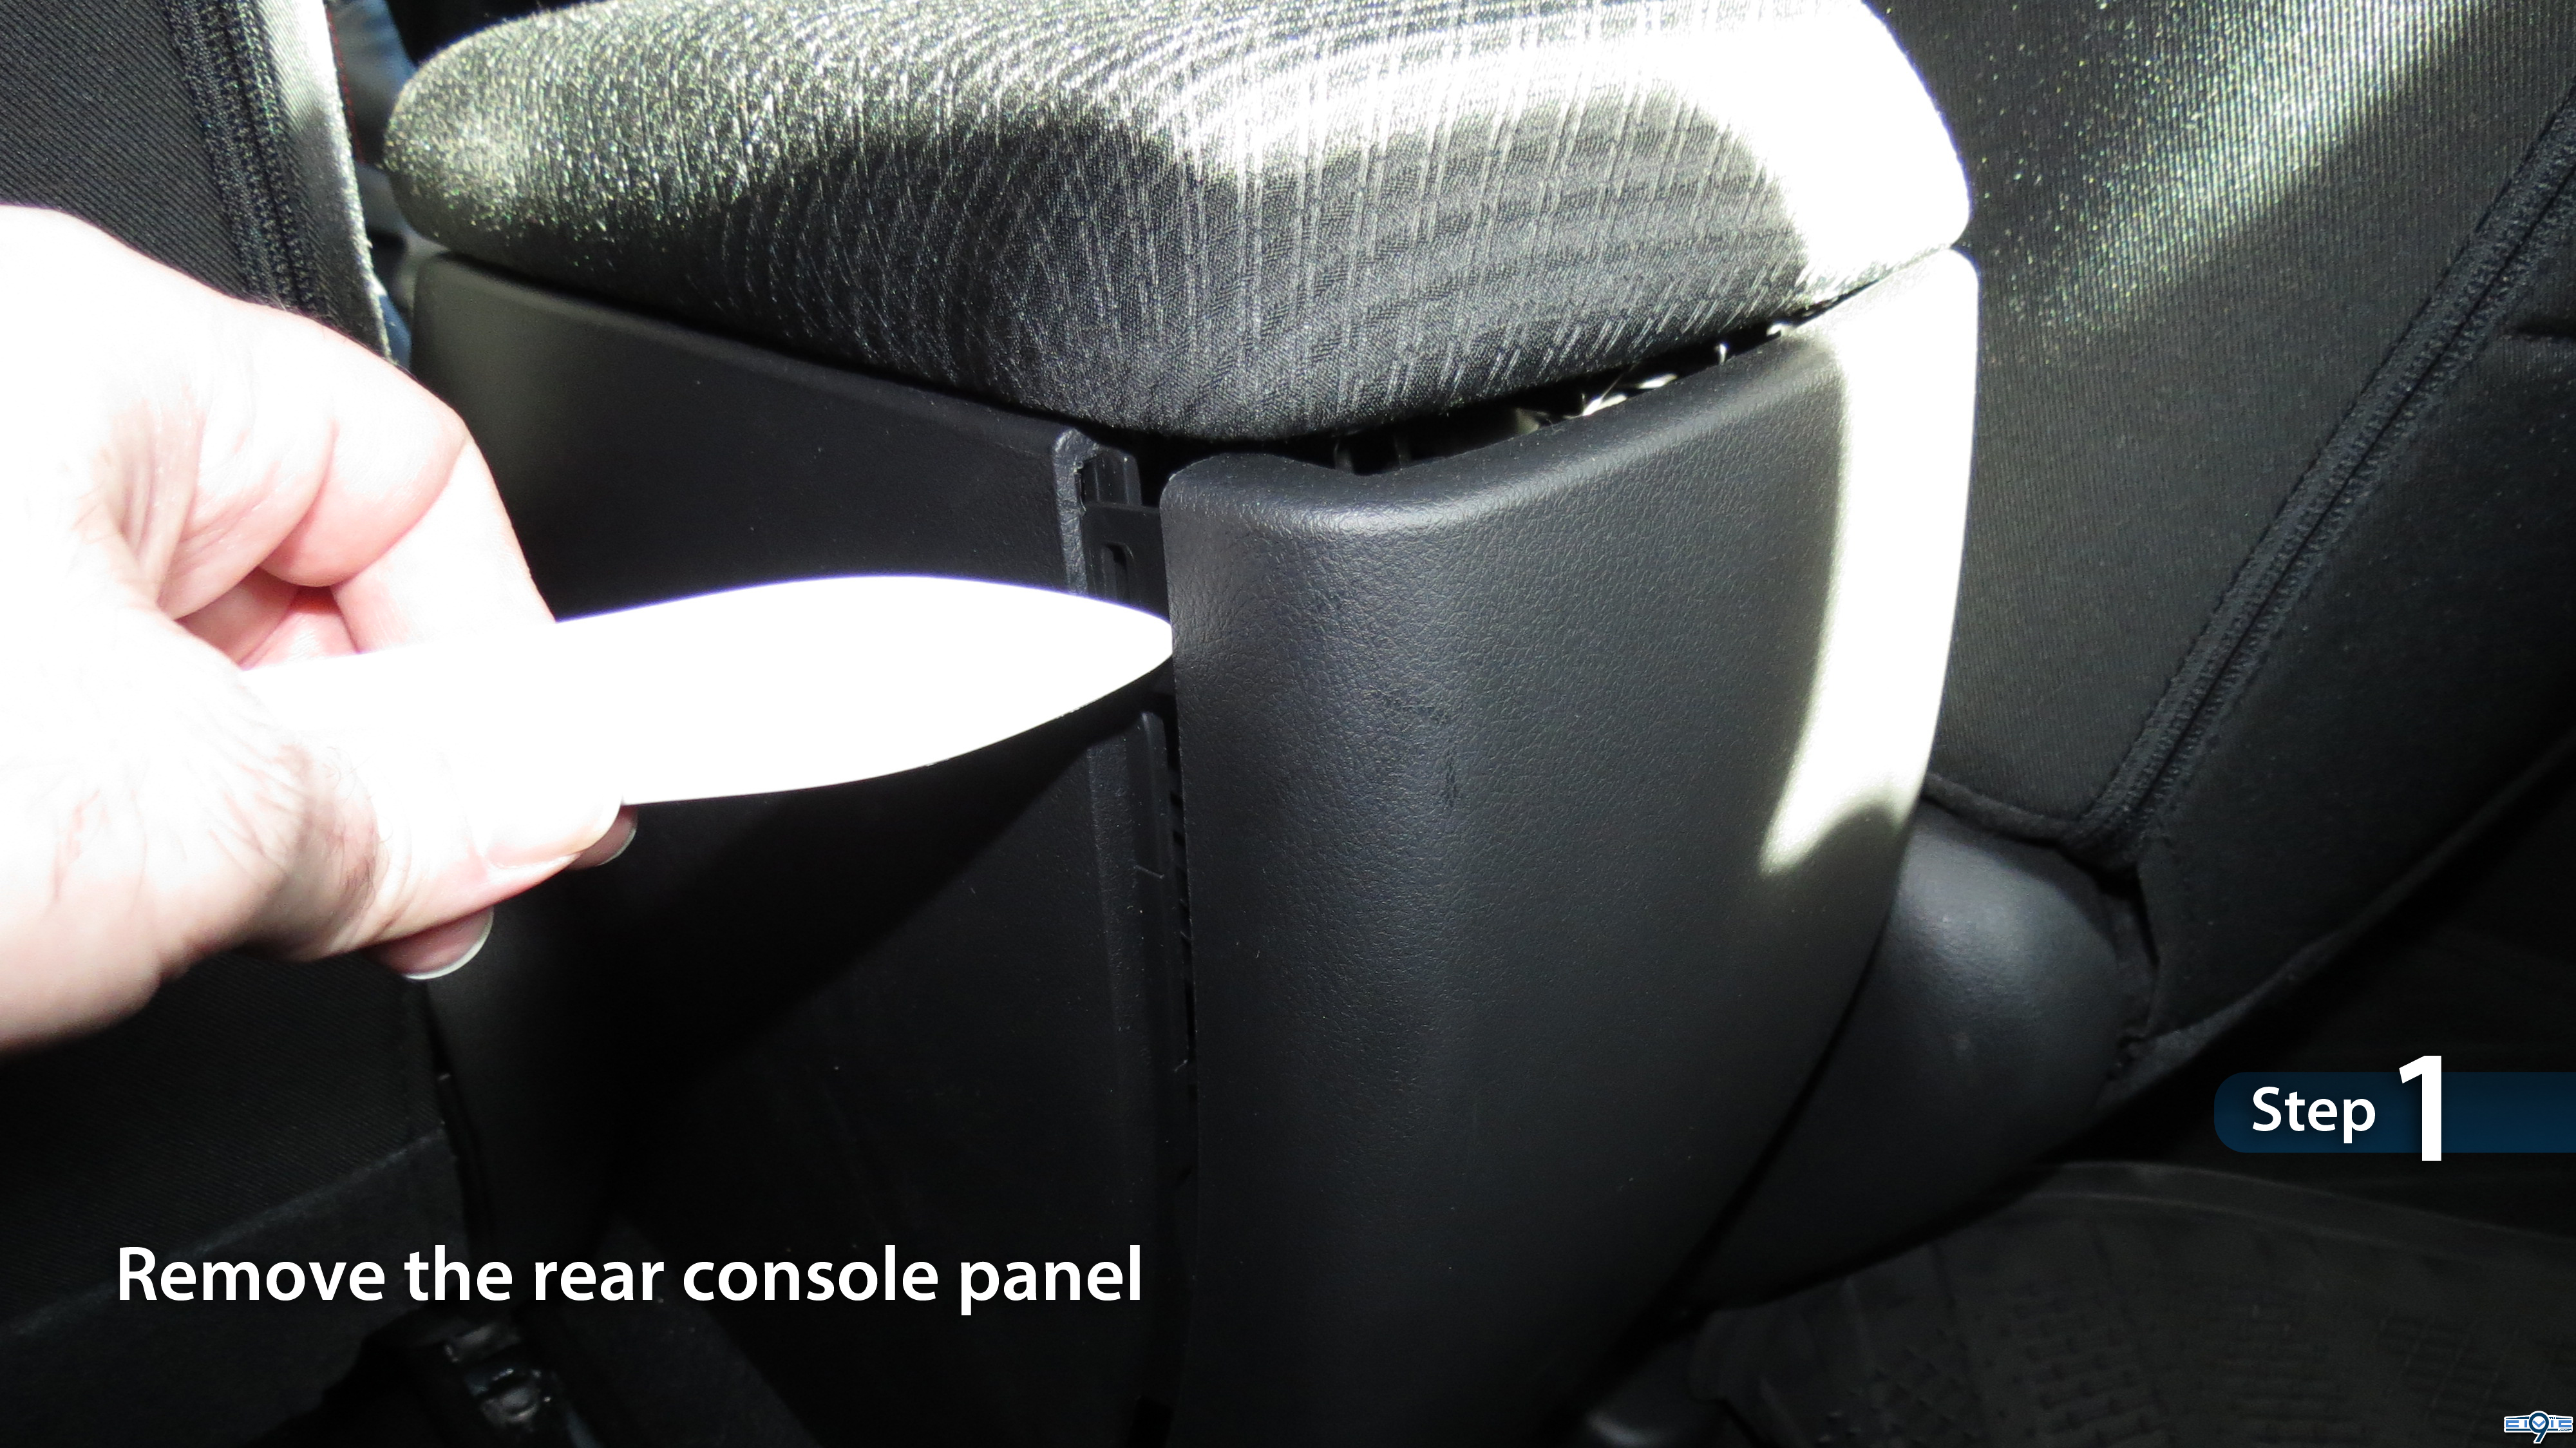
- Remove the rear console panel.
The panel is tightly fitted with six retaining clips. My recommendation is to use something smooth, round, and pointed at the end. A dash removal trim tool is what was used here.
Note: Using a sharp tool is not recommend as it can damage the panel.
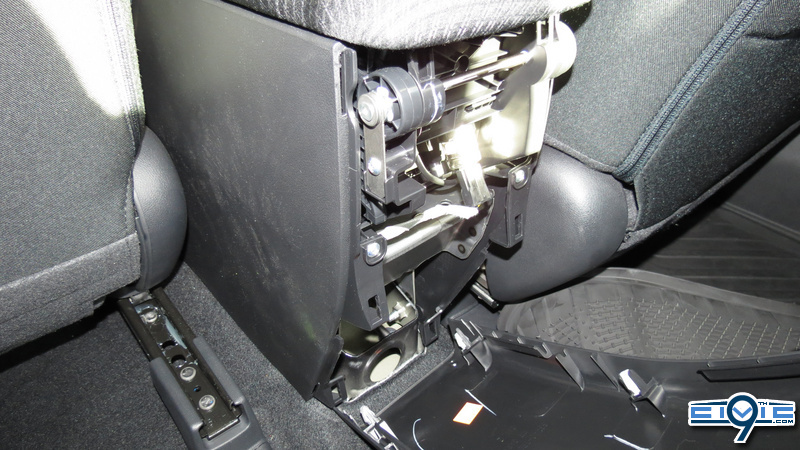
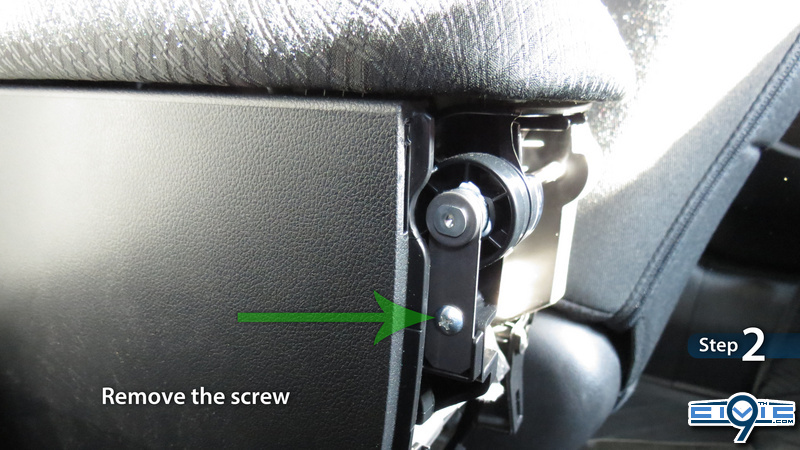
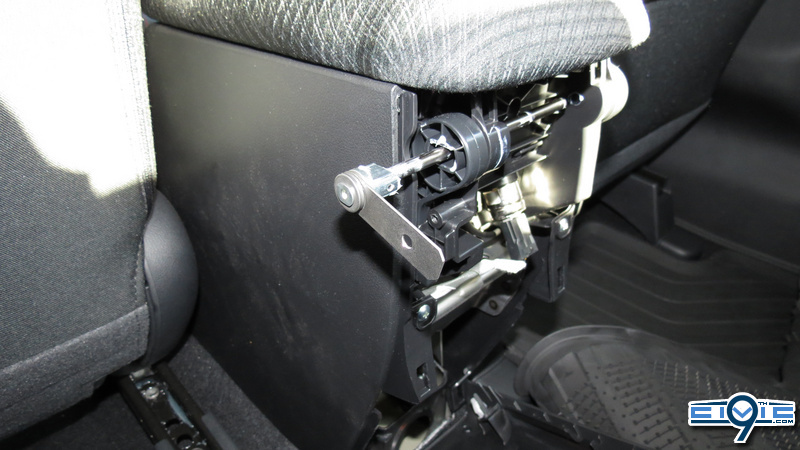
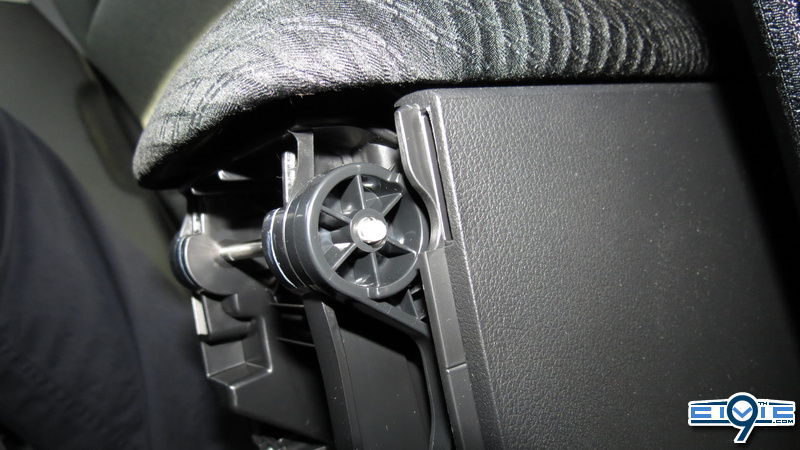
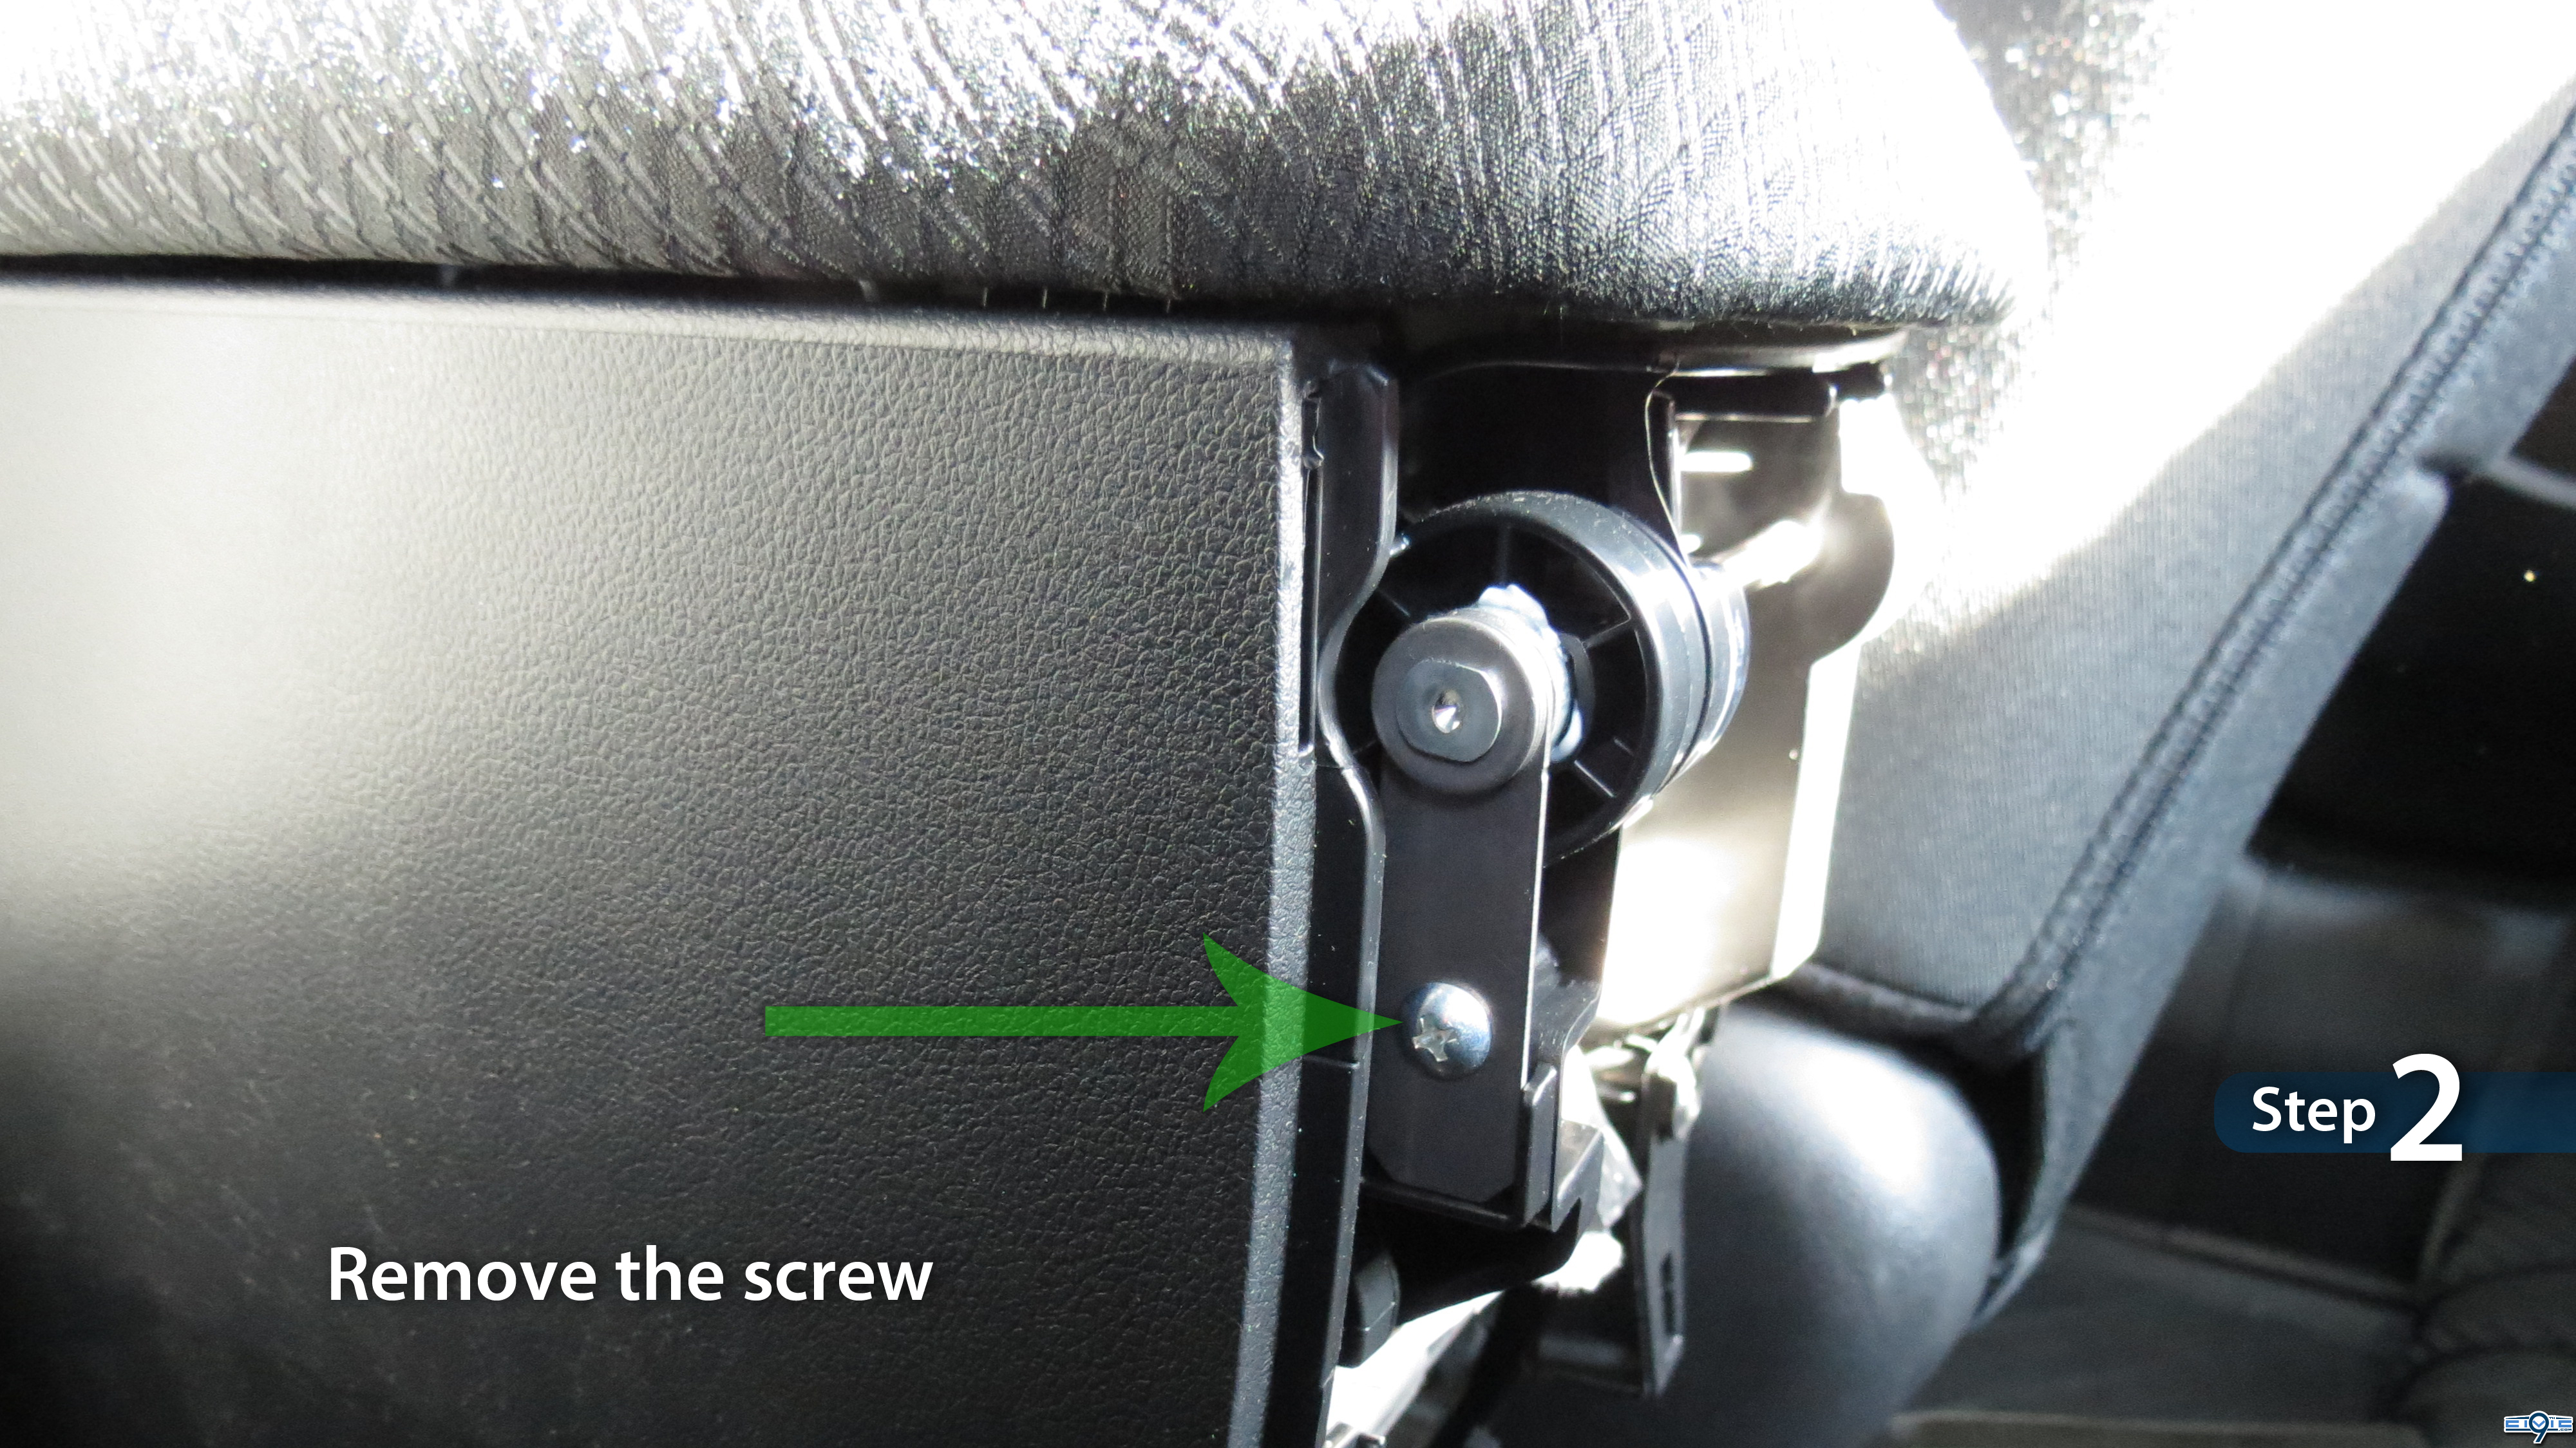
- Remove the screw.
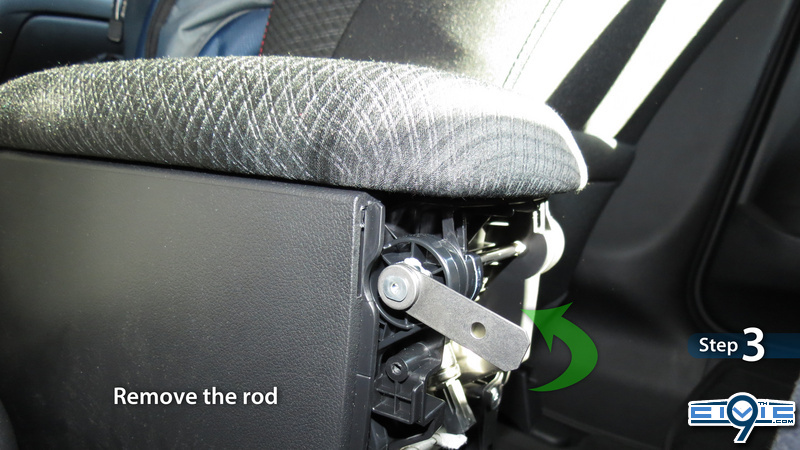
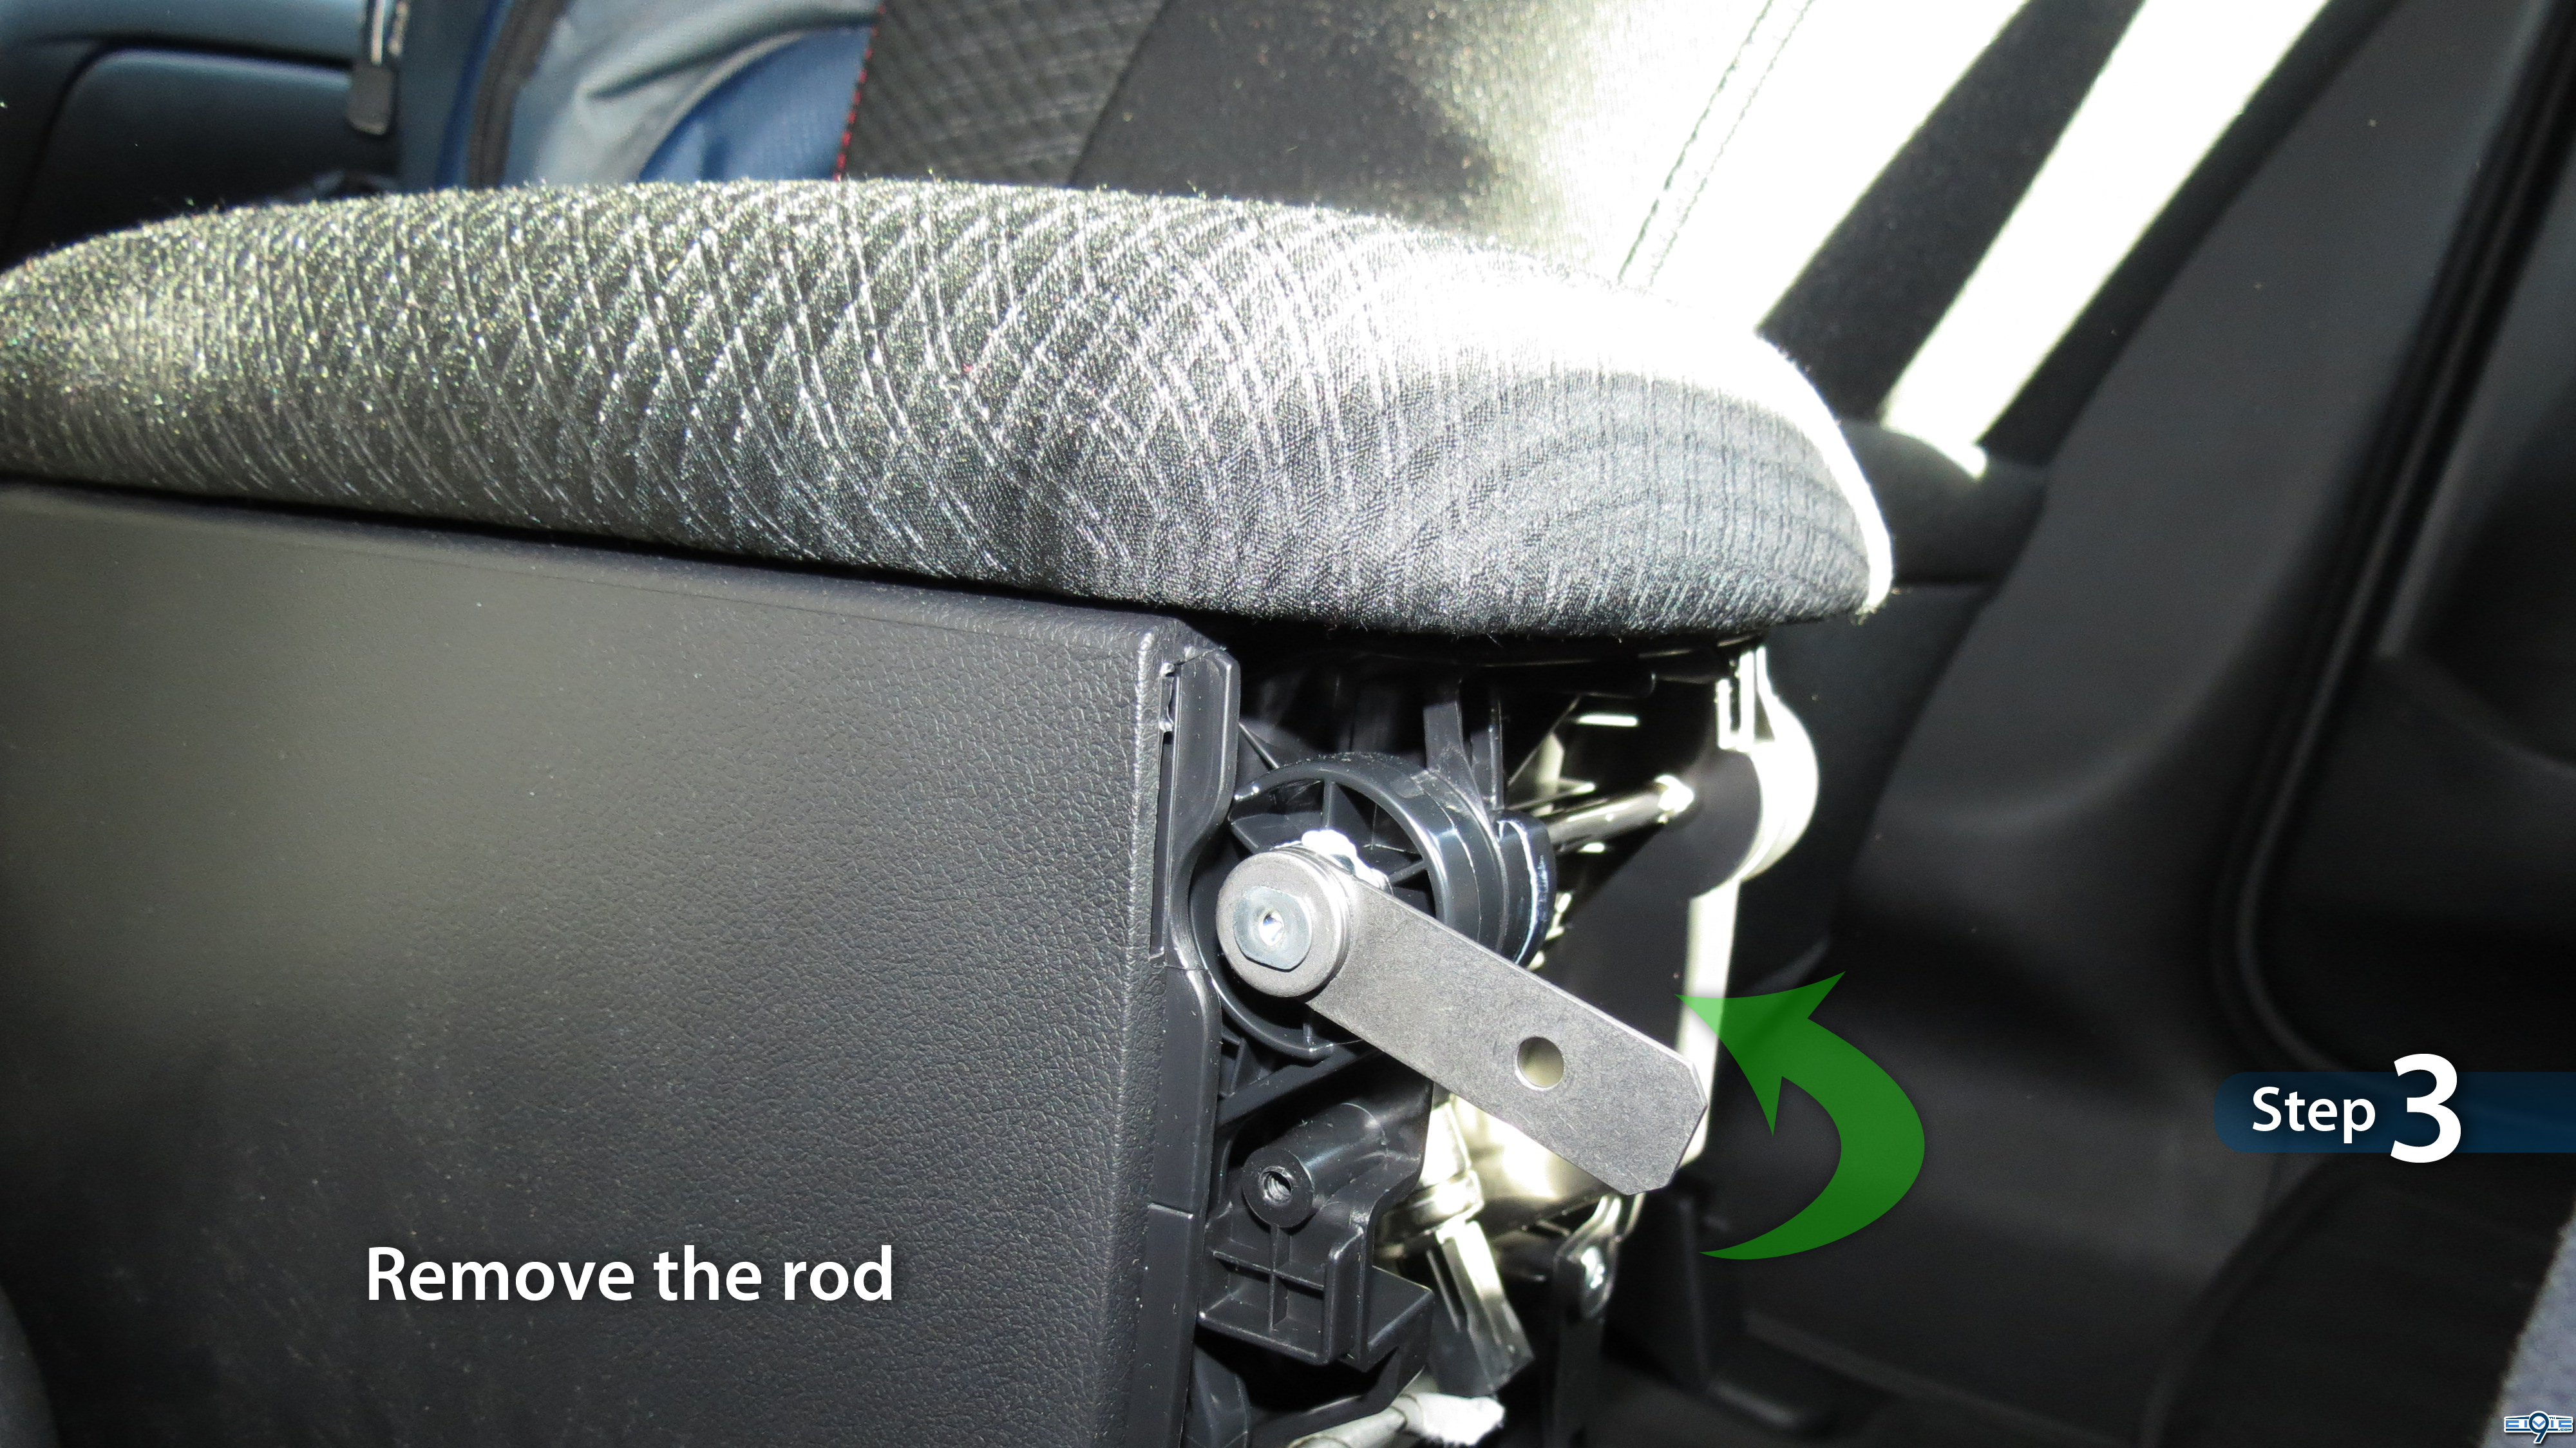
- Remove the rod.
Turn the metal tab counter-clockwise, then pull the tab towards you to remove the metal rod.
Place the rod onto a shop towel to keep the grease from getting onto your hands and upholstery.
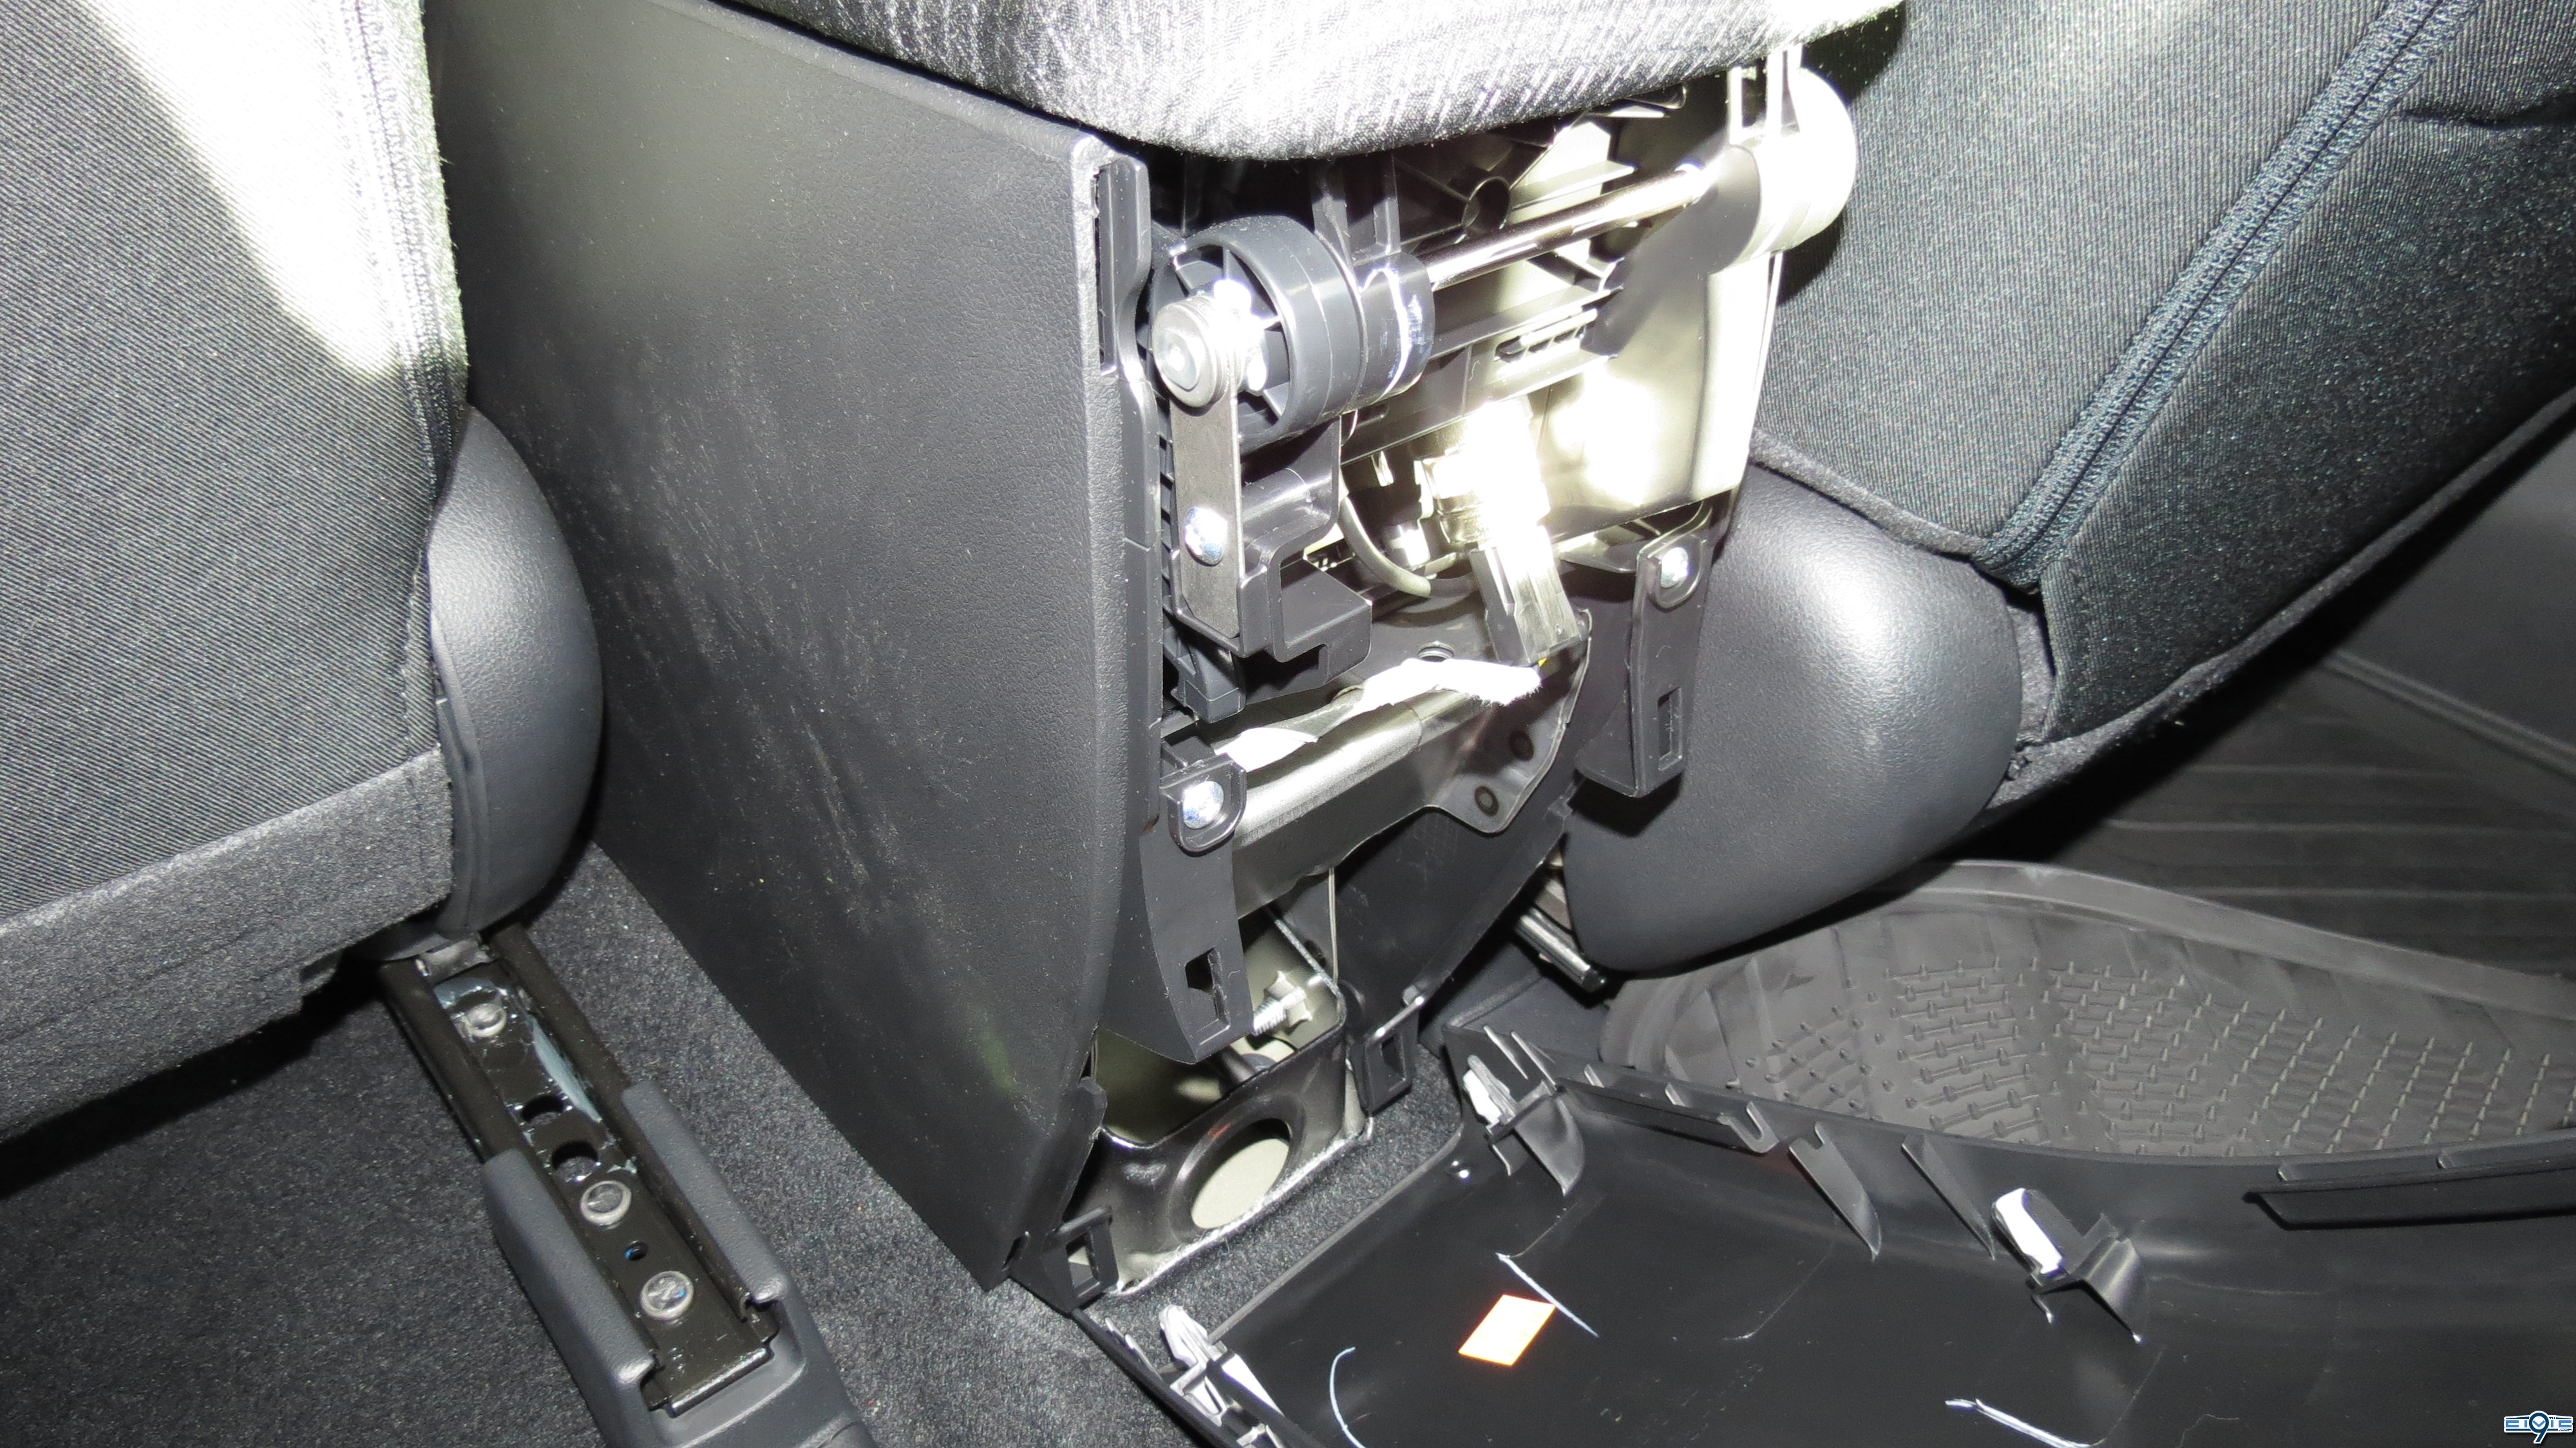
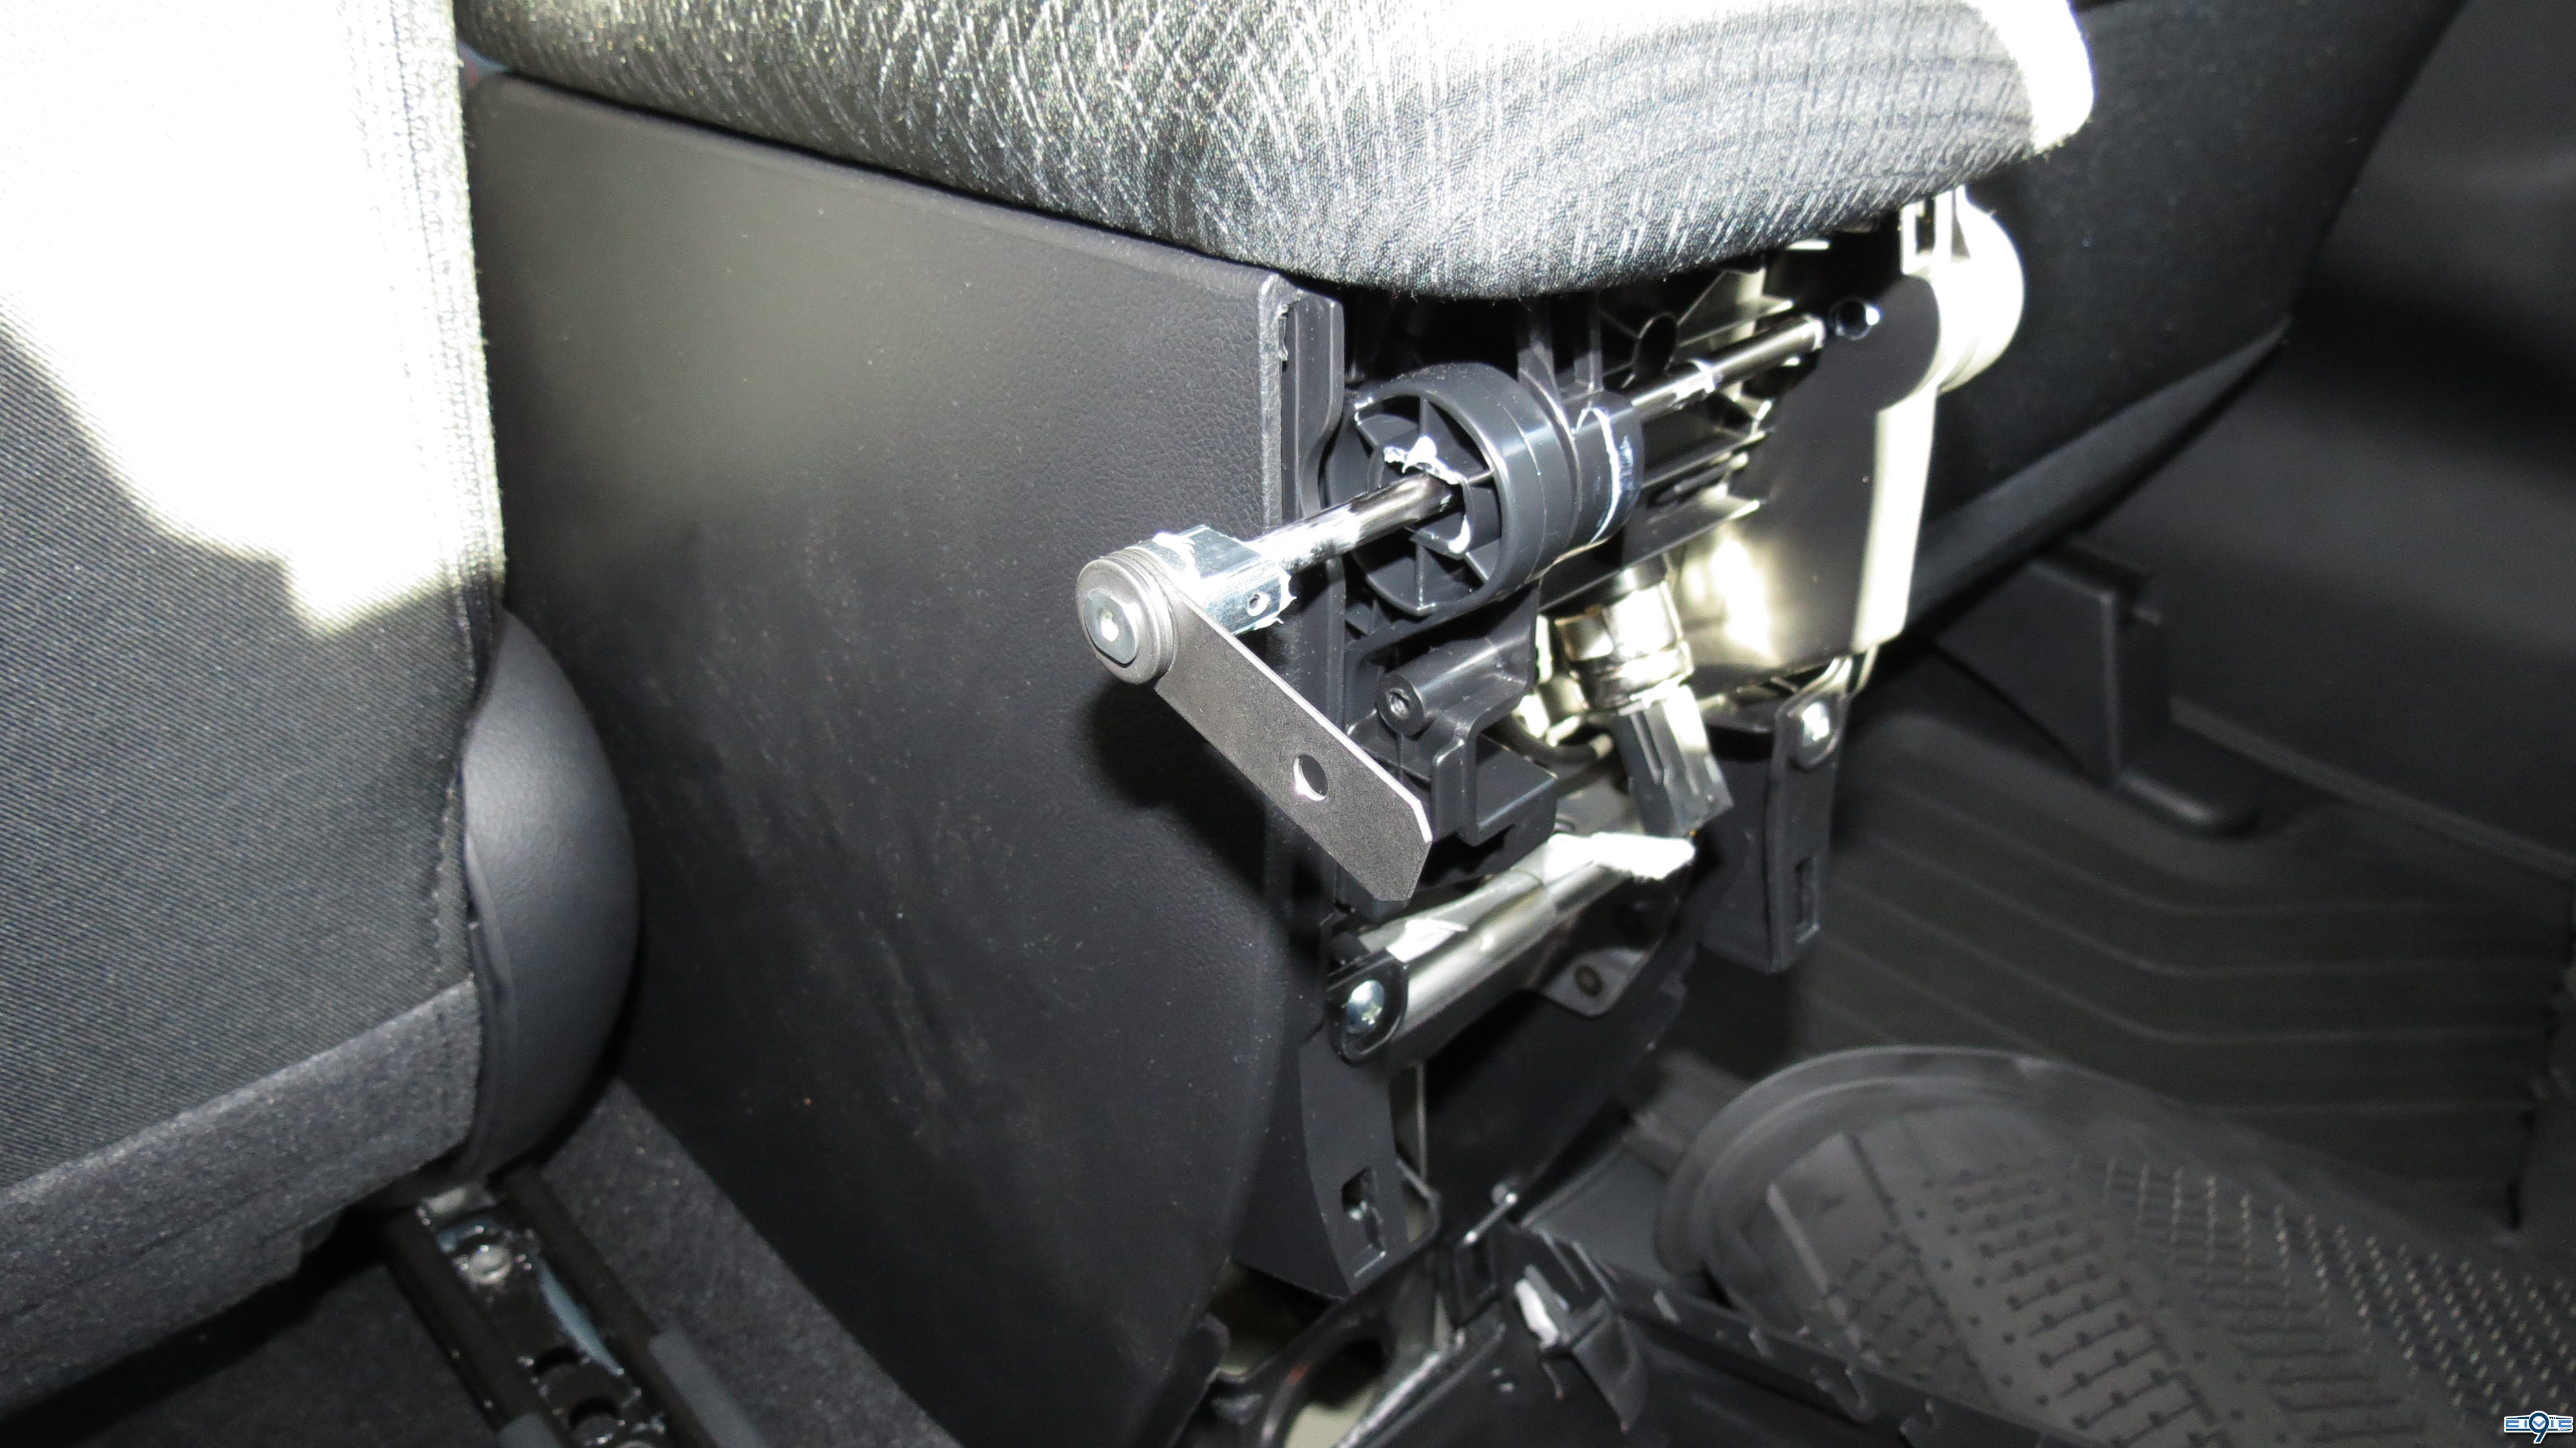
The Armrest Assembly should now lift of with ease.
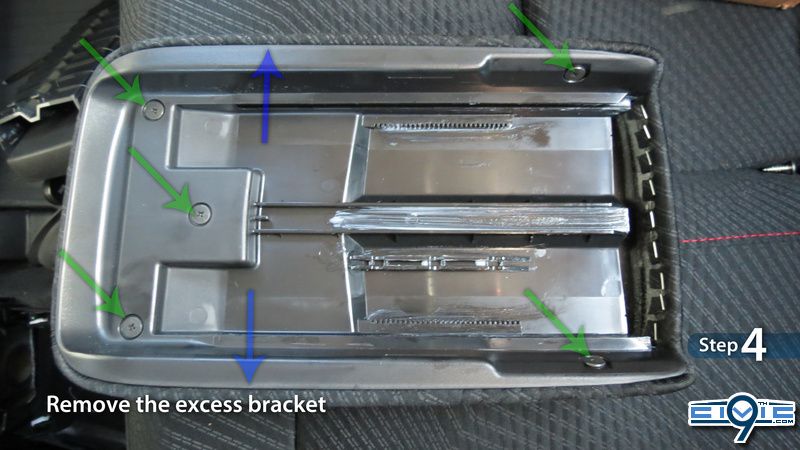
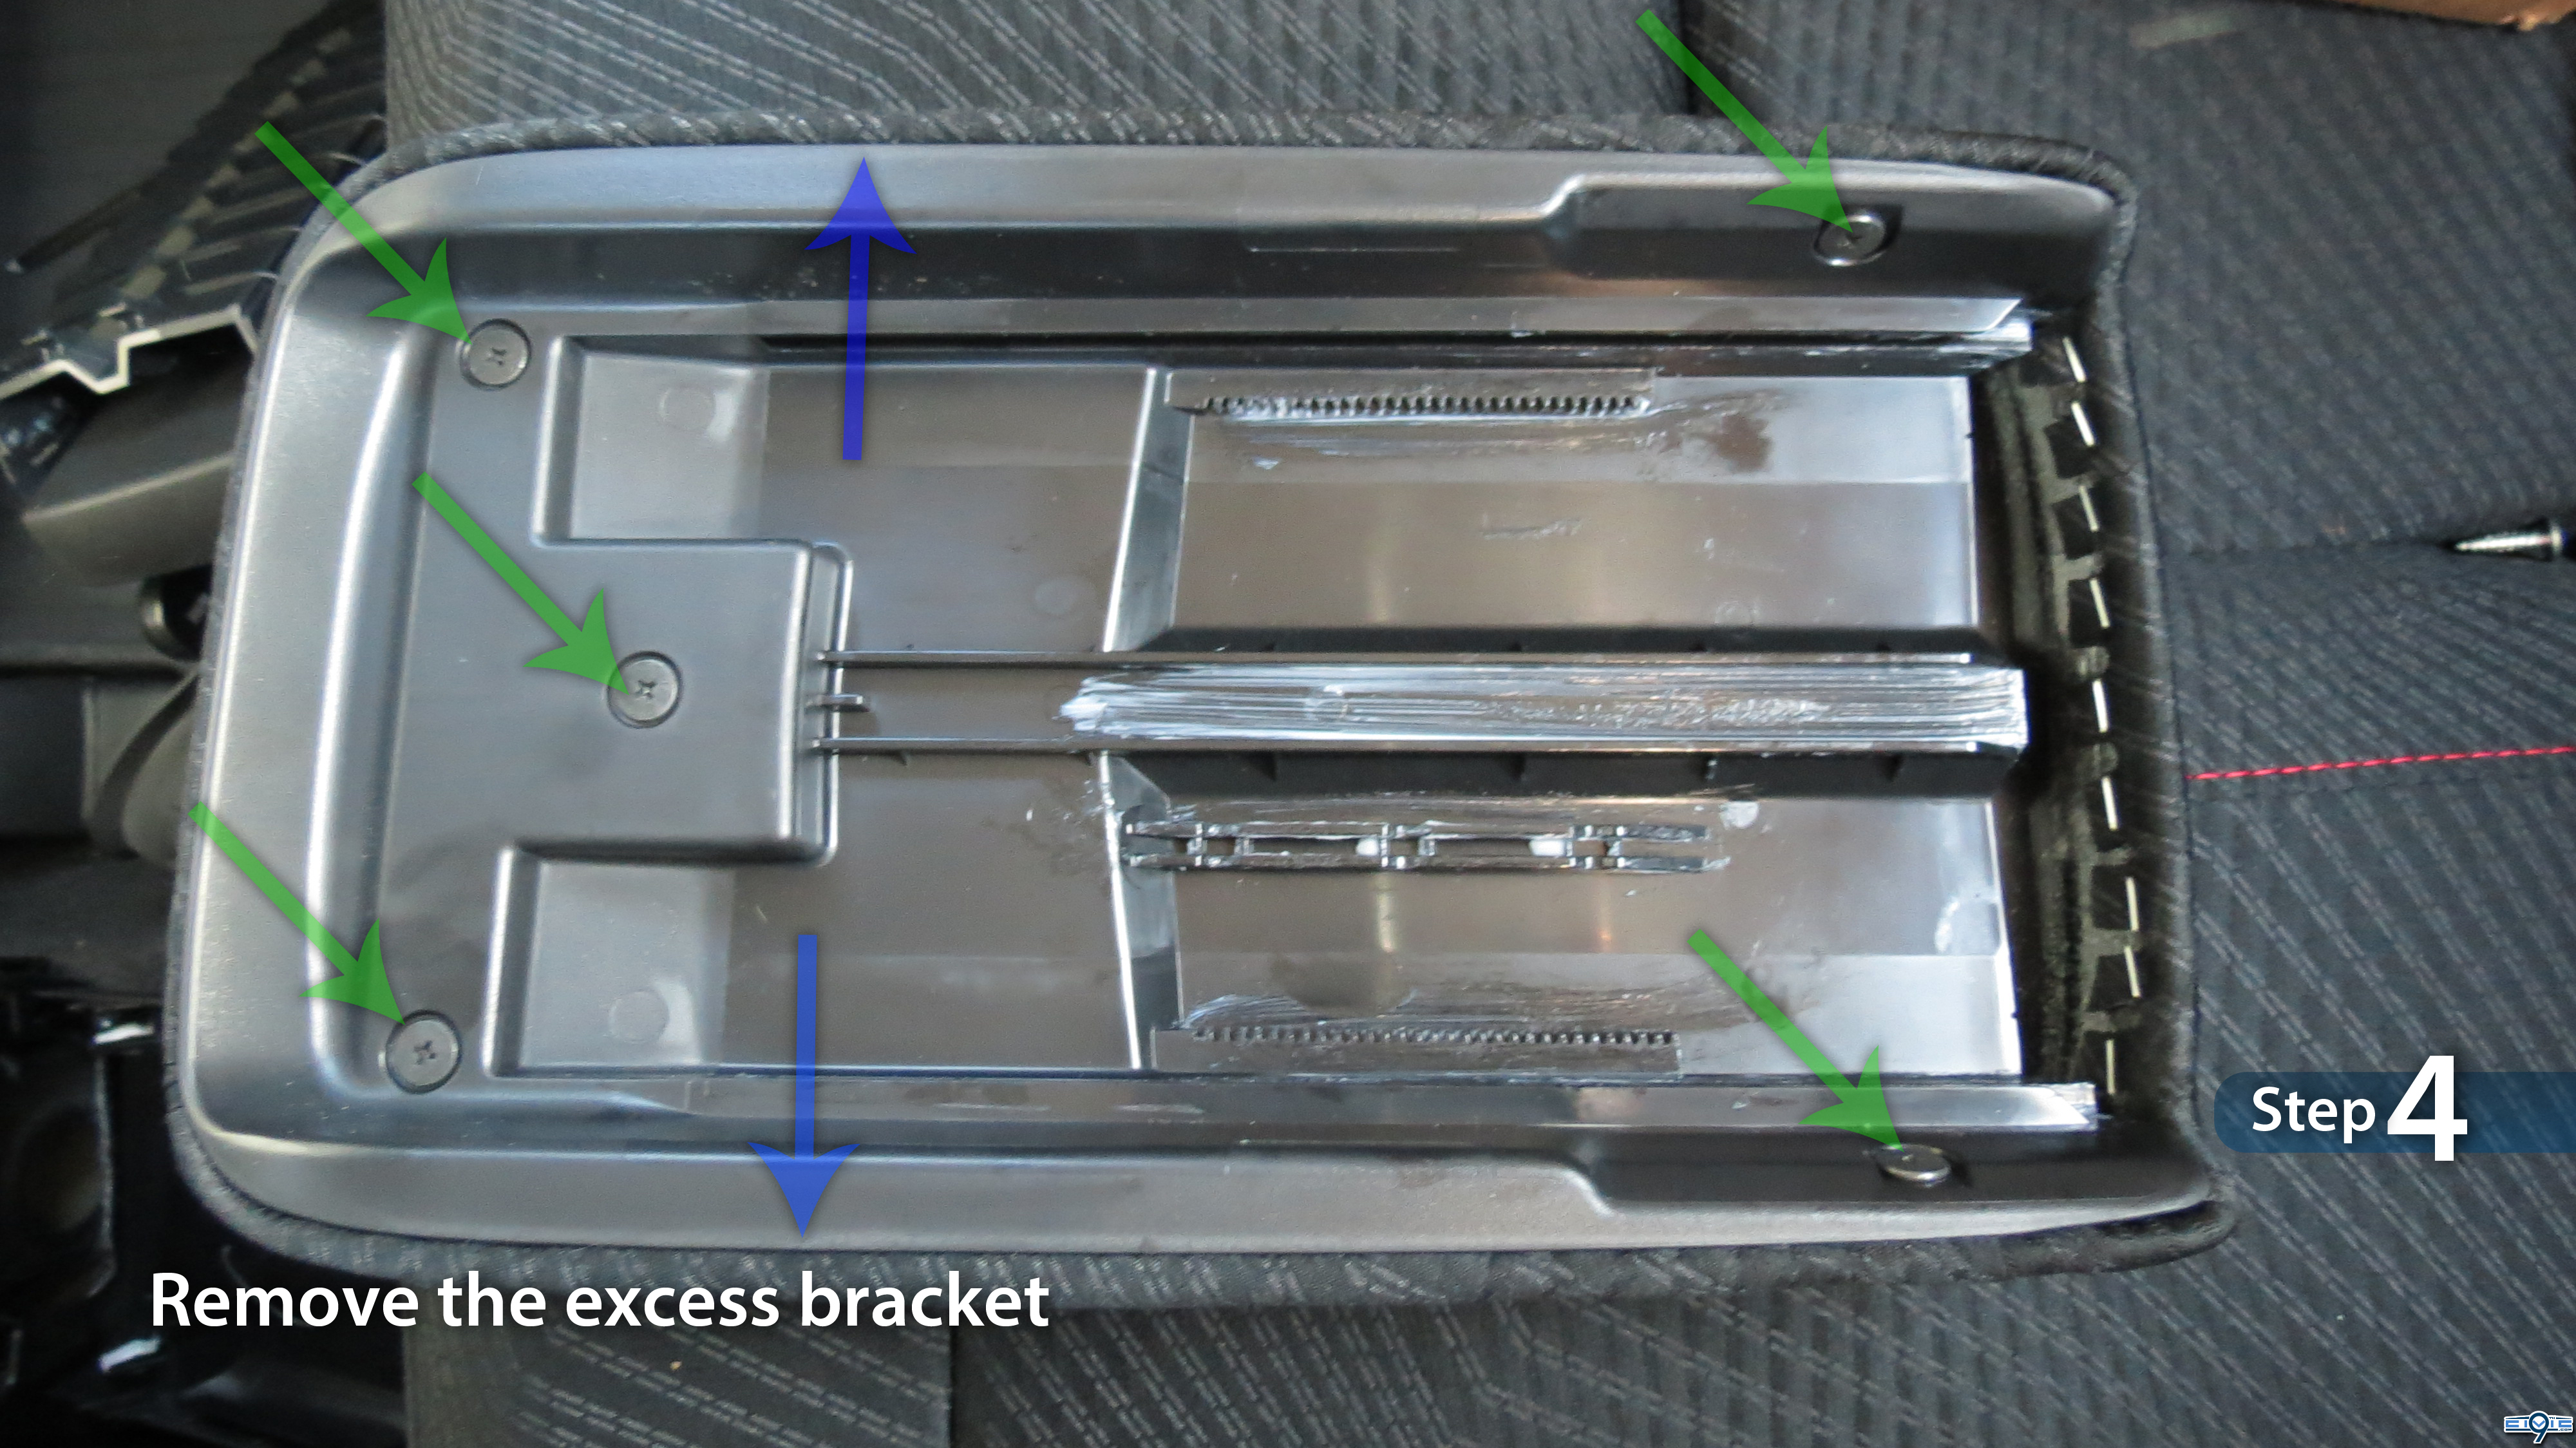
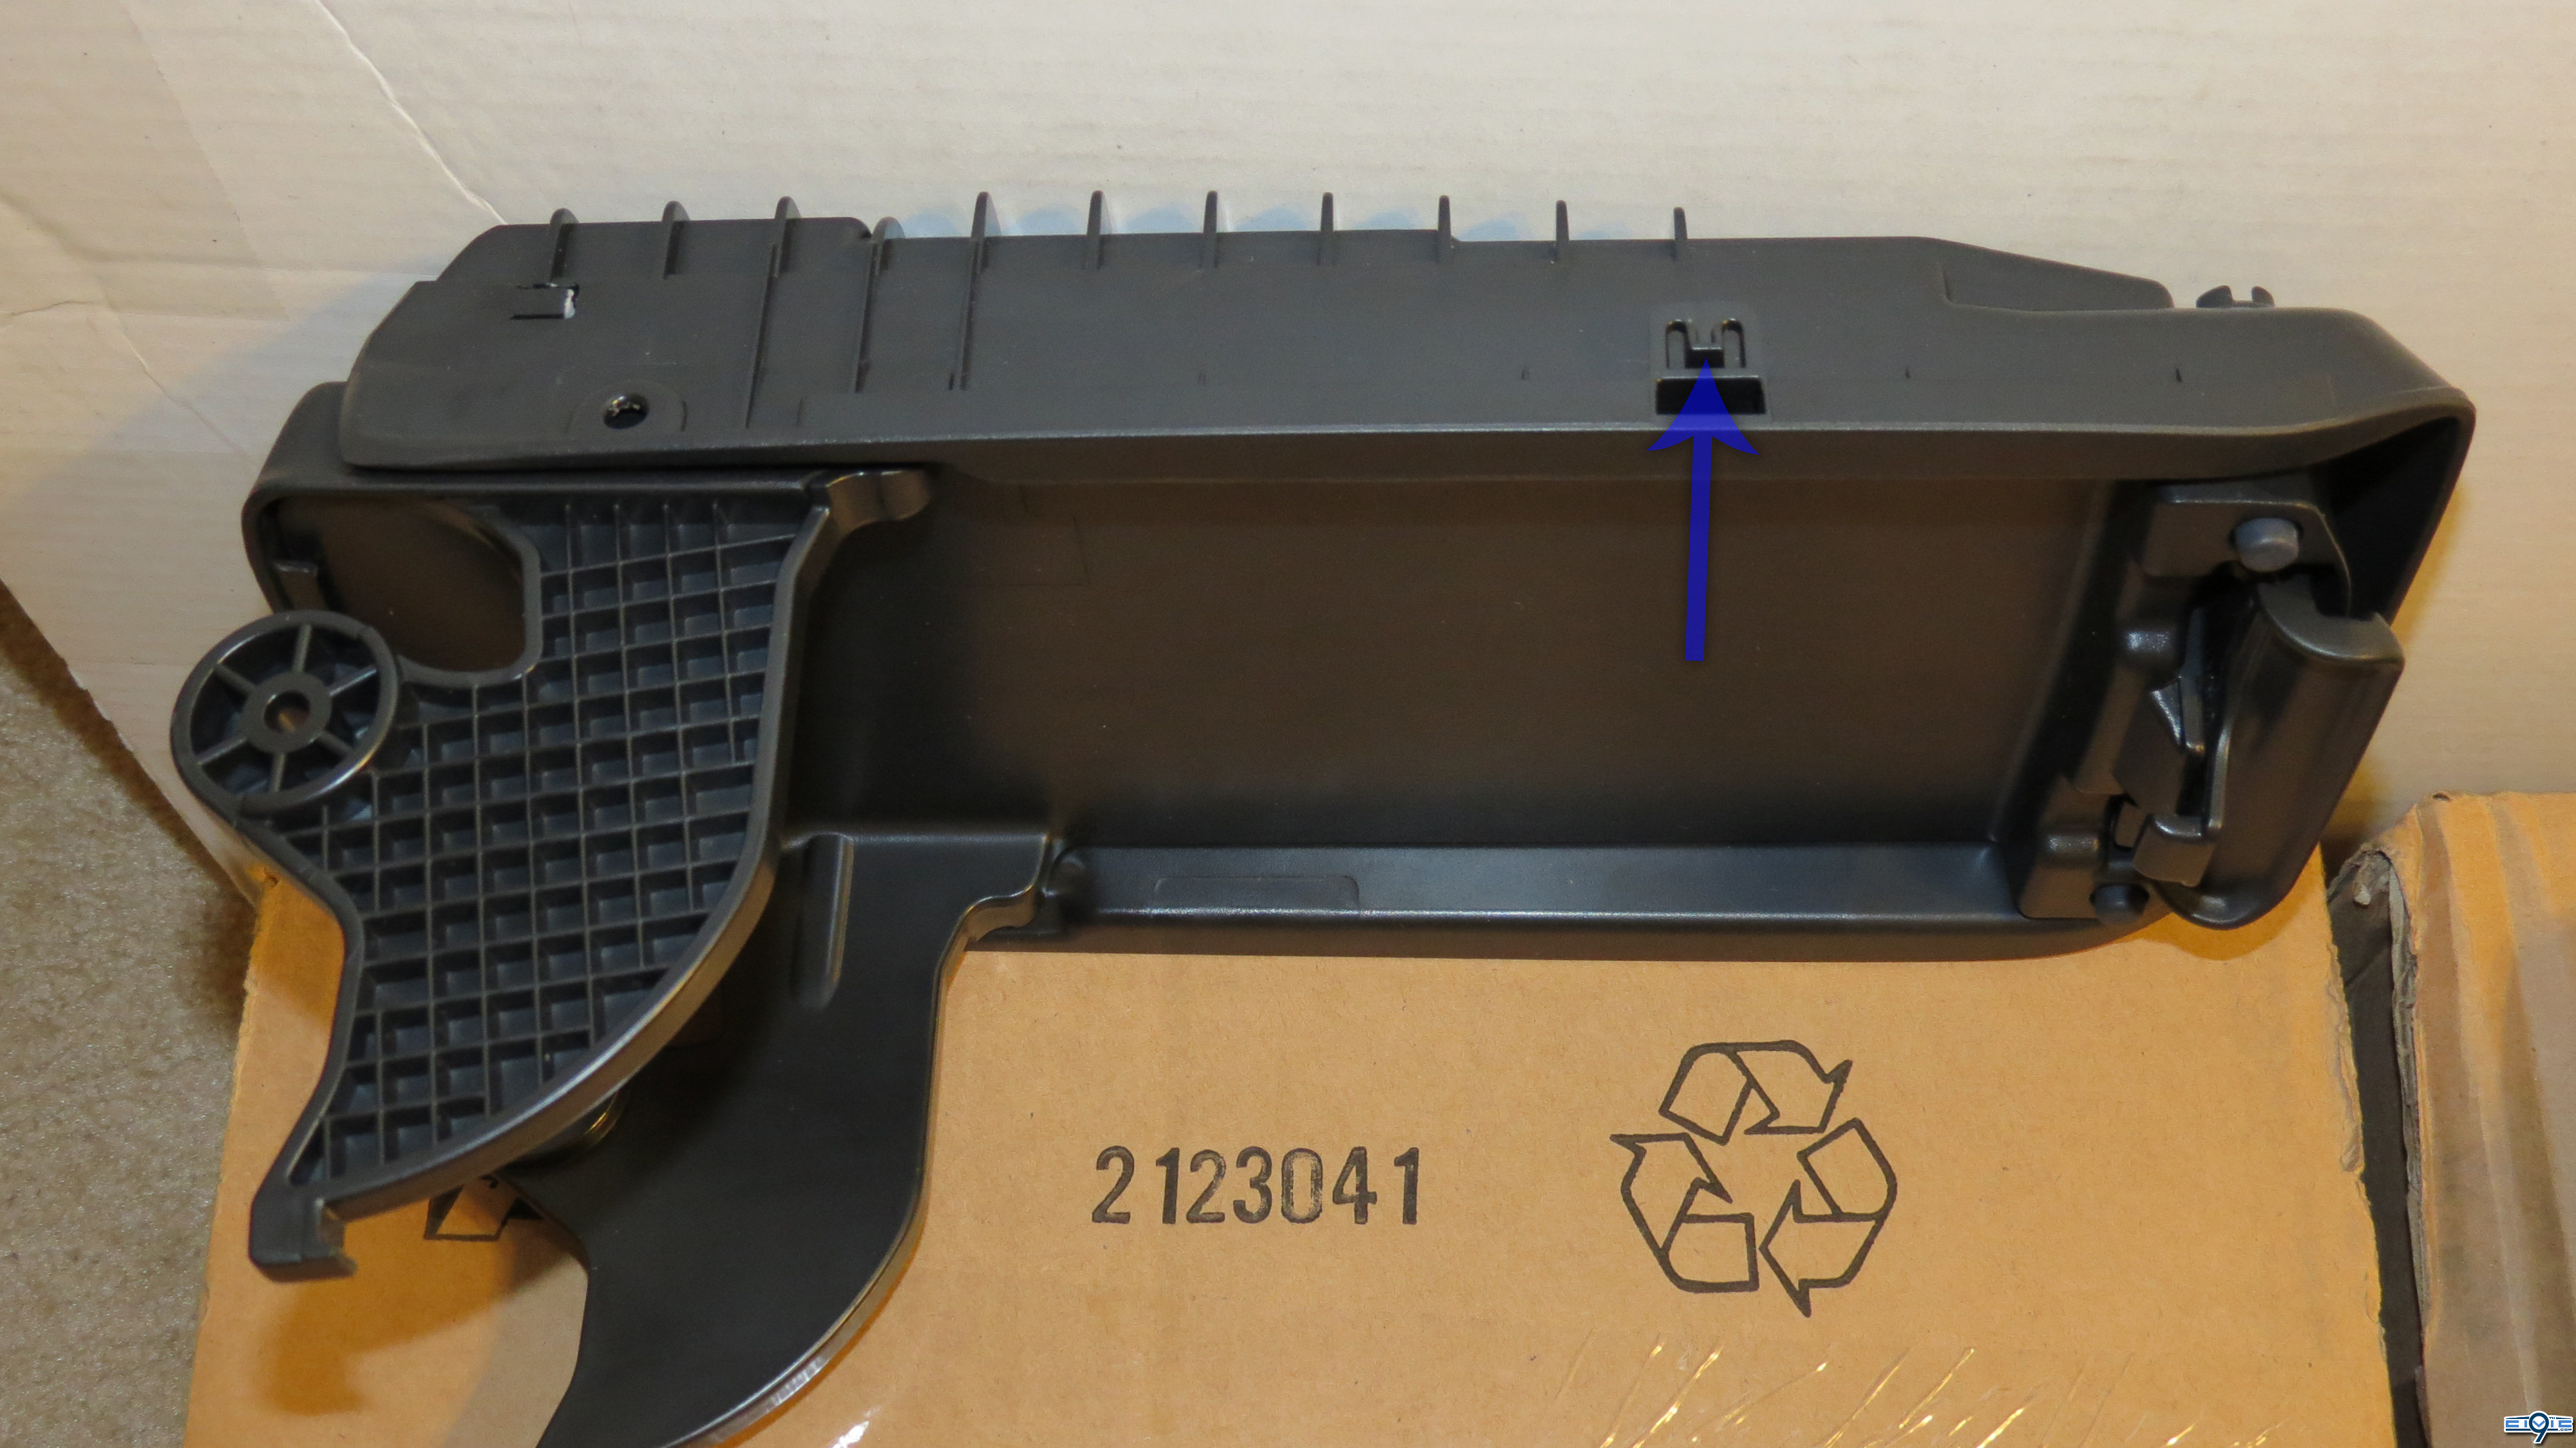
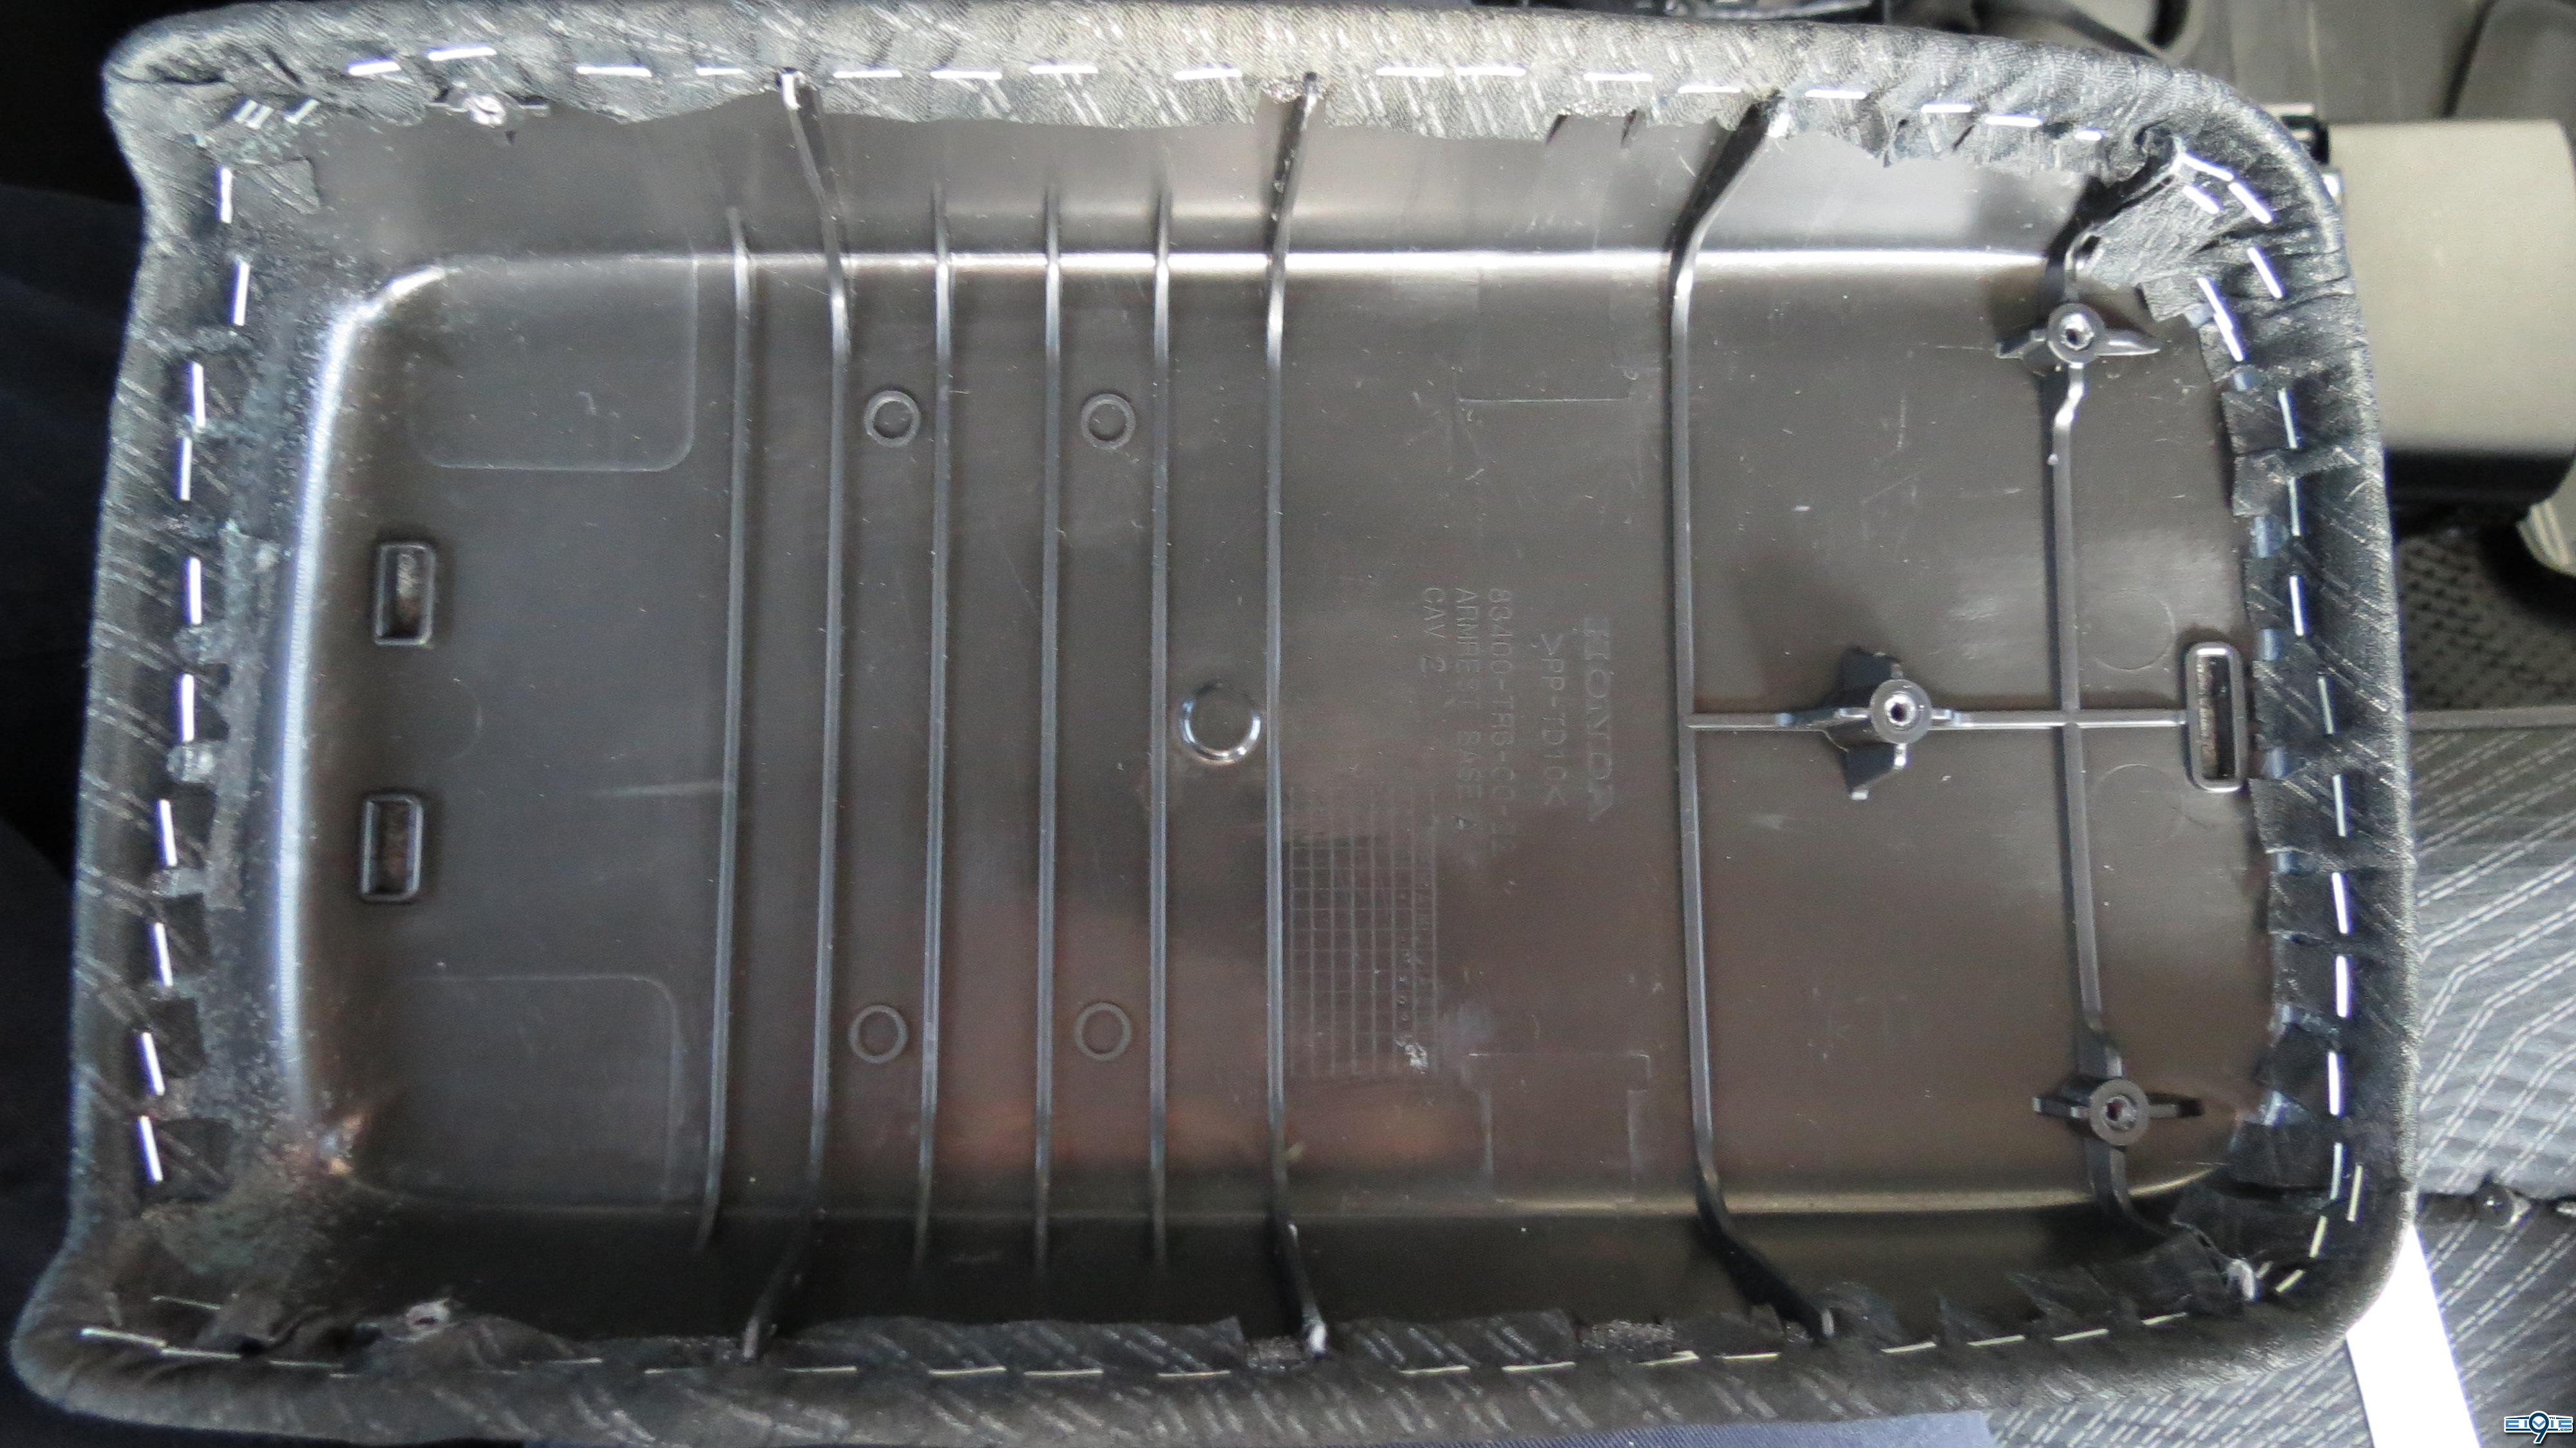
- Remove the excess mounting bracket from your new Top Coat Assembly.
To do so, remove all five screws (green arrows), then use your dash removal trim tool to push inward a mounting clip (blue arrows), as indentified in the photos below. The clips are in-between the fabric and the bracket. You only need to push one in, then the entire bracket will come loose.
Note: Honda included two mounting brackets with the Si; one attached to the Top Coat Assembly and one attached to the Hinge Assembly. You only need one bracket.
I do not know if Honda included it by accident or not, so I'm going to assume that this is standard operating procedure.
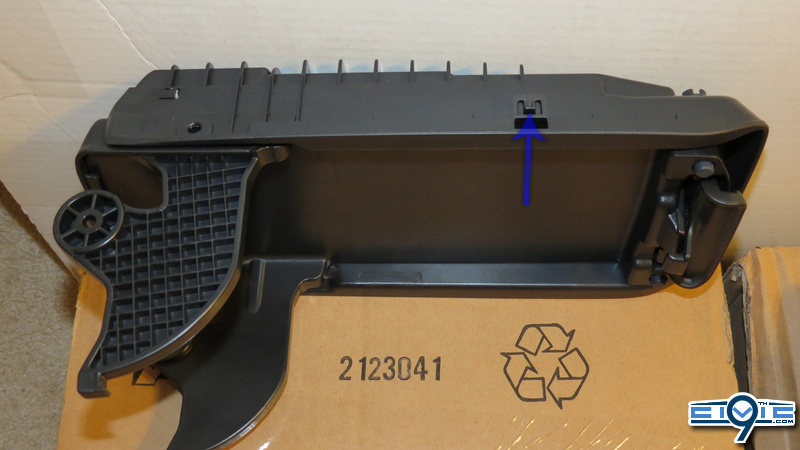

- Attach your new Top Coat Assembly to the new Hinge Assembly.
Sorry, no photos for this step as I forgot to do so; however, you probably don't need one anyway.
It's difficult to show you exactly where and how to line up the bracket with the Top Coat, but you should be able to eye it out. Although you won't hear any clicking sounds to indicate a firm connection, you'll know you have it seated correctly when you can no longer use your fingers to separate the bracket from the Top Coat.
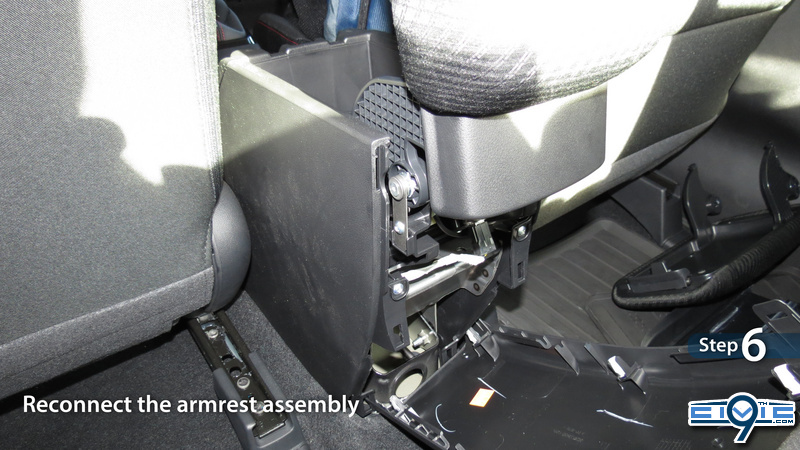
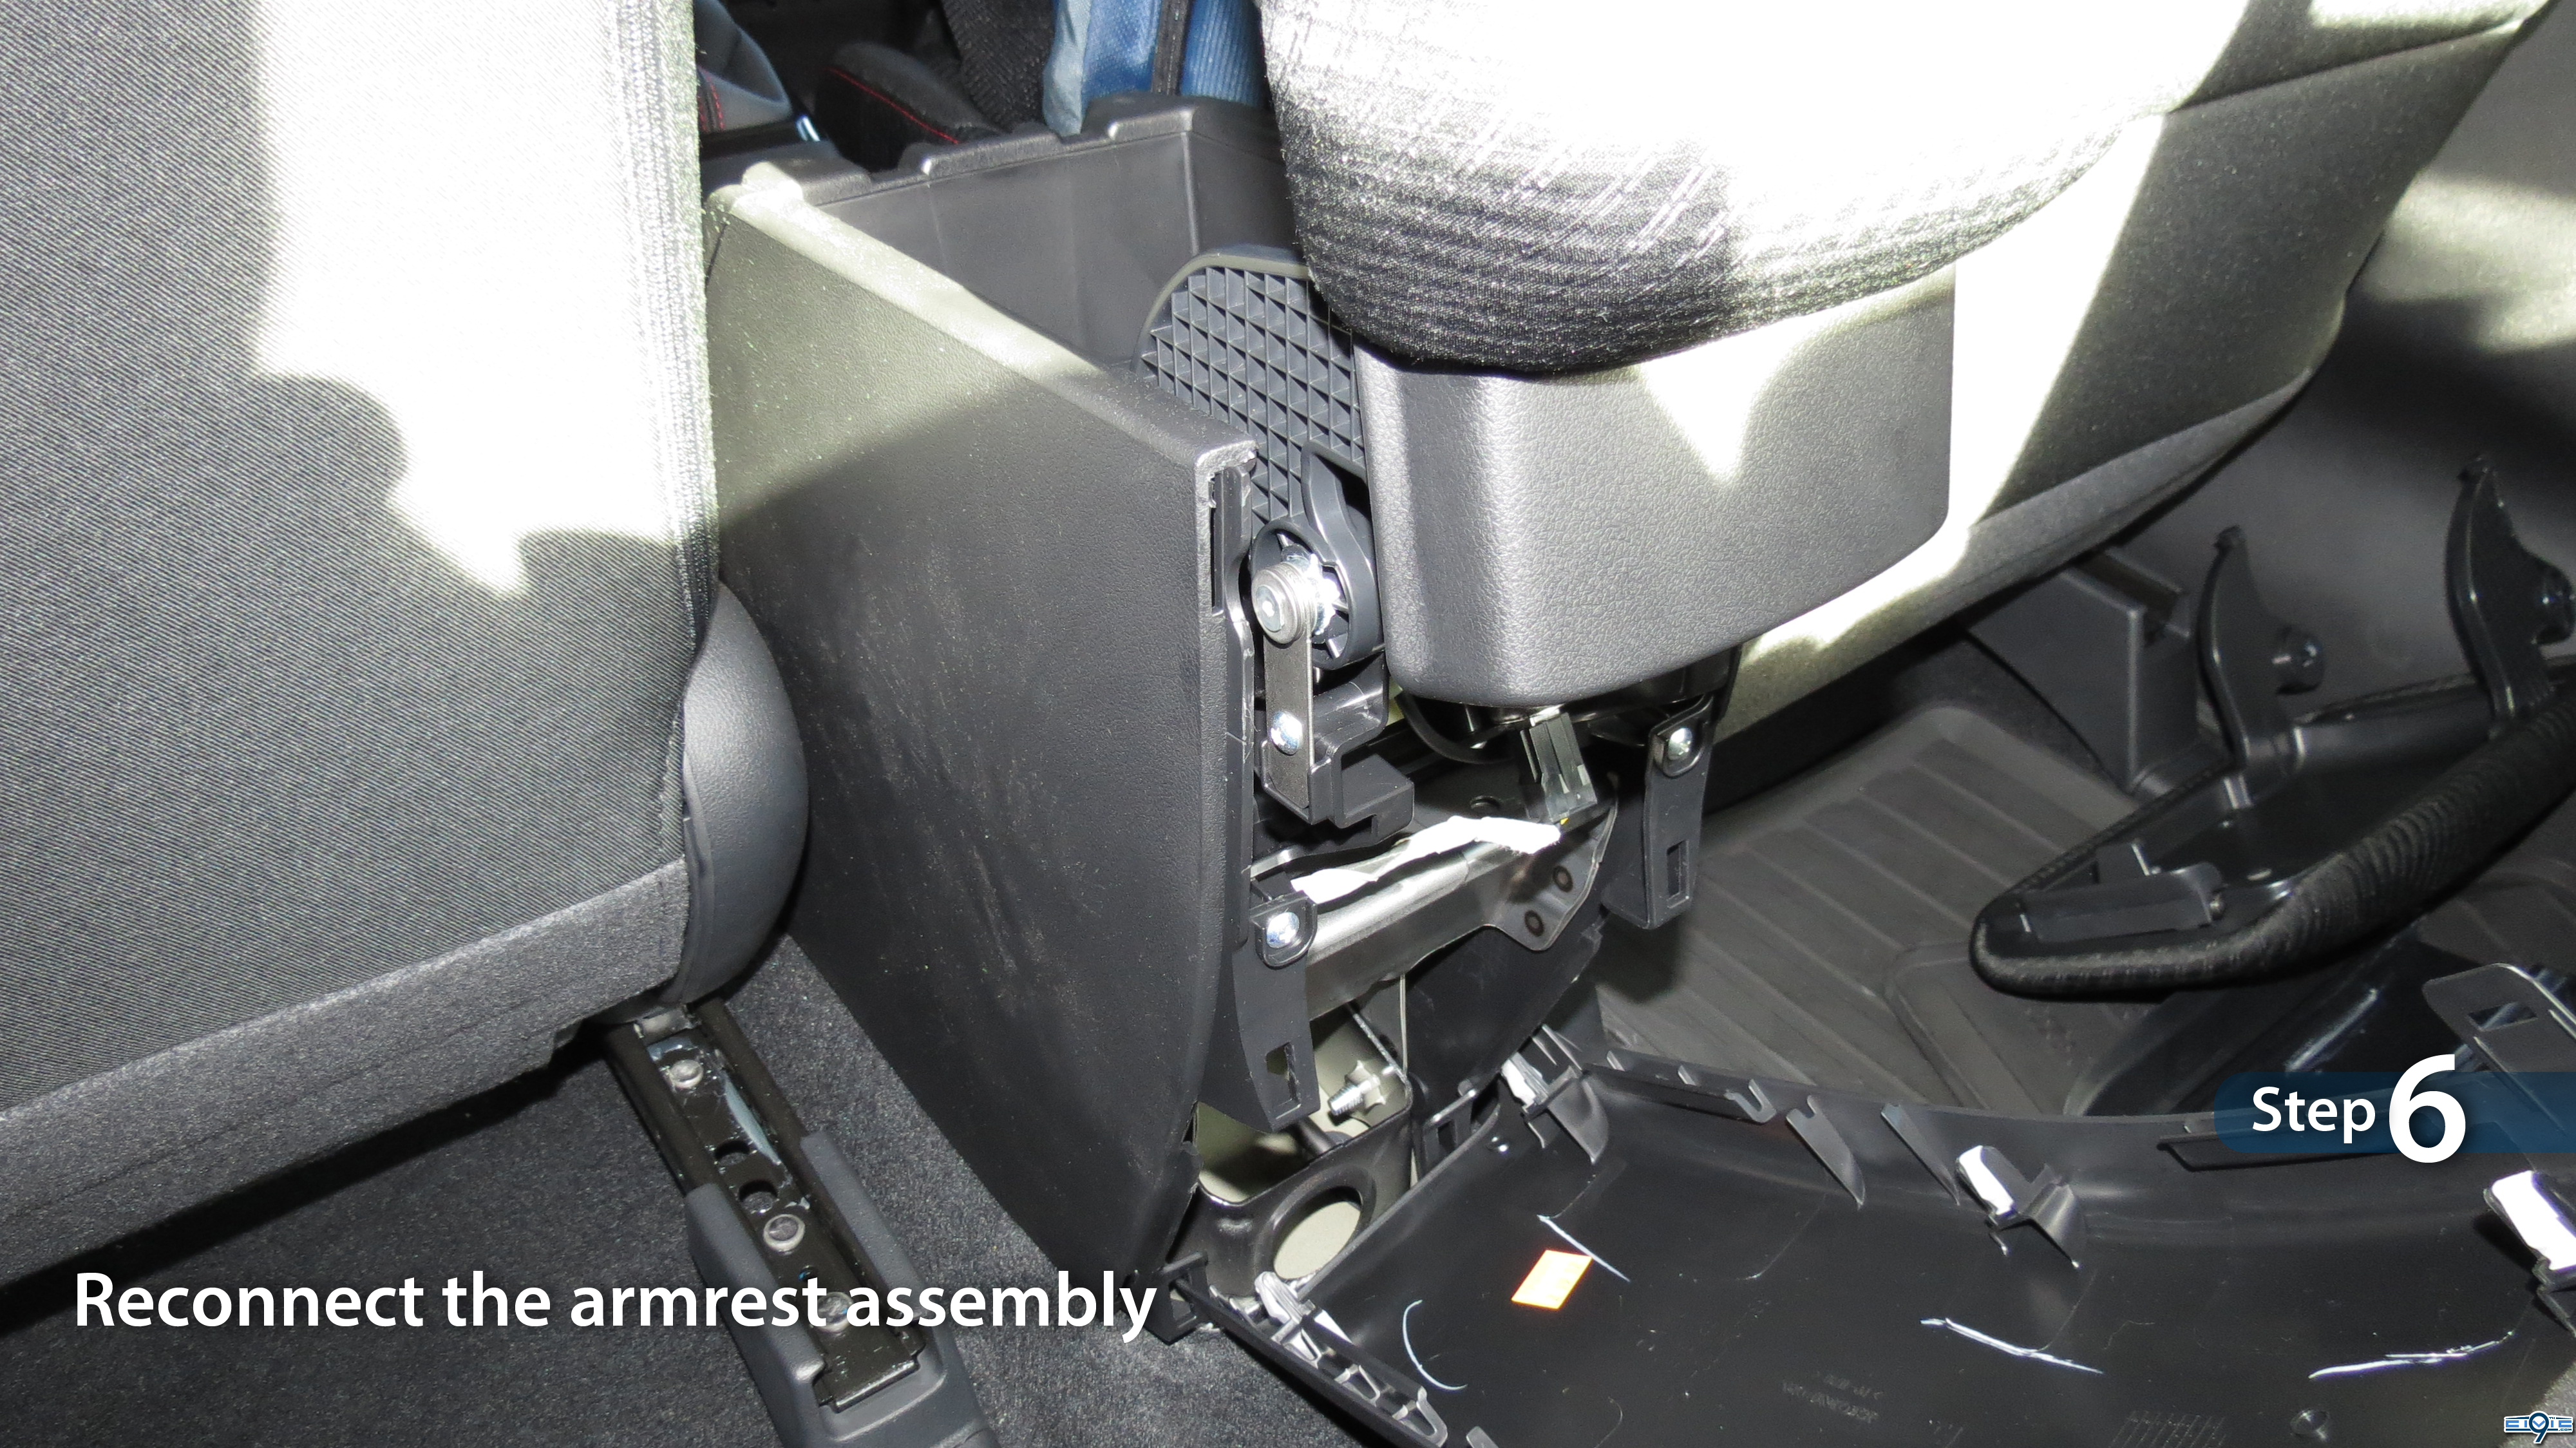
- Reconnect the armrest assembly.
Reinsert the Armrest Assembly back into place in the center console and line it up with holes where the rod will go.
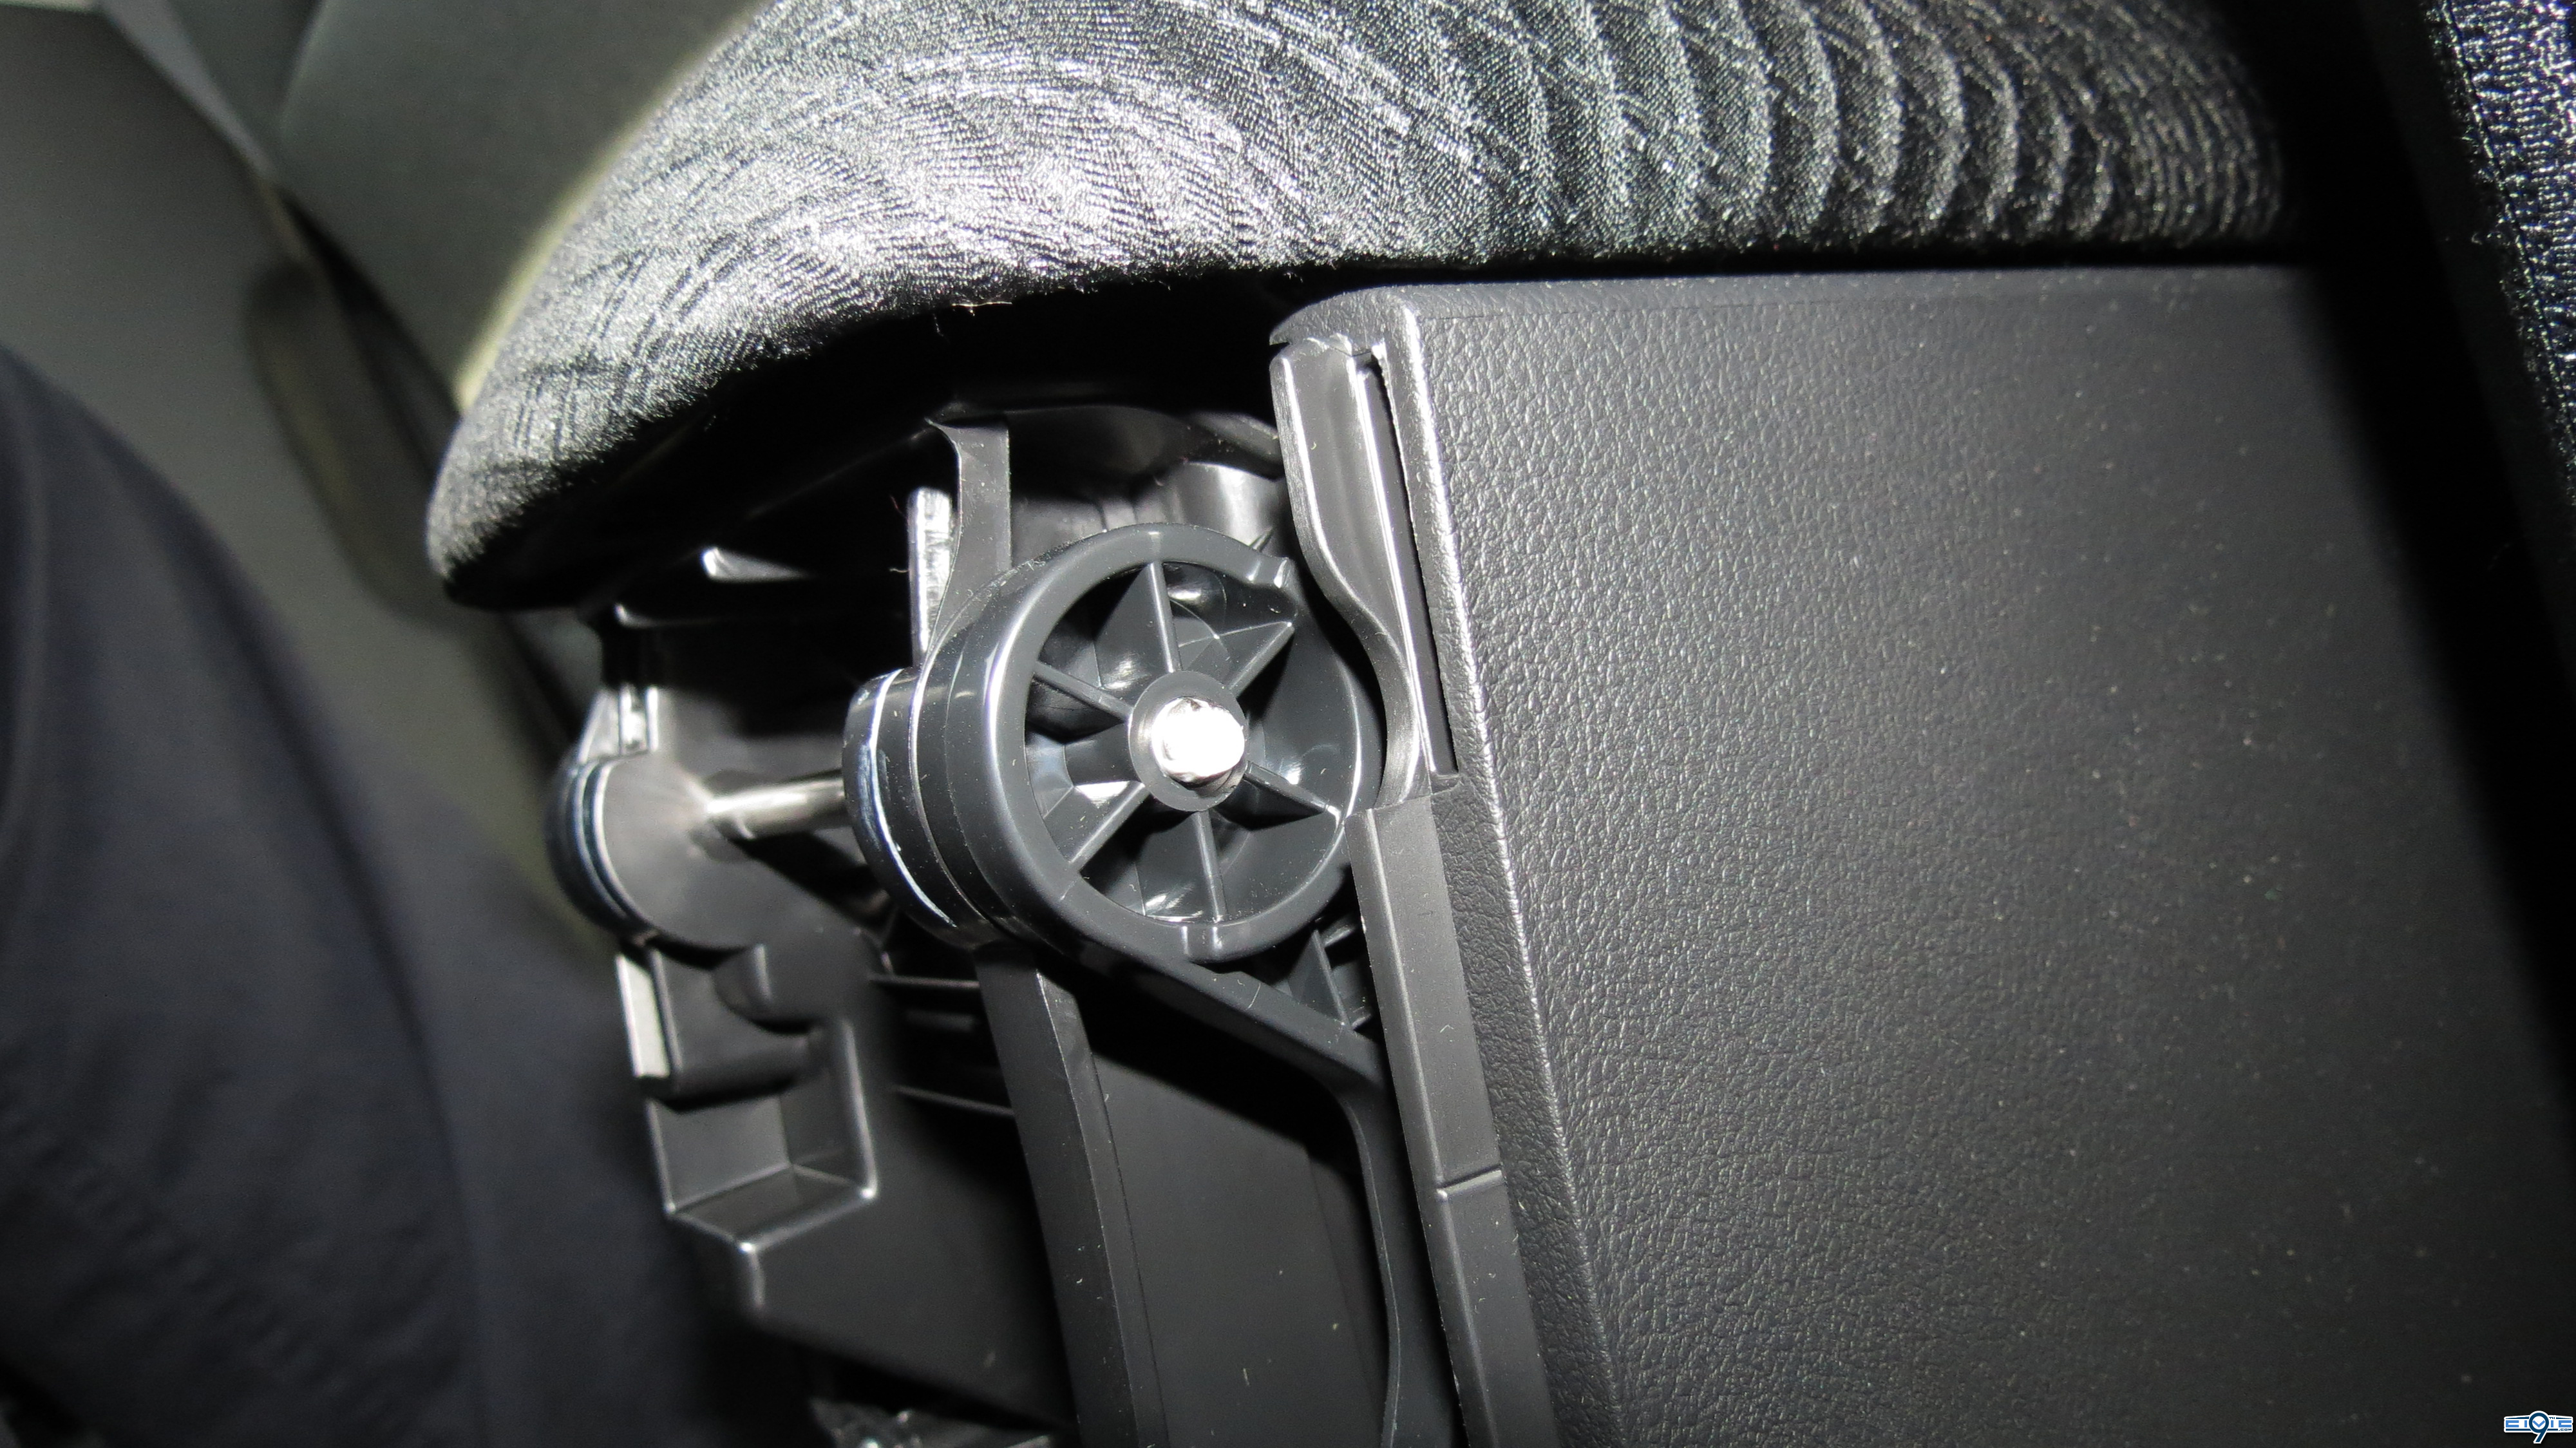
Reinsert the rod and be sure to push it as far inward as it can go. You'll notice that the end of the rod with the metal tab has an oval-rectangle joint that must align with the same-shaped joint on the Armrest Assembly. Once you have it aligned and fully inserted, push the metal tab back into it's original position and mount the screw.
You'll know you have the rod correctly in place when you can see it on the other end as shown in the second photo below.
Note: It is easier to reassemble the rod when the Armrest Assembly is closed.
- Install the new rear console panel.
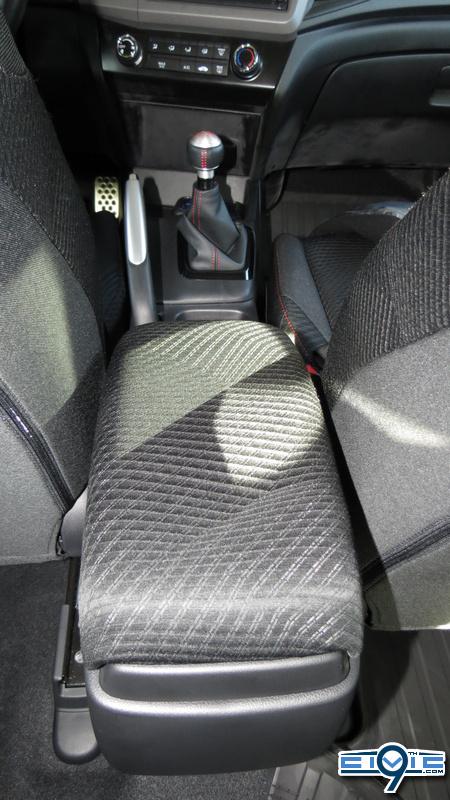
Here are a few photos of it installed in its retracted and extended positions.
And here is a photo showing the size difference between the old and new armrest. The old armrest is at the bottom.

Photo showing the design difference between the old and new rear console panel. The new armrest is at the bottom.
Last edited:


 awesome as always. Thank you!
")

